Issue Certificates via the Web Interface
Issue Certificates Efficiently Using PKI Trust Manager

This tutorial guides you through issuing a certificate using the PKI Trust Manager. You will learn how to navigate the interface and complete all necessary steps to successfully issue a certificate.
1. Select Certificate Admin#
The certificates can be issued and managed via various channels in PKI Trust Manager including automation, API interfaces and integrations with services. In this video we will walkthrough on how to issue a certificate manually

2. Select Certificate Admin#
The Certificates are tied to the identity of the PKI Admin. To Issue a Certificate - Click on your Identity
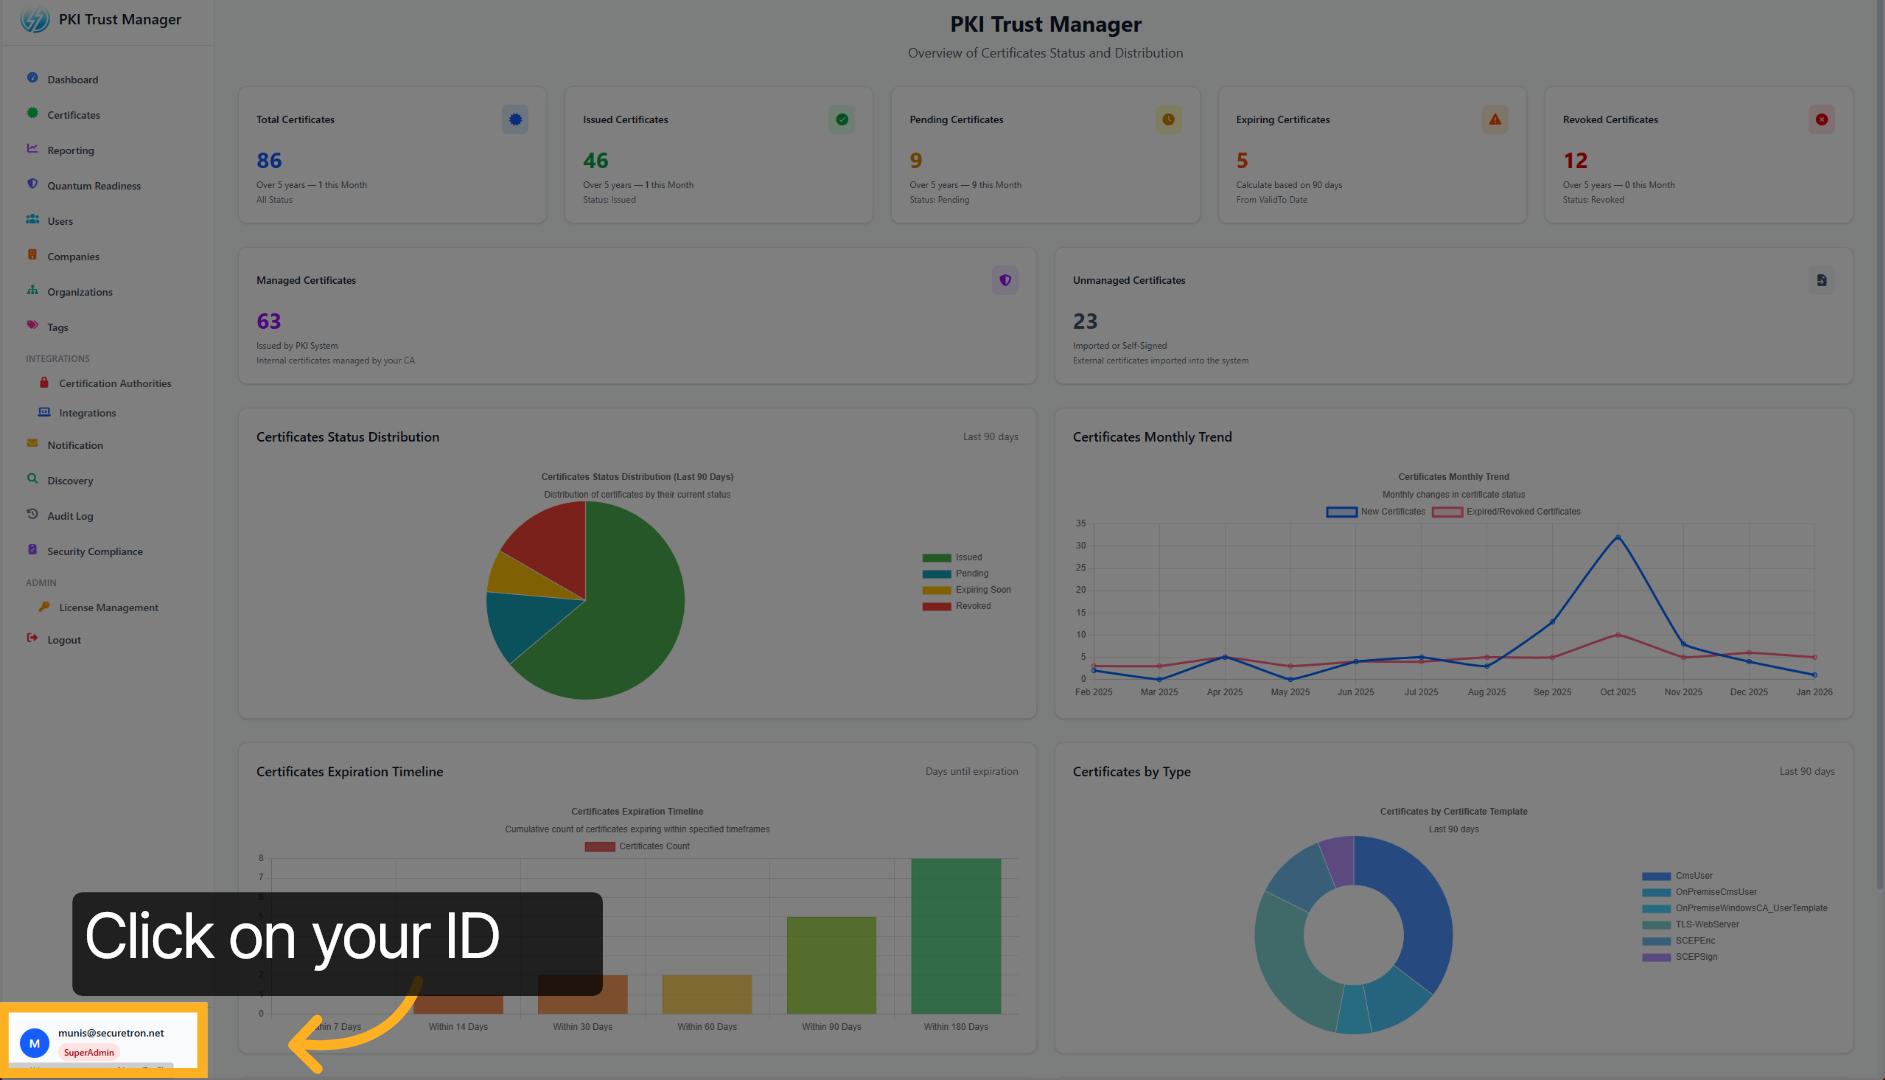
3. Open Certificates Section#
Click the Certificates tab to access certificate management options.
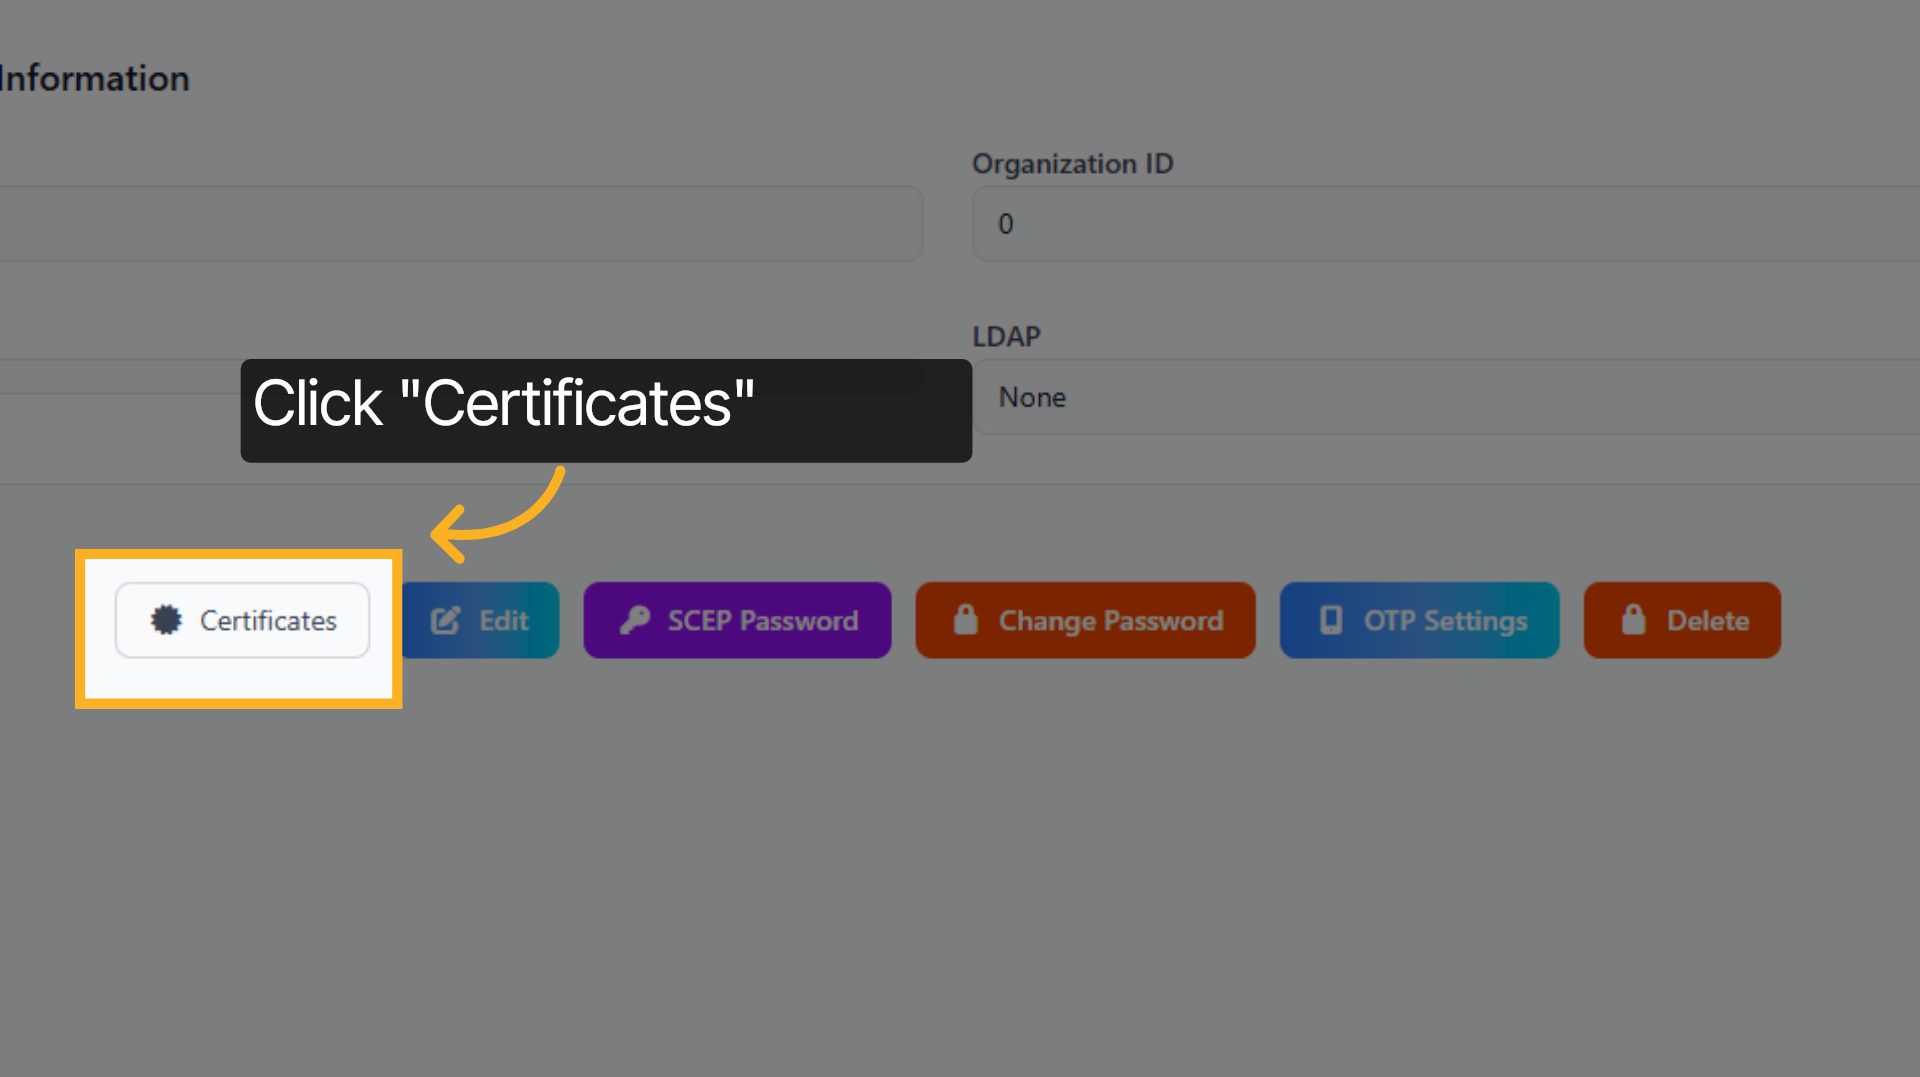
4. Initiate New Certificate#
Click the New button to start creating a new certificate.
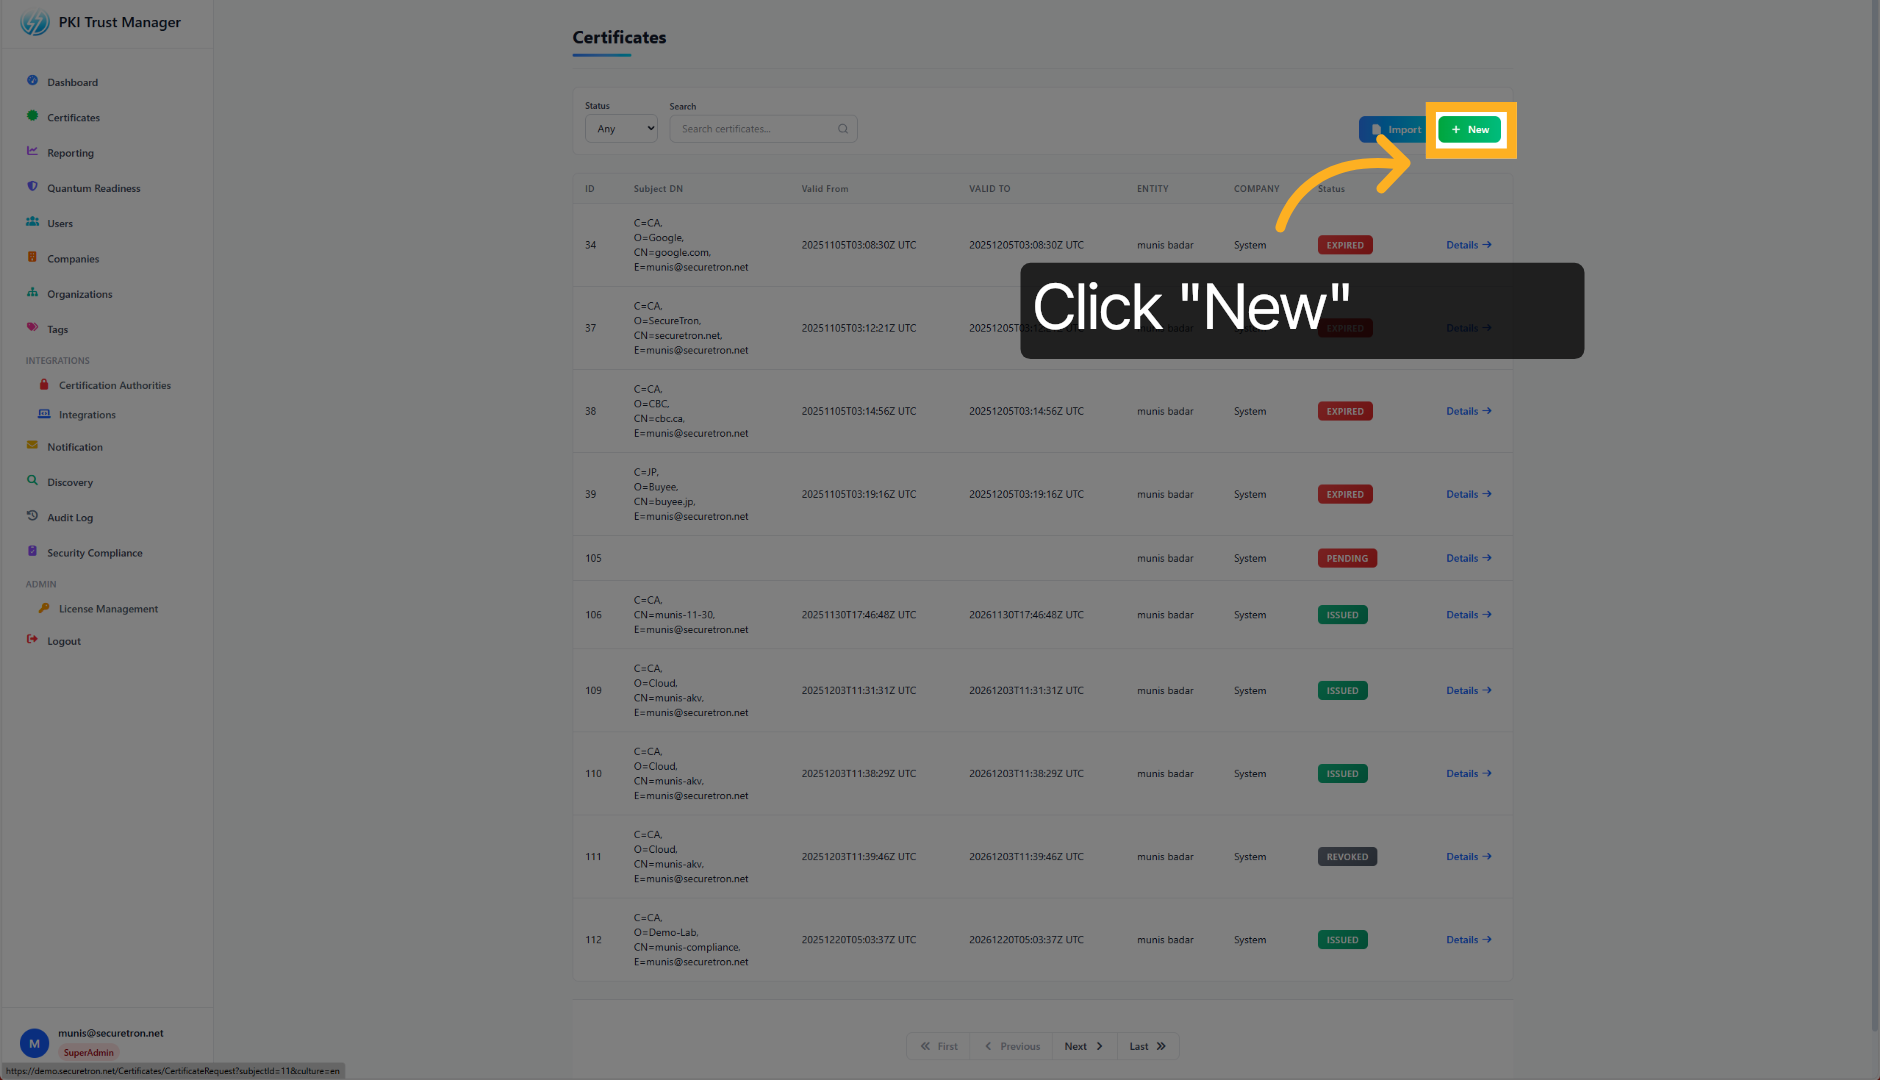
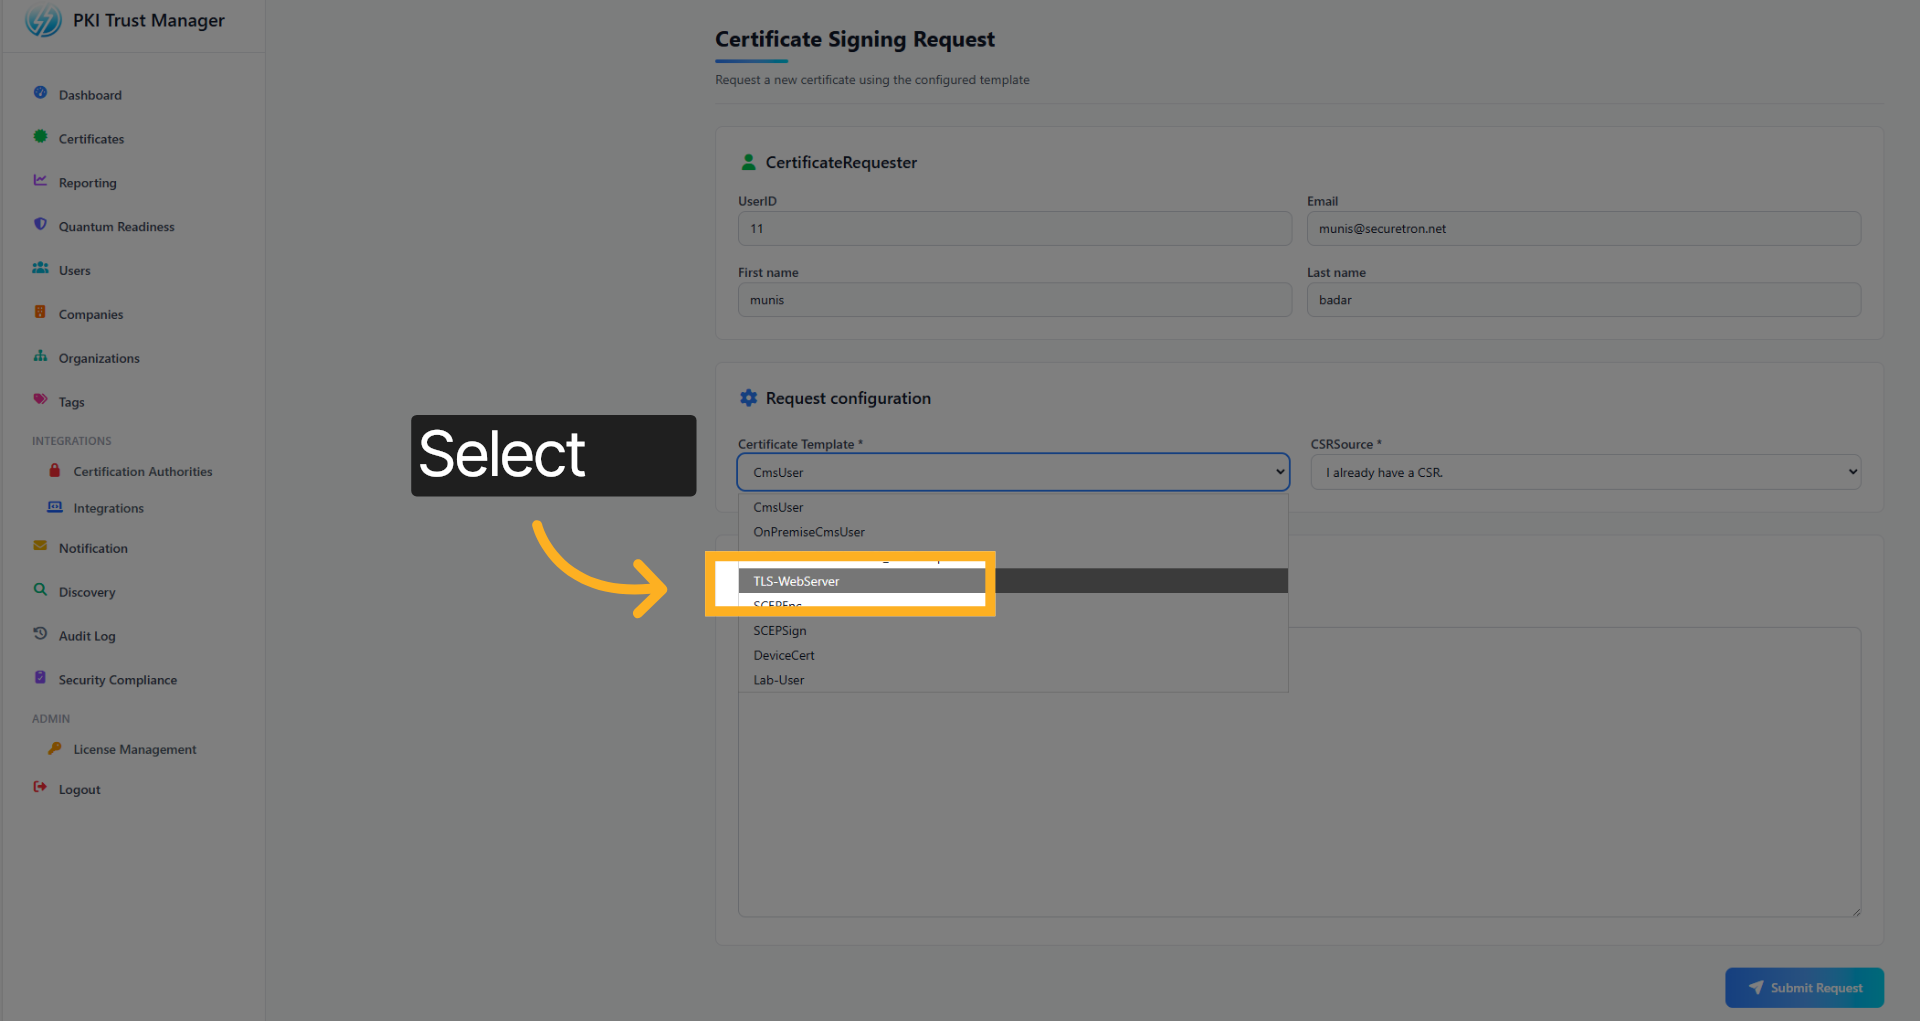
5. Certificate Template#
Select the Template that will be used to issue a new certificate. These are the templates that the PKI Admin has published and made available through the integrations of the Certification Authorities
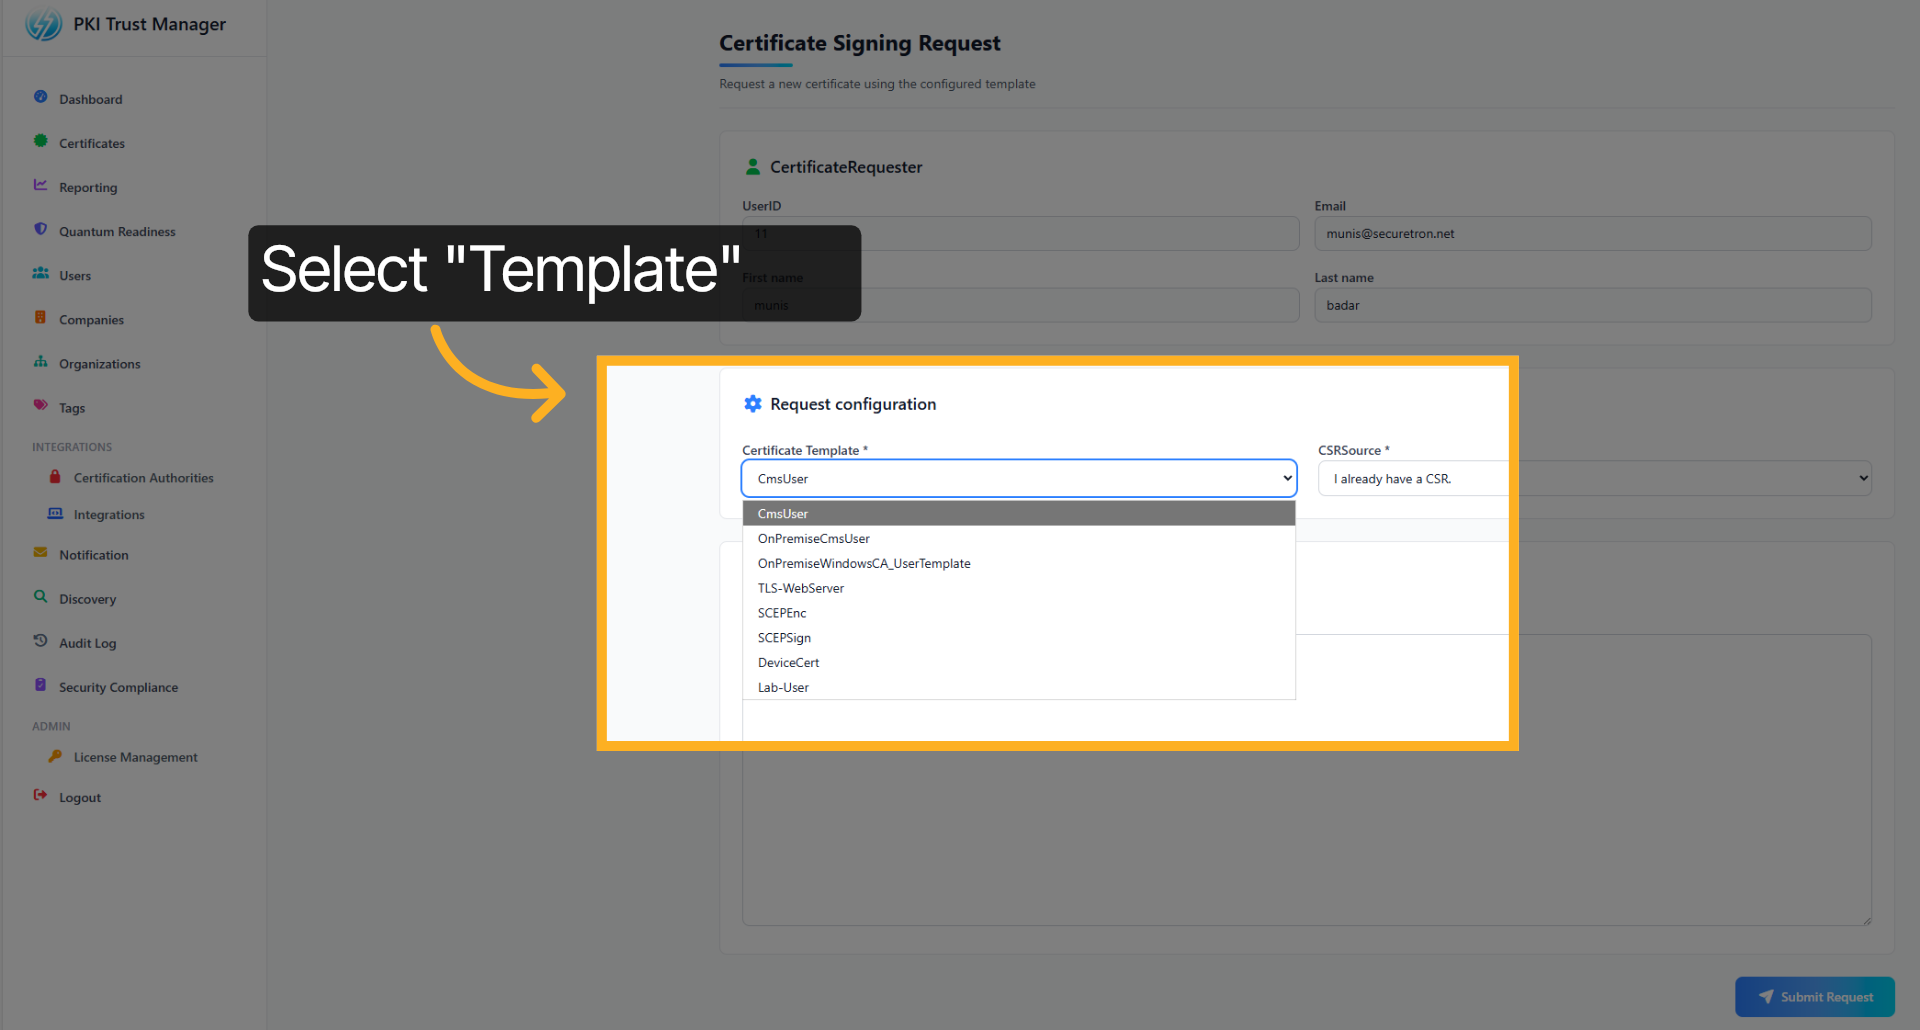
6. Select Template#
For this demonstration, we will be using the TLS Web Server template to issue a TLS Certificate that can be tied to a internal web-application
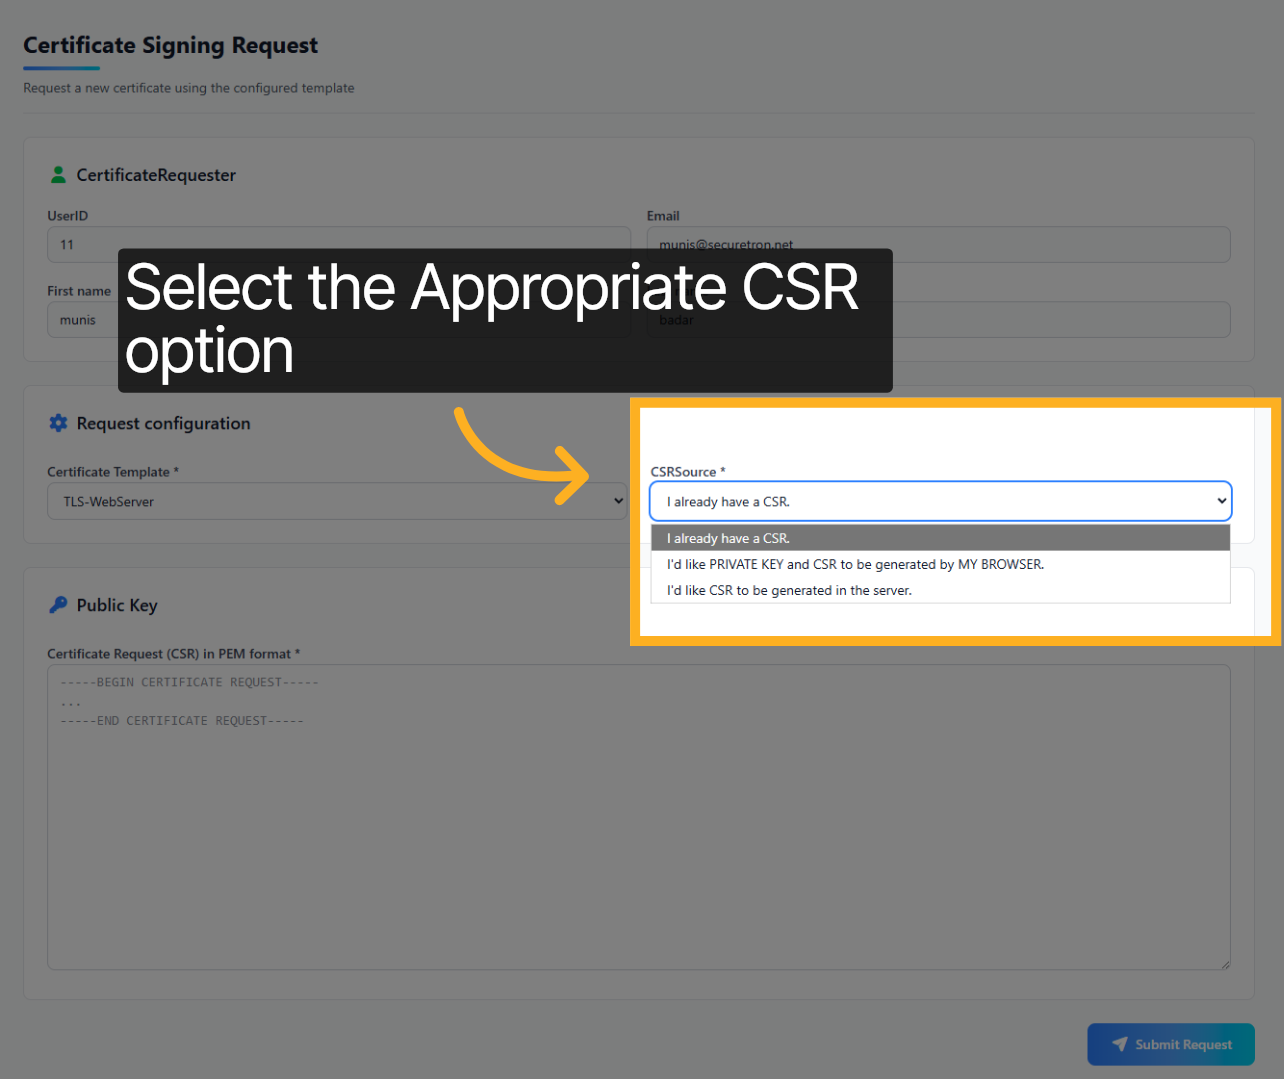
7. Certificate Signing Request#
Next we will select the CSR Option. There are three choices. First, if you already have the CSR; second, that you would like to generate the CSR in your browser; and finally, the third option is to generate the CSR on the Server side.
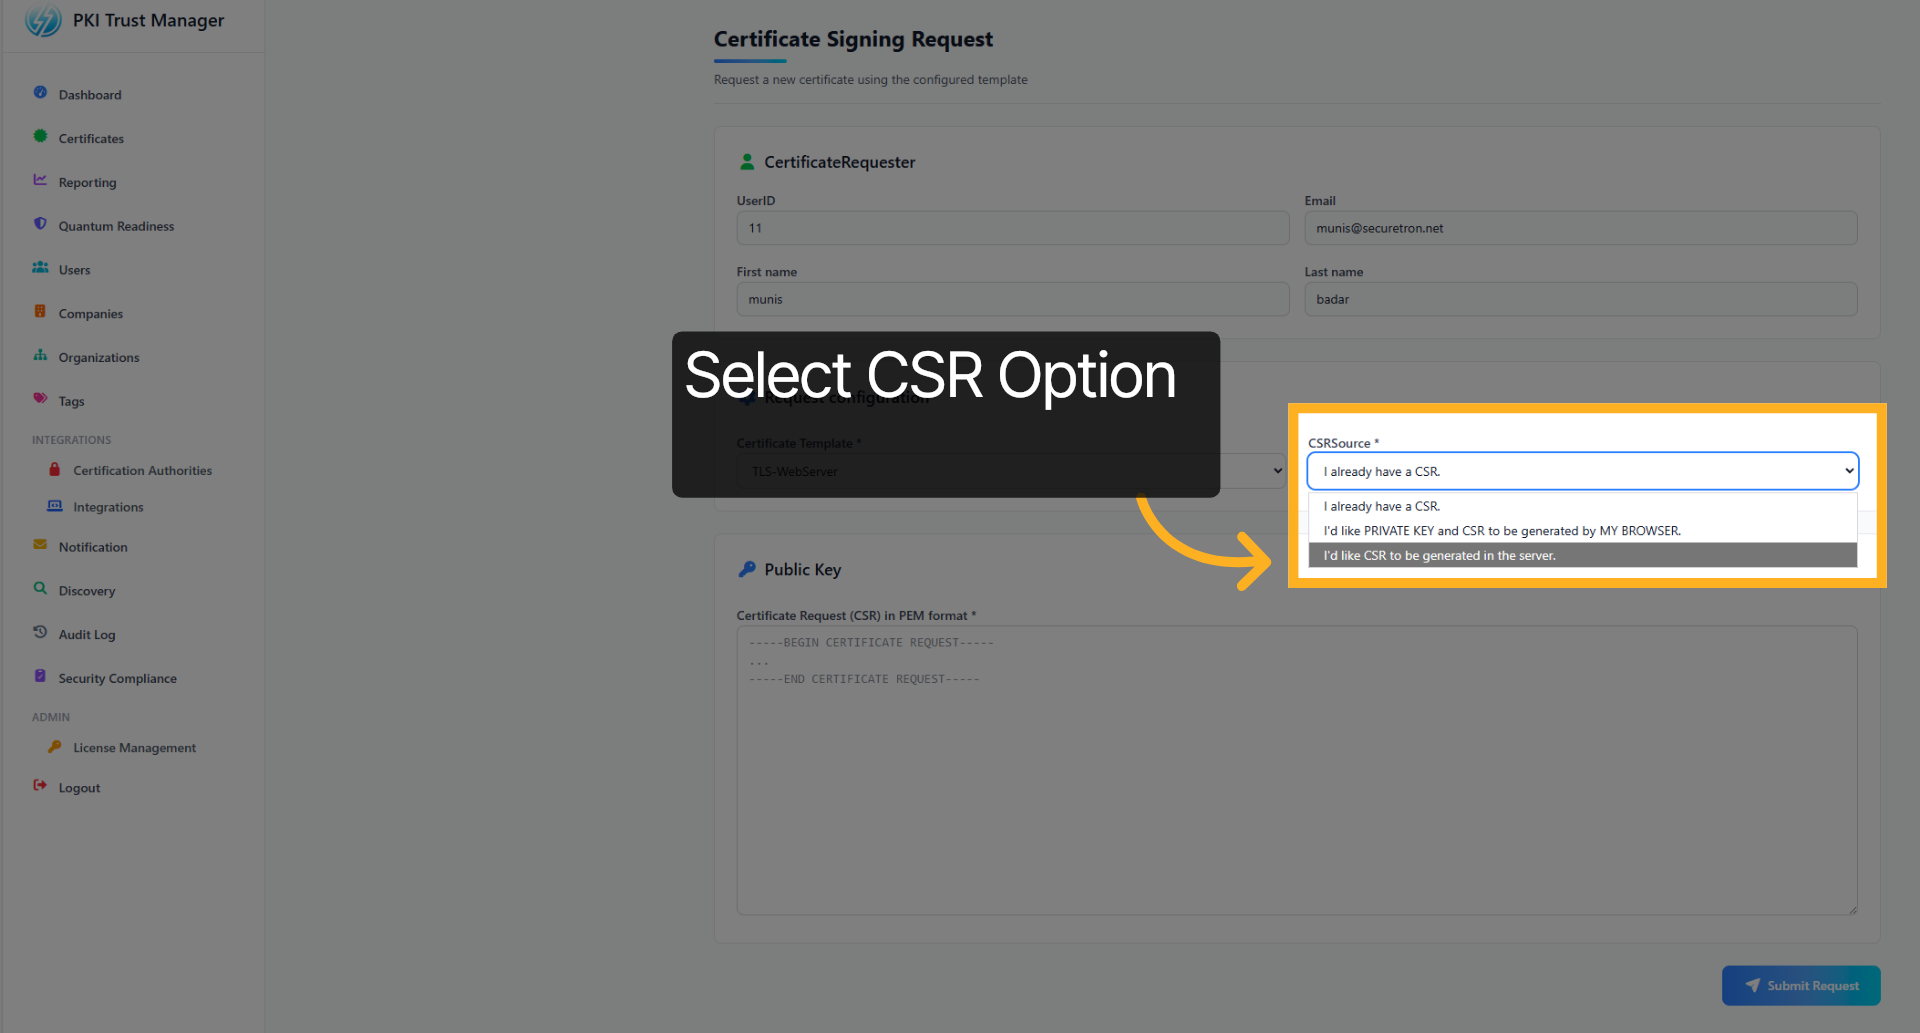
8. Select CSR Option#
We will select the "Server Side" option to generate the CSR
9. Certificate Details#
Next, we want to fill out the details required to generate a CSR. These fields have been either made mandatory or optional by the PKI Admin when through the Template.
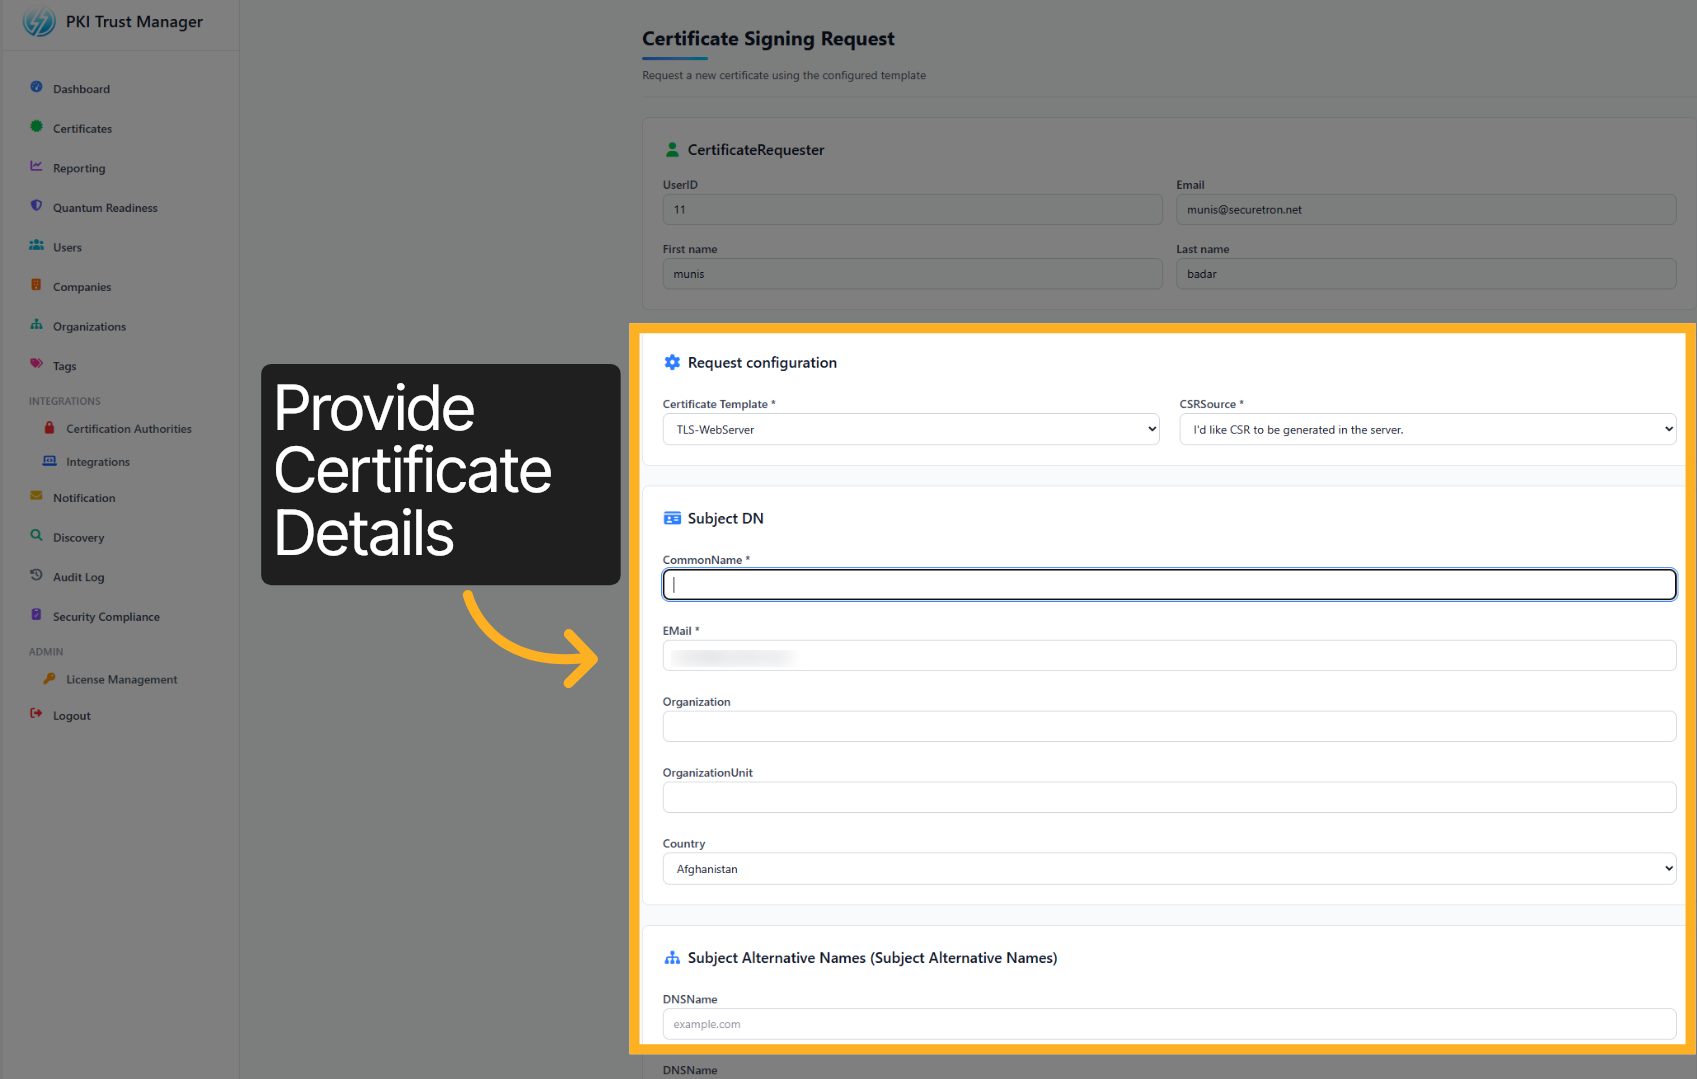
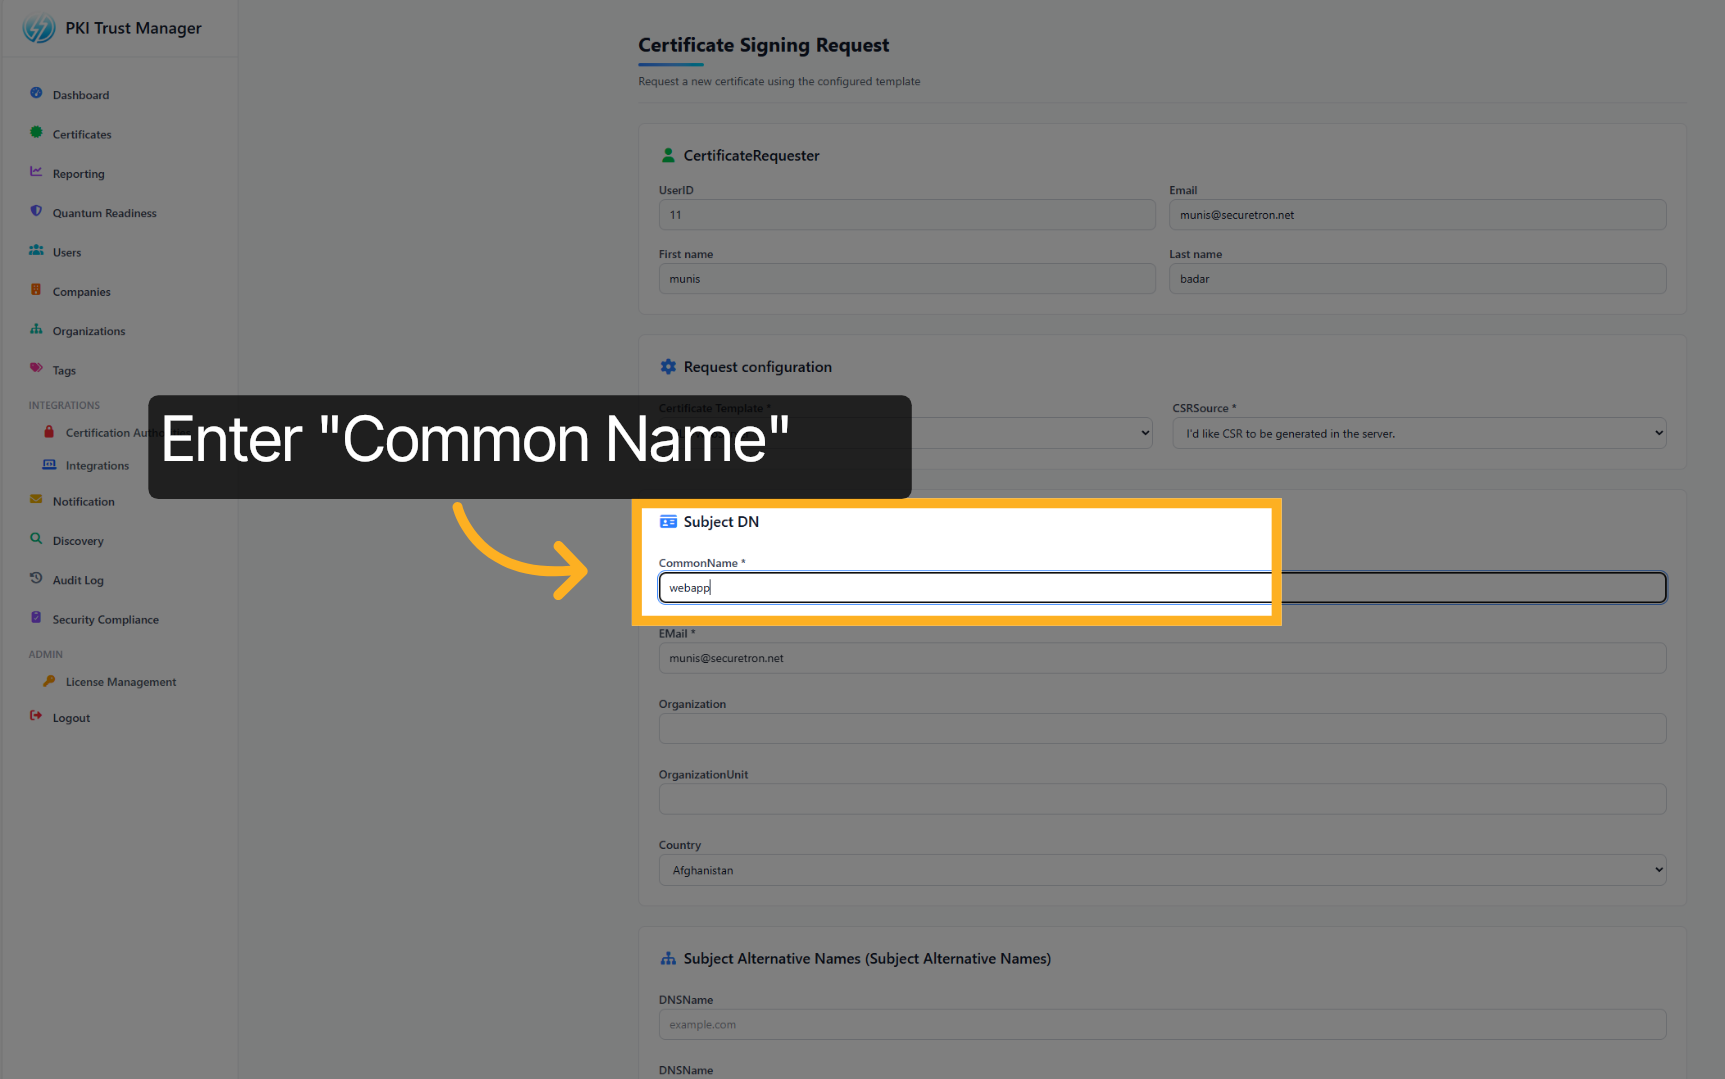
10. Common Name#
Enter your application name or DNS Name to identify the certificate's purpose.
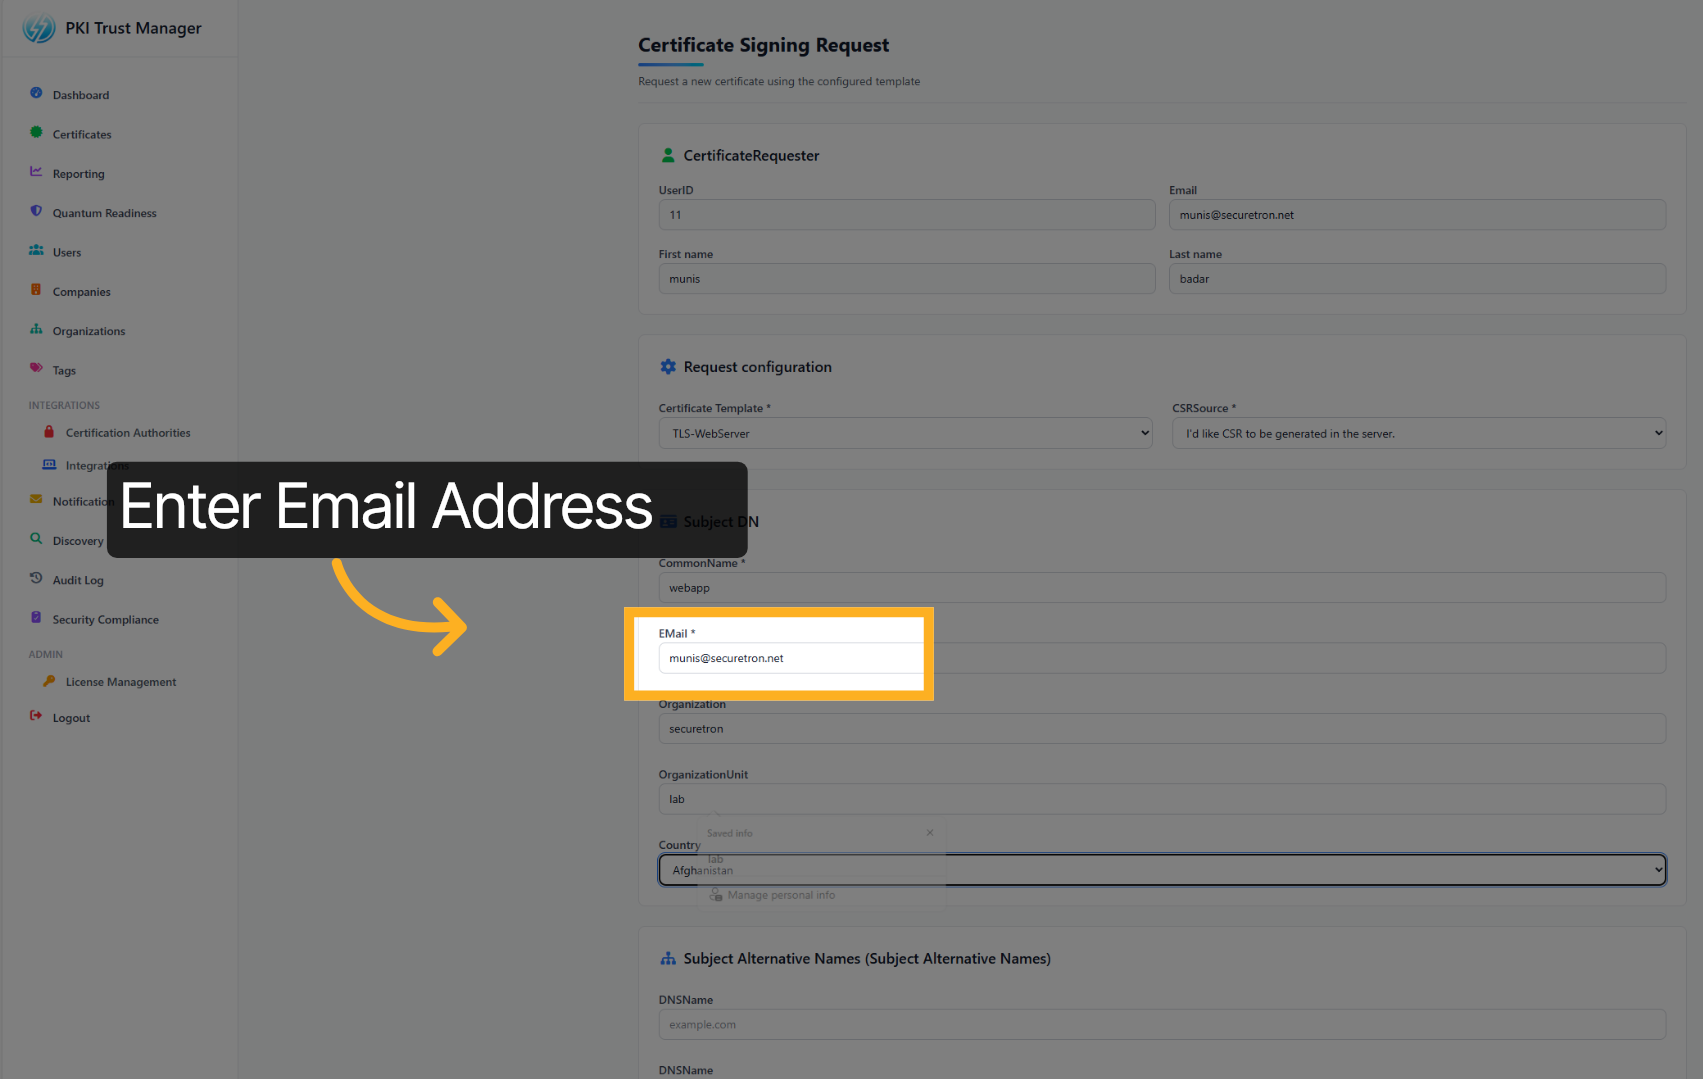
11. Email Address#
Enter your email address associated with the certificate requestor. This typically should be a distribution list.
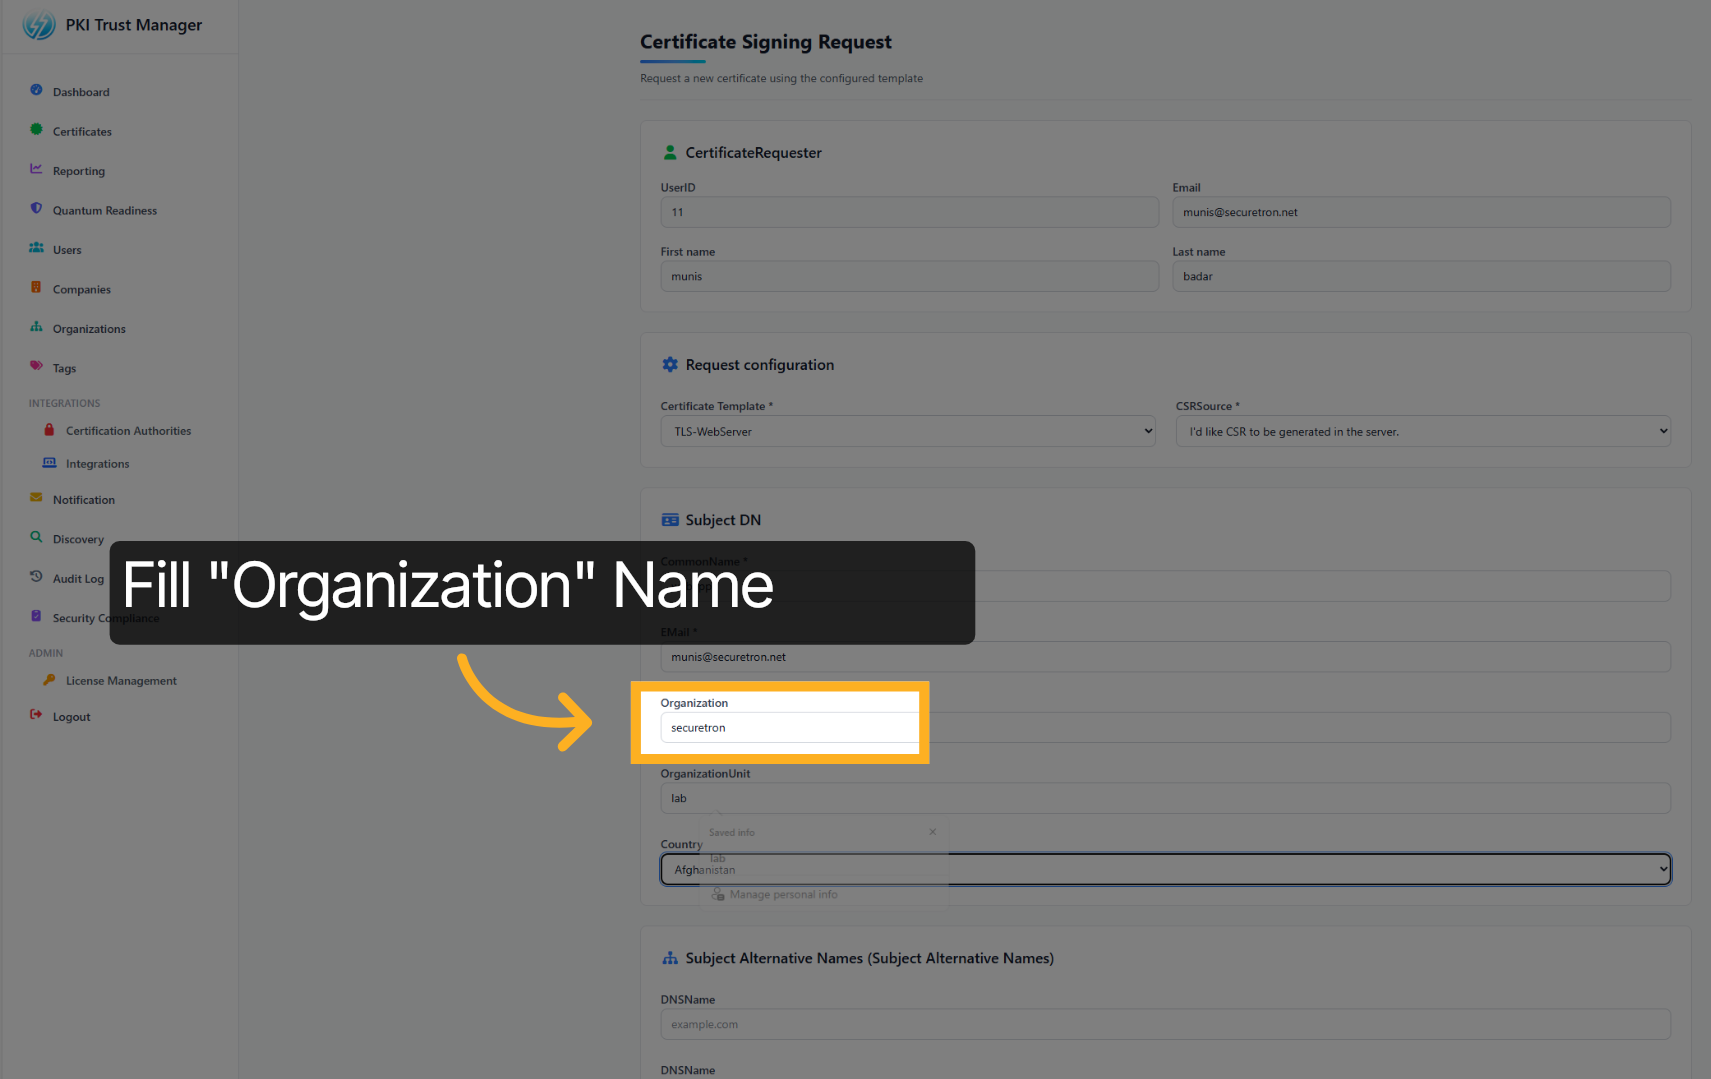
12. Organization Name#
Enter your organization or department name to which the certificate belongs to
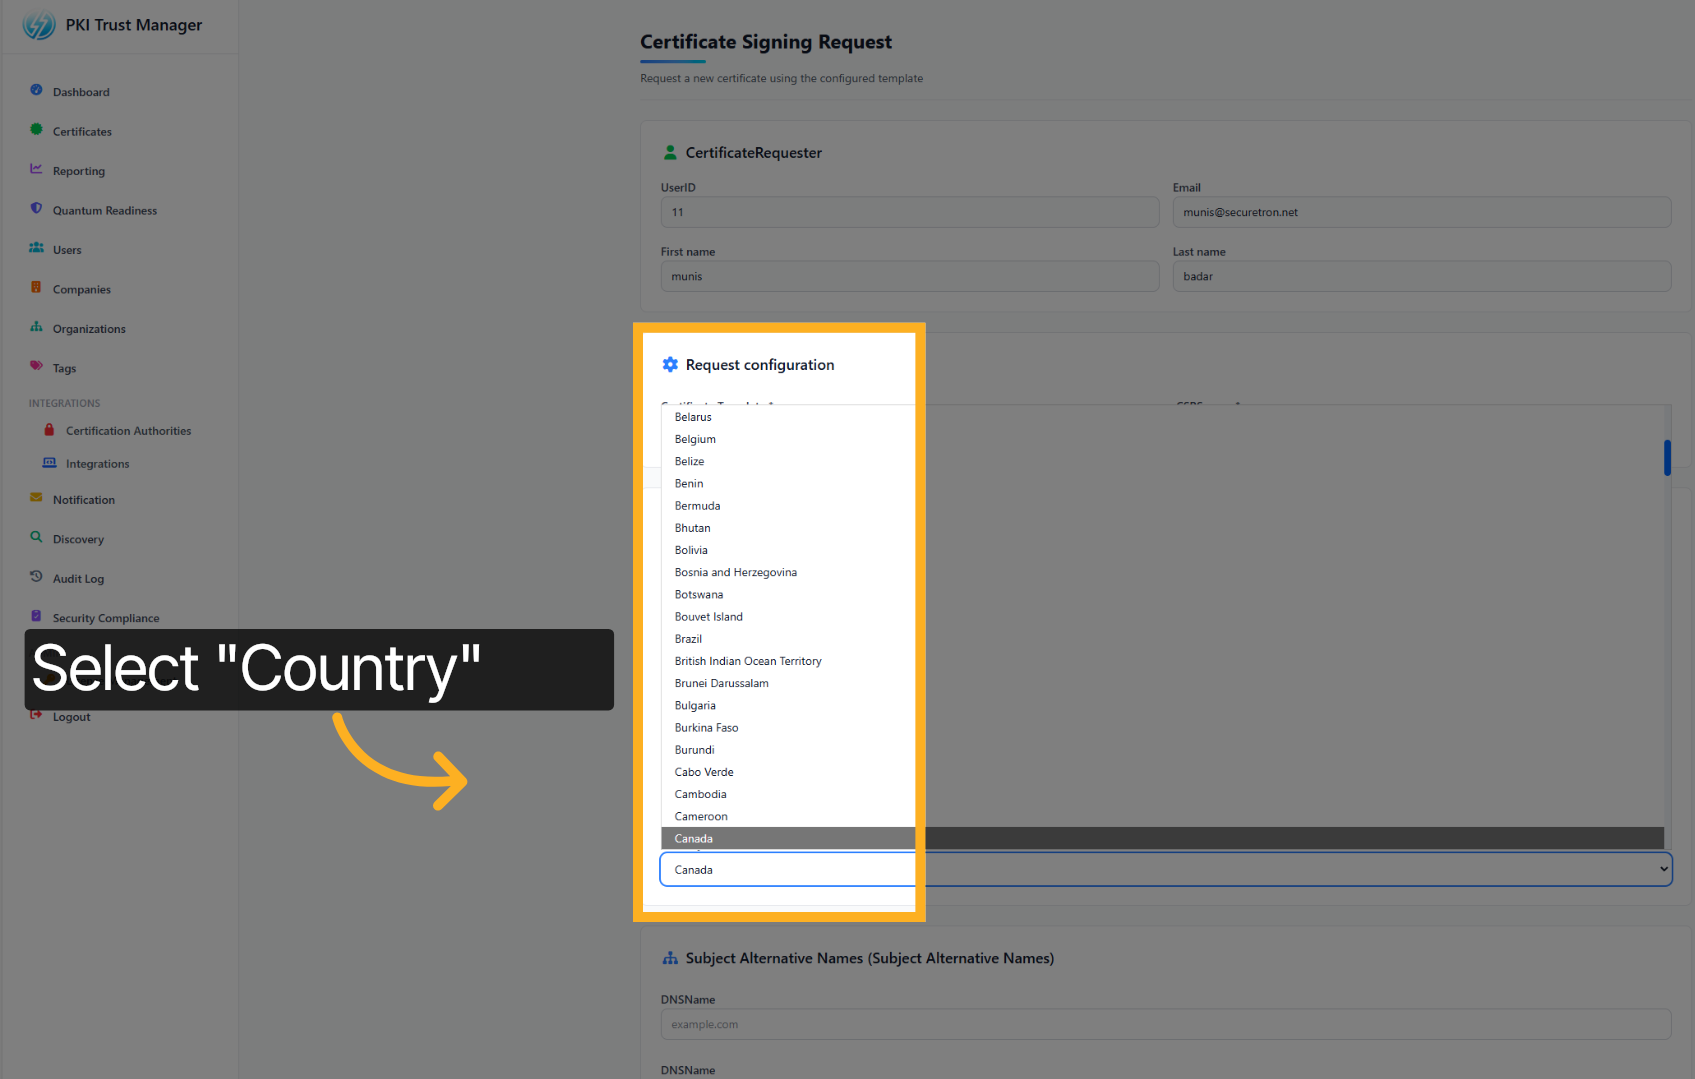
13. Country#
Select the appropriate country from the list.
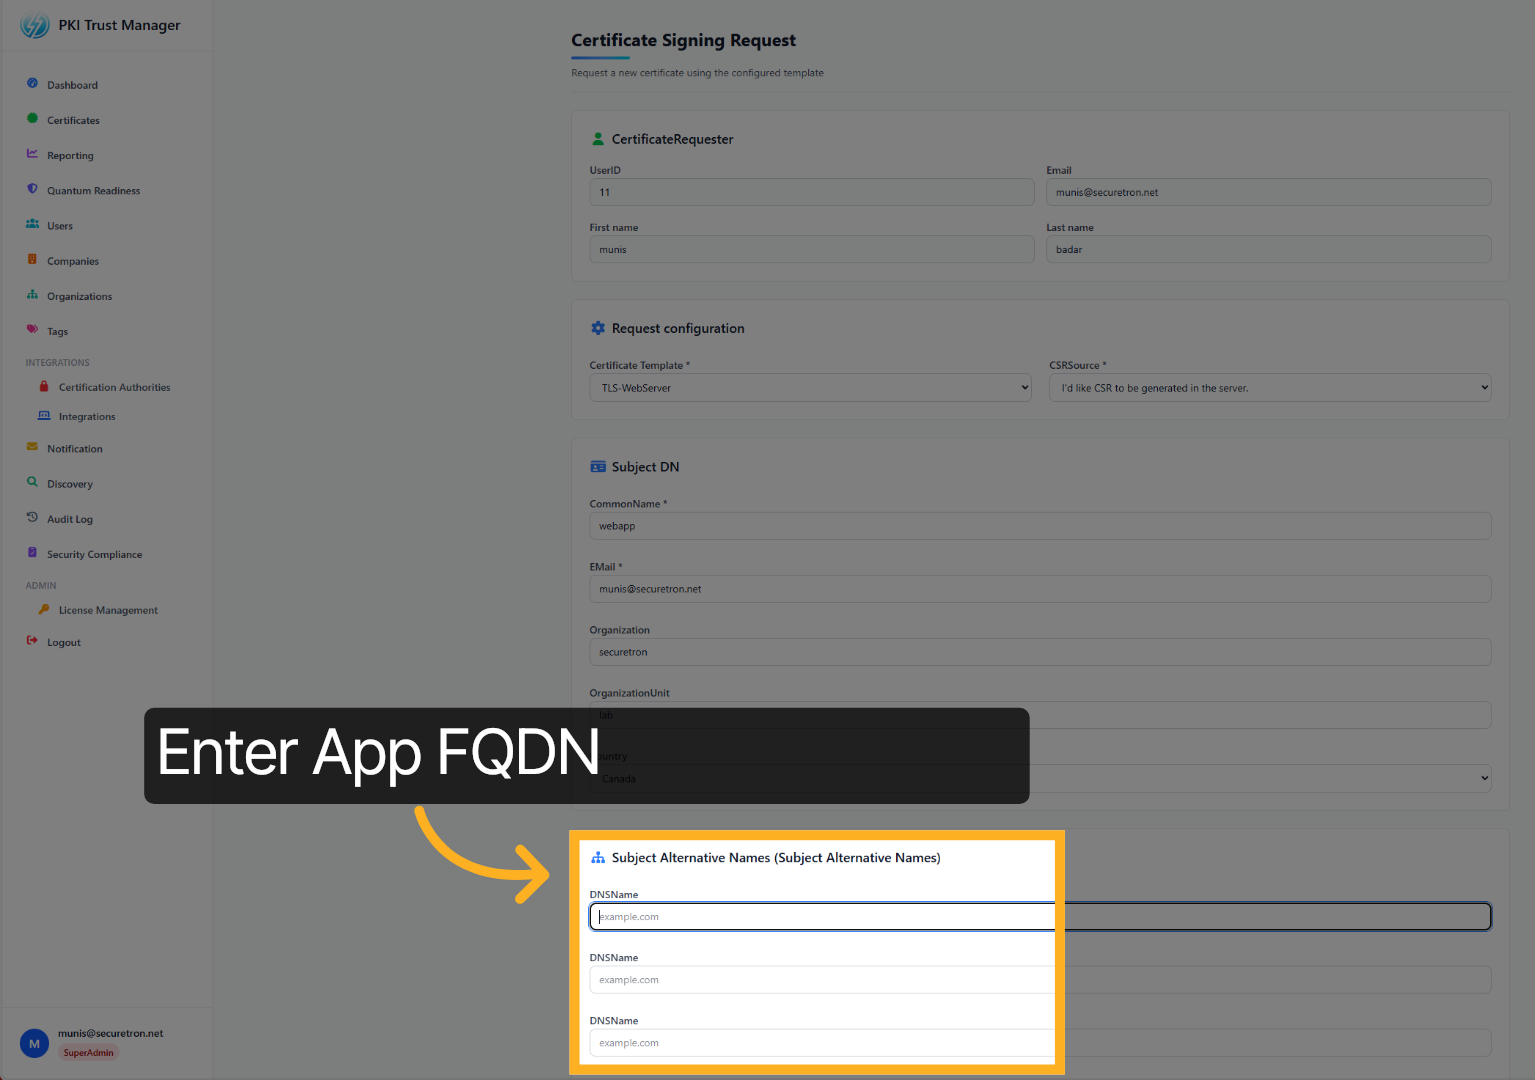
14. Subject Alternative Names#
Select the domain name associated with the certificate. These might be aliases used to access the application. They are commonly known as DNS Alias or Subject Alternative Names. If you do not have one - then re-enter the common name here.
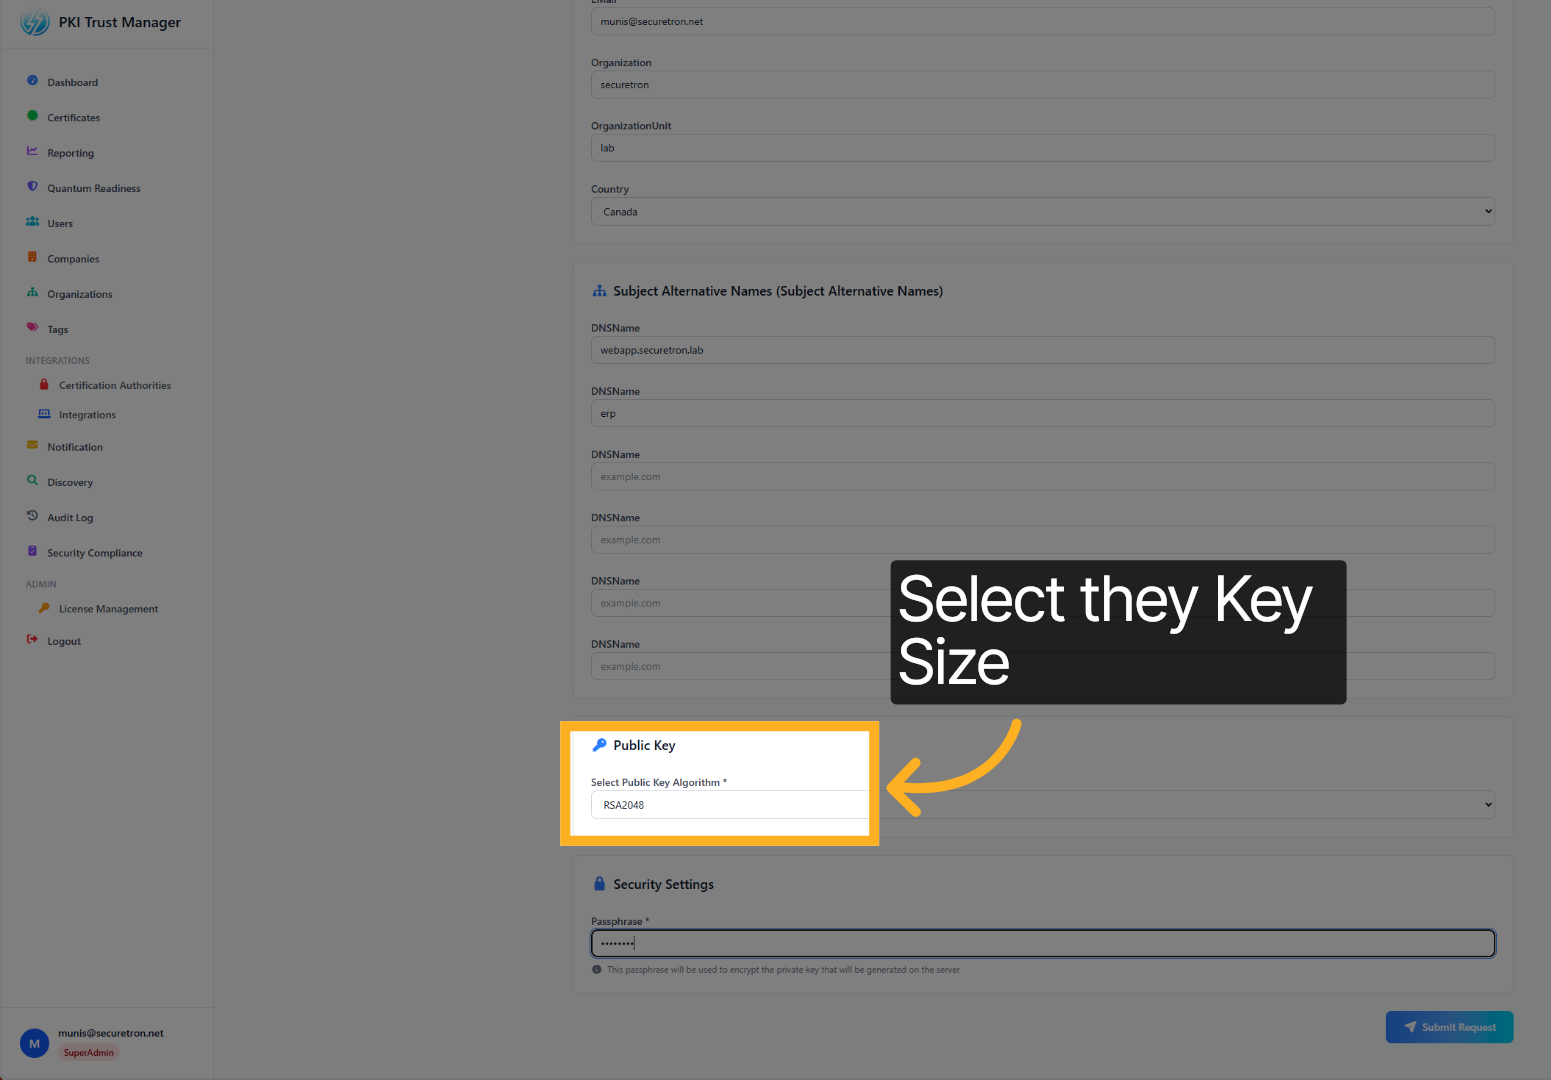
15. Key Algorithm and Size#
Select the Key algorithm and size
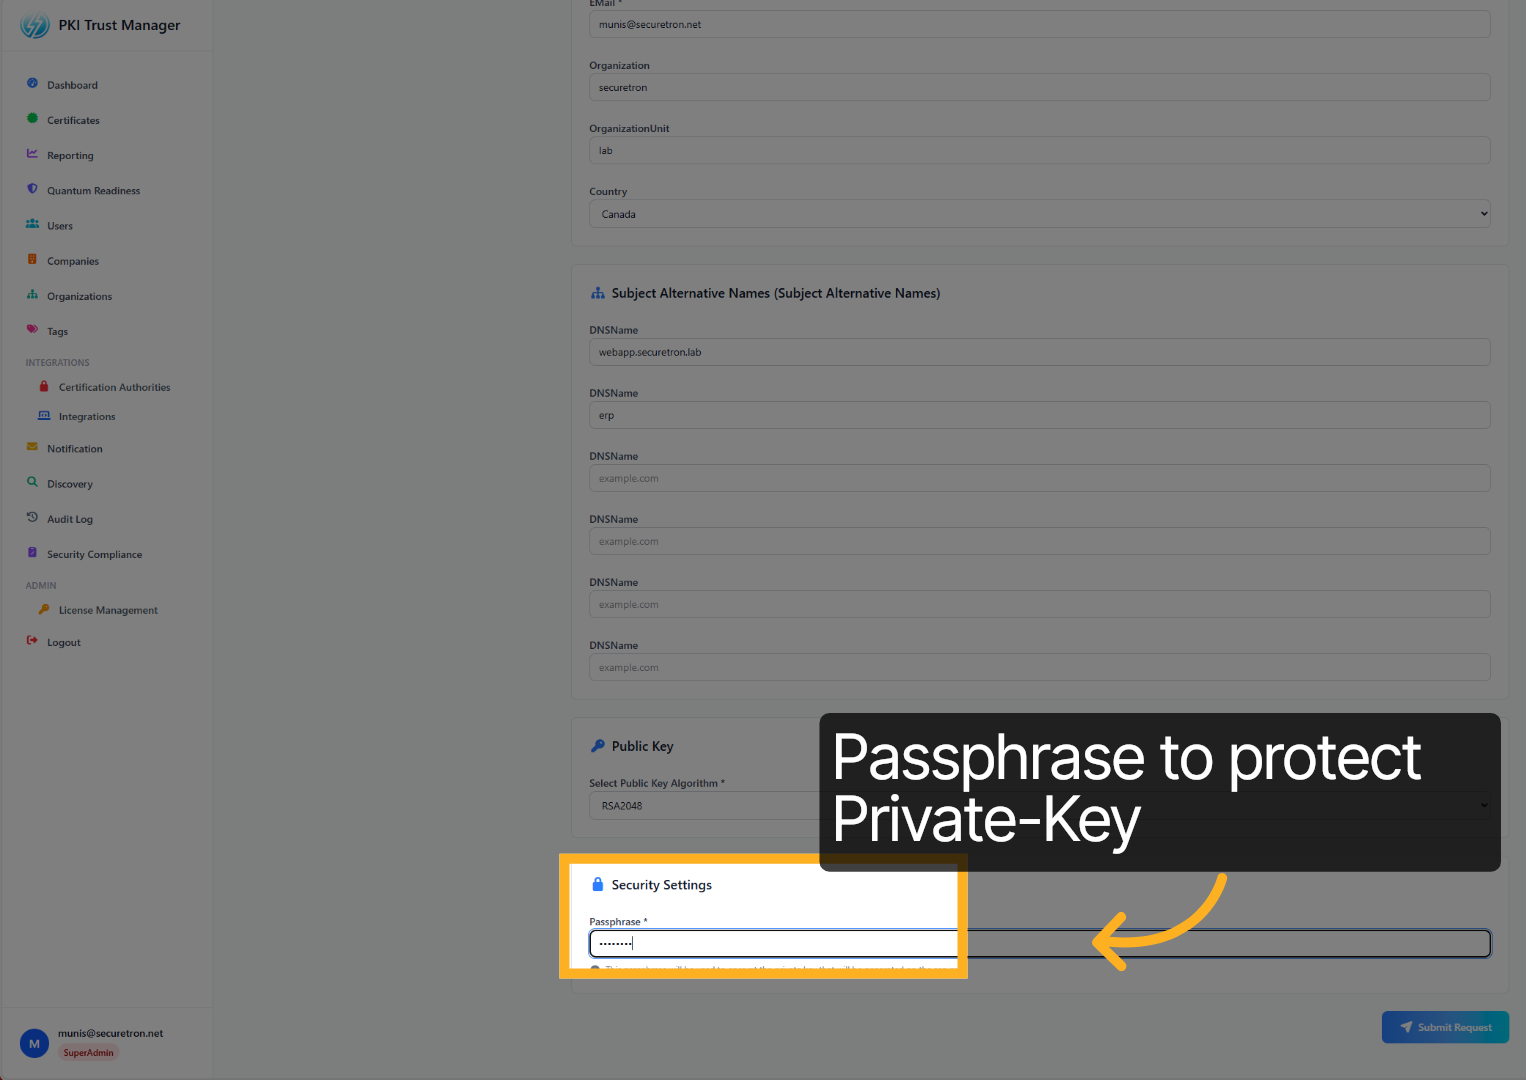
16. Passphrase#
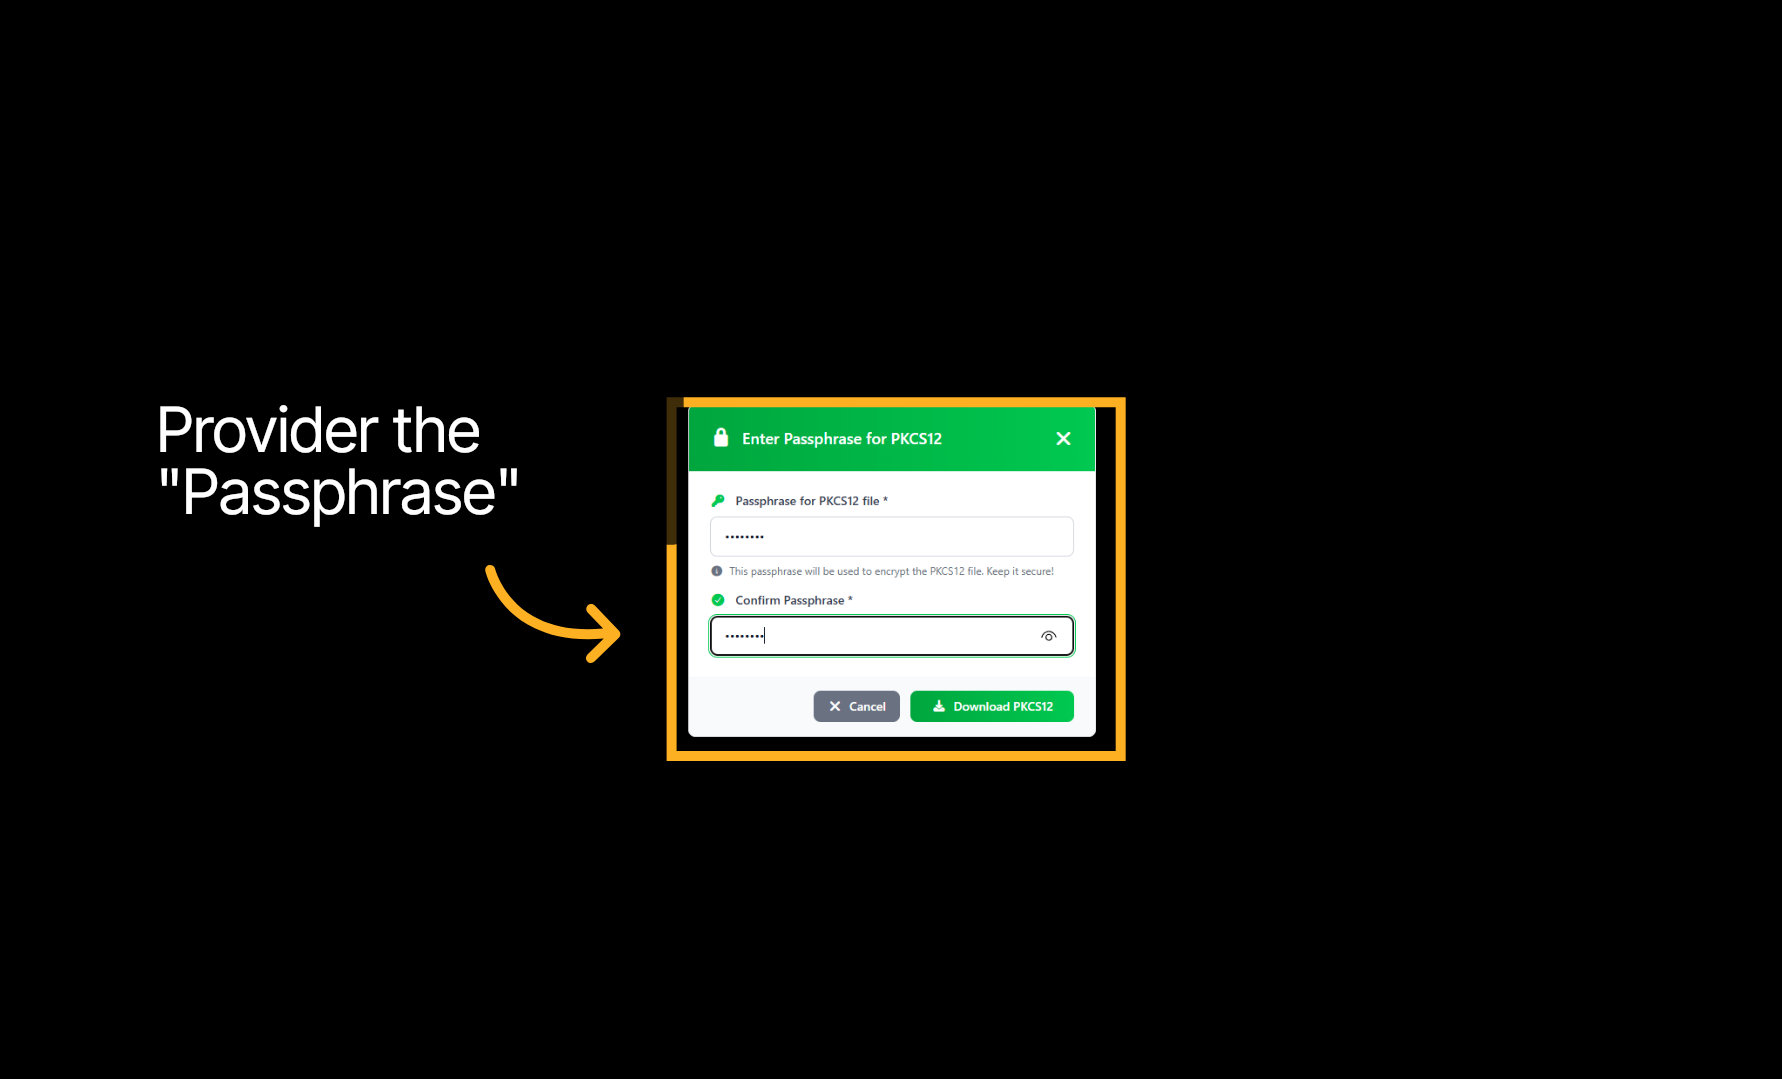
To protect the Private key, provide a pass phrase. This passphrase will be used to download as well as import it on the application server.
17. Submit Certificate Request#
Click Submit Request to send your certificate signing request.

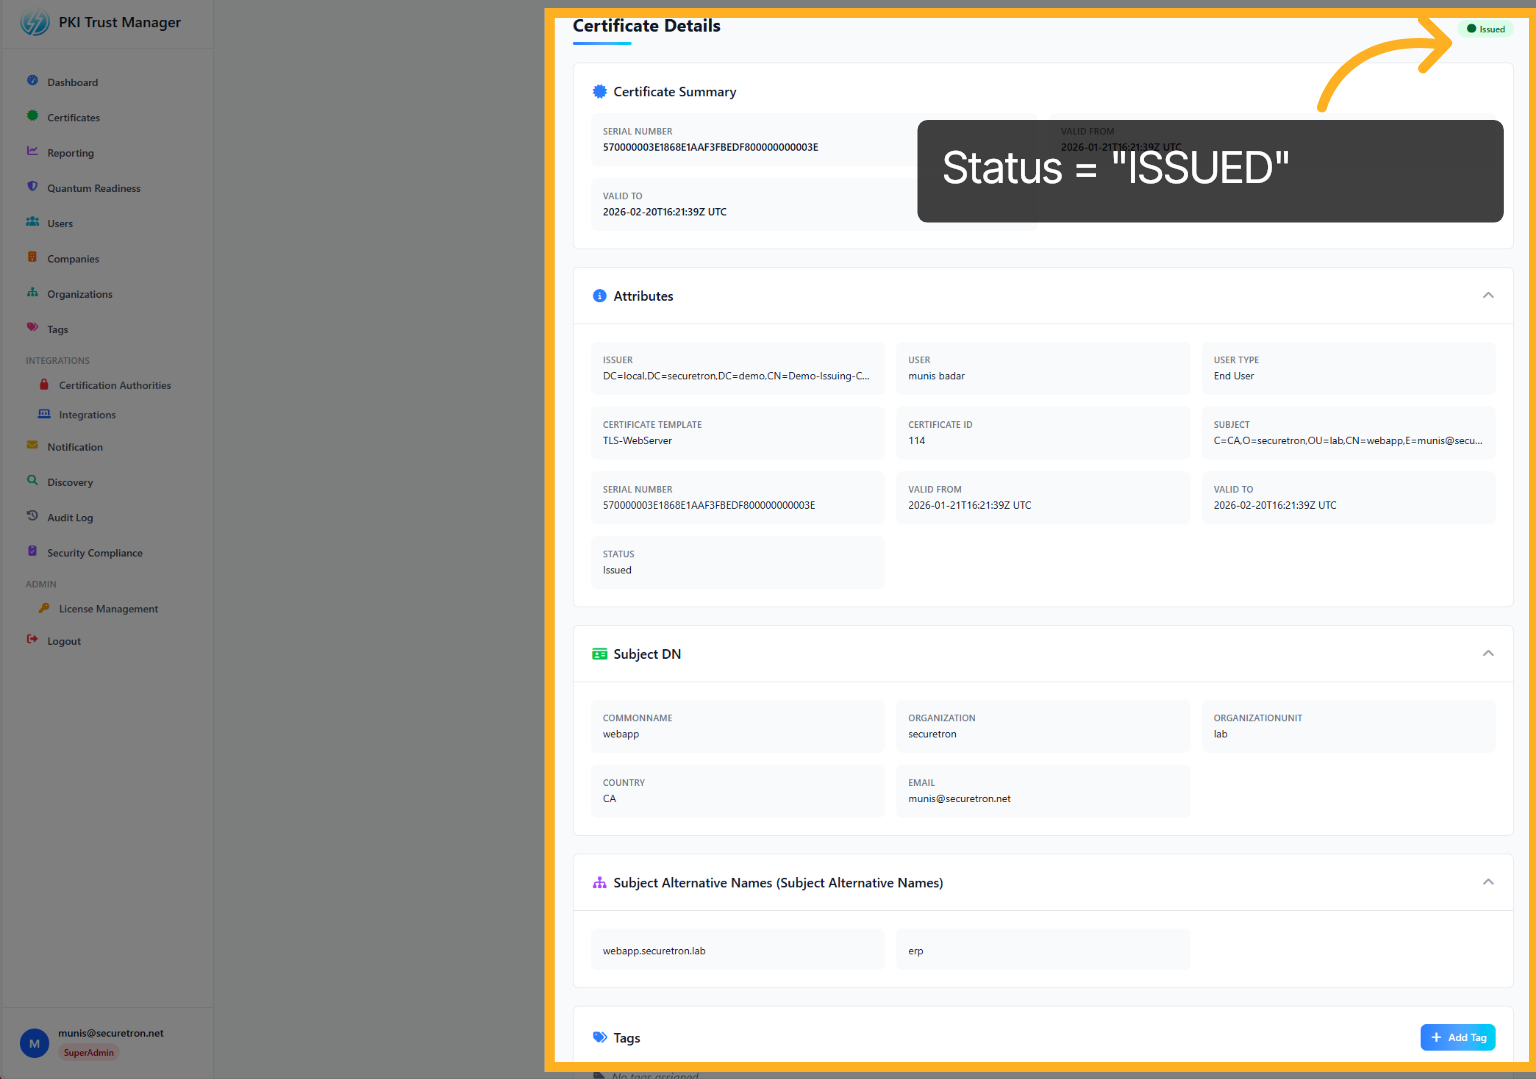
18. Certificate Details#
The Certificate details will show the status as "ISSUED" if successful.
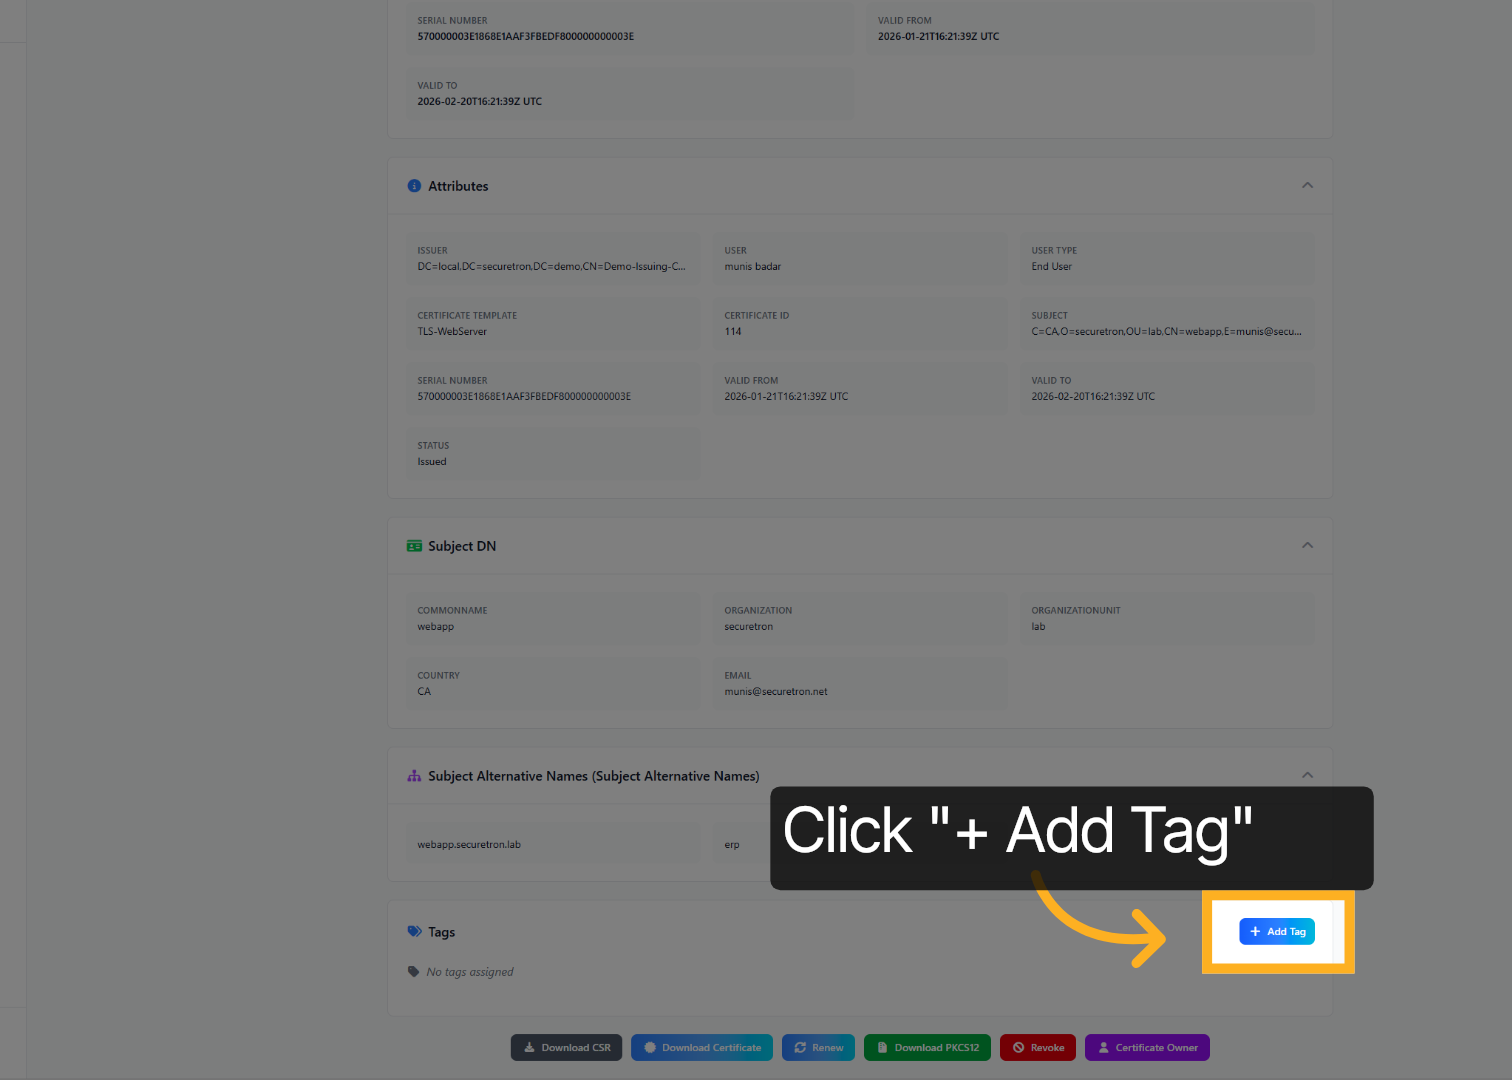
19. Certificate Tag#
It is best practice to add further metadata to the certificates. You can do this by adding tags to the certificates. You can add multiple tags to the certificates. Let us add a tag to this newly issued certificate. Click on Add Tag, which is located at the bottom of the screen in the tags section
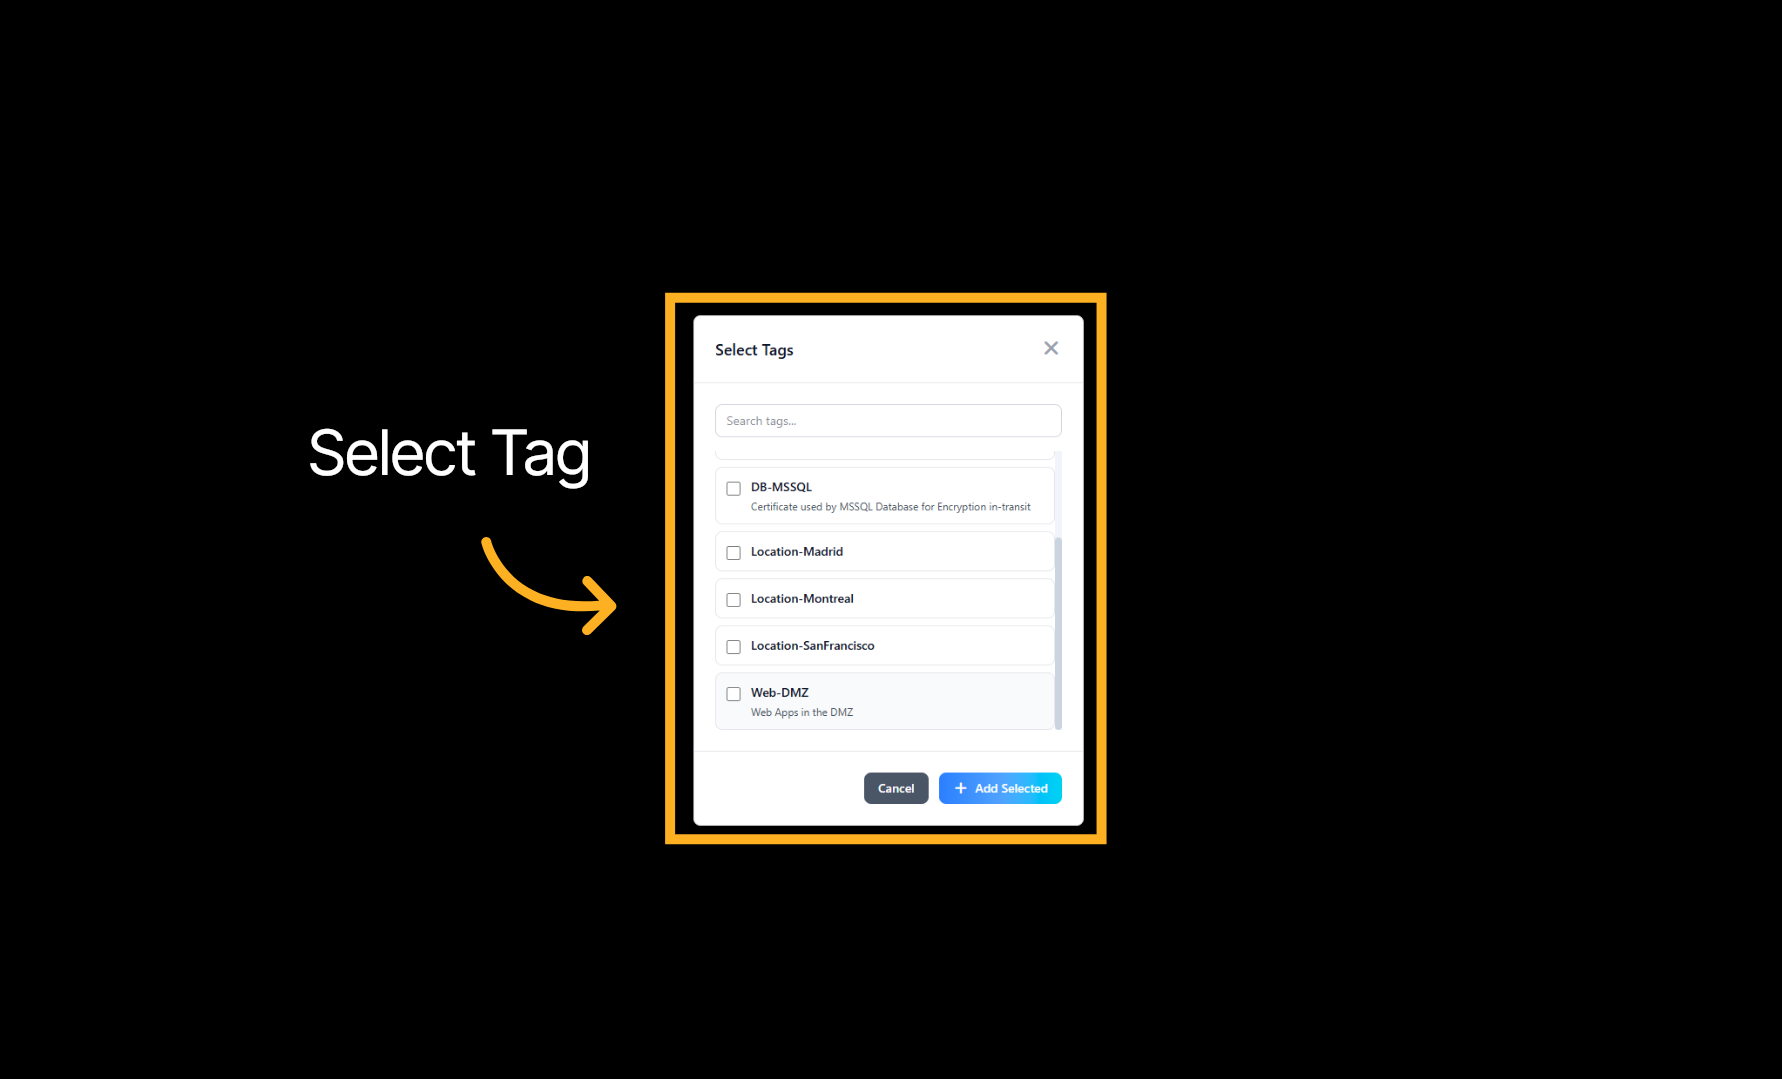
20. Select Tag#
hoose a tag for the certificate.
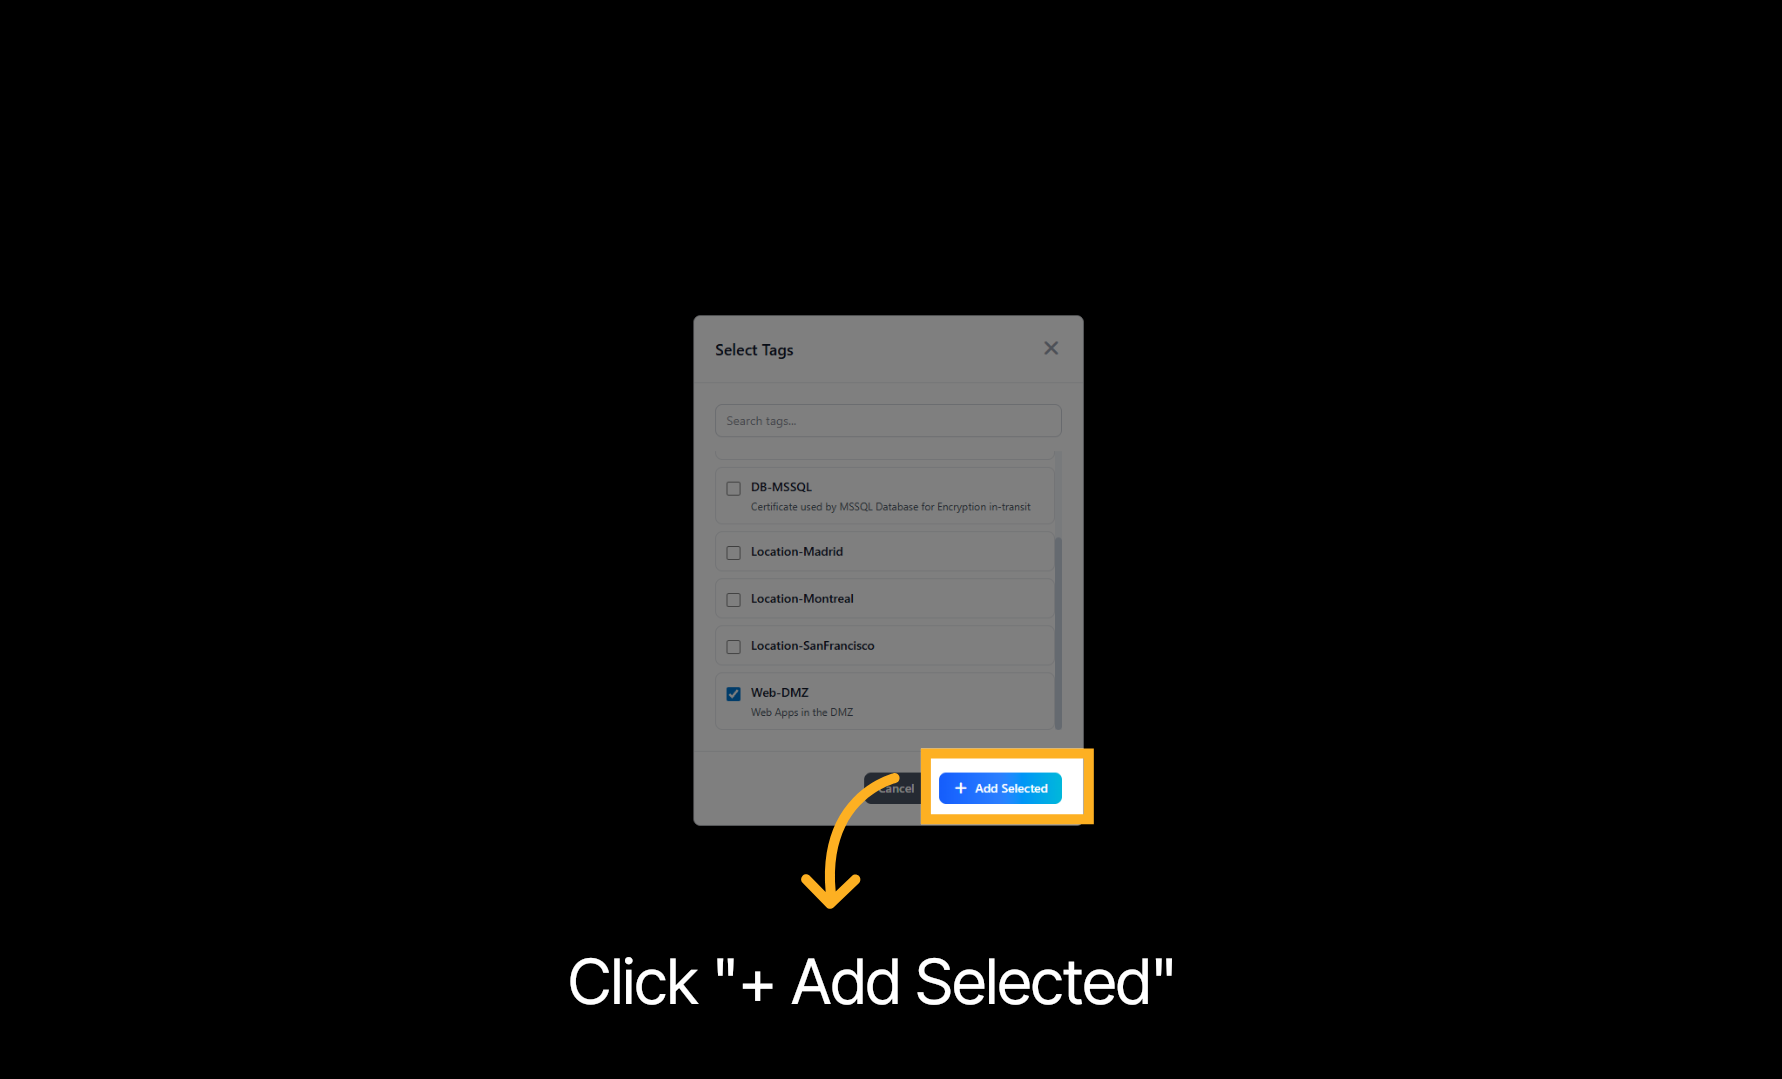
21. Add Selected Tags#
Click Add Selected to apply the chosen tags to the certificate.
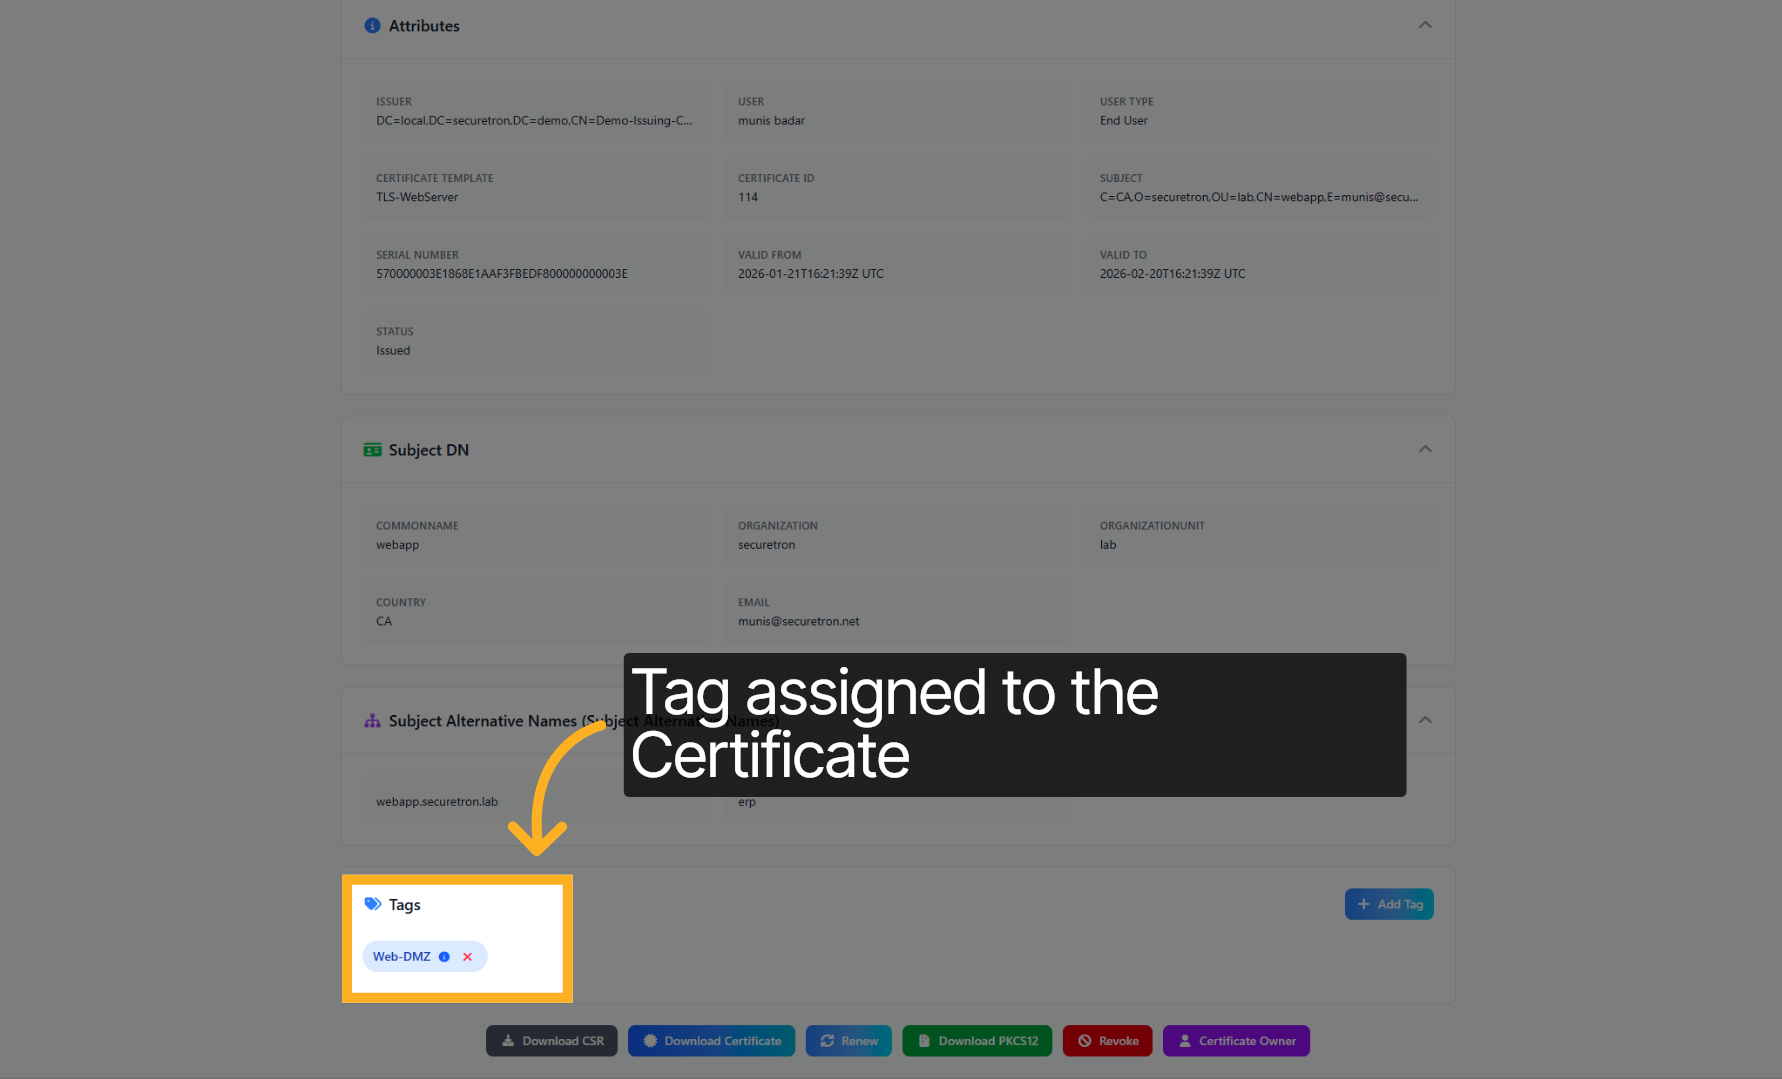
22. Assigned Tags#
The tag has been successfully assigned to the certificate.
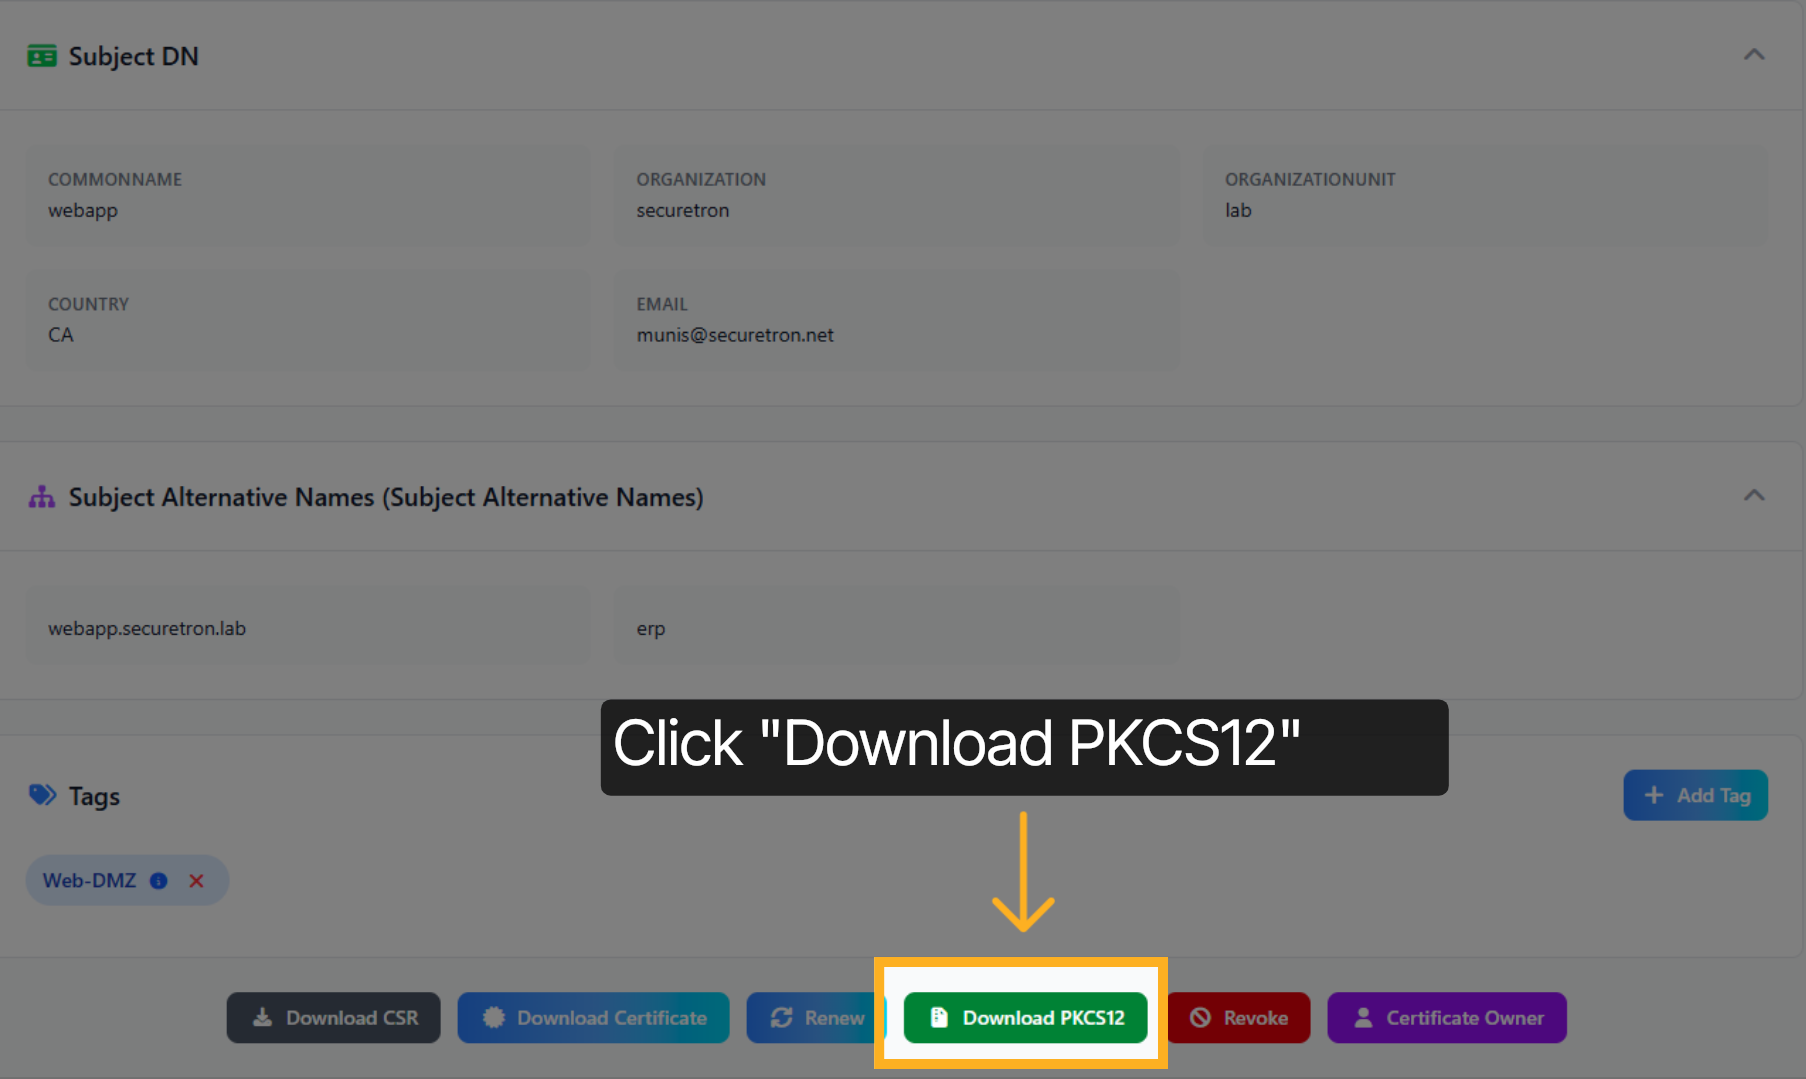
23. Download PKCS12 File#
Next, let us download the certificate including the private key. Click Download PKCS12 to obtain the certificate in PKCS12 format.
24. Fill Passphrase#
Enter your passphrase to secure the PKCS12 certificate file.
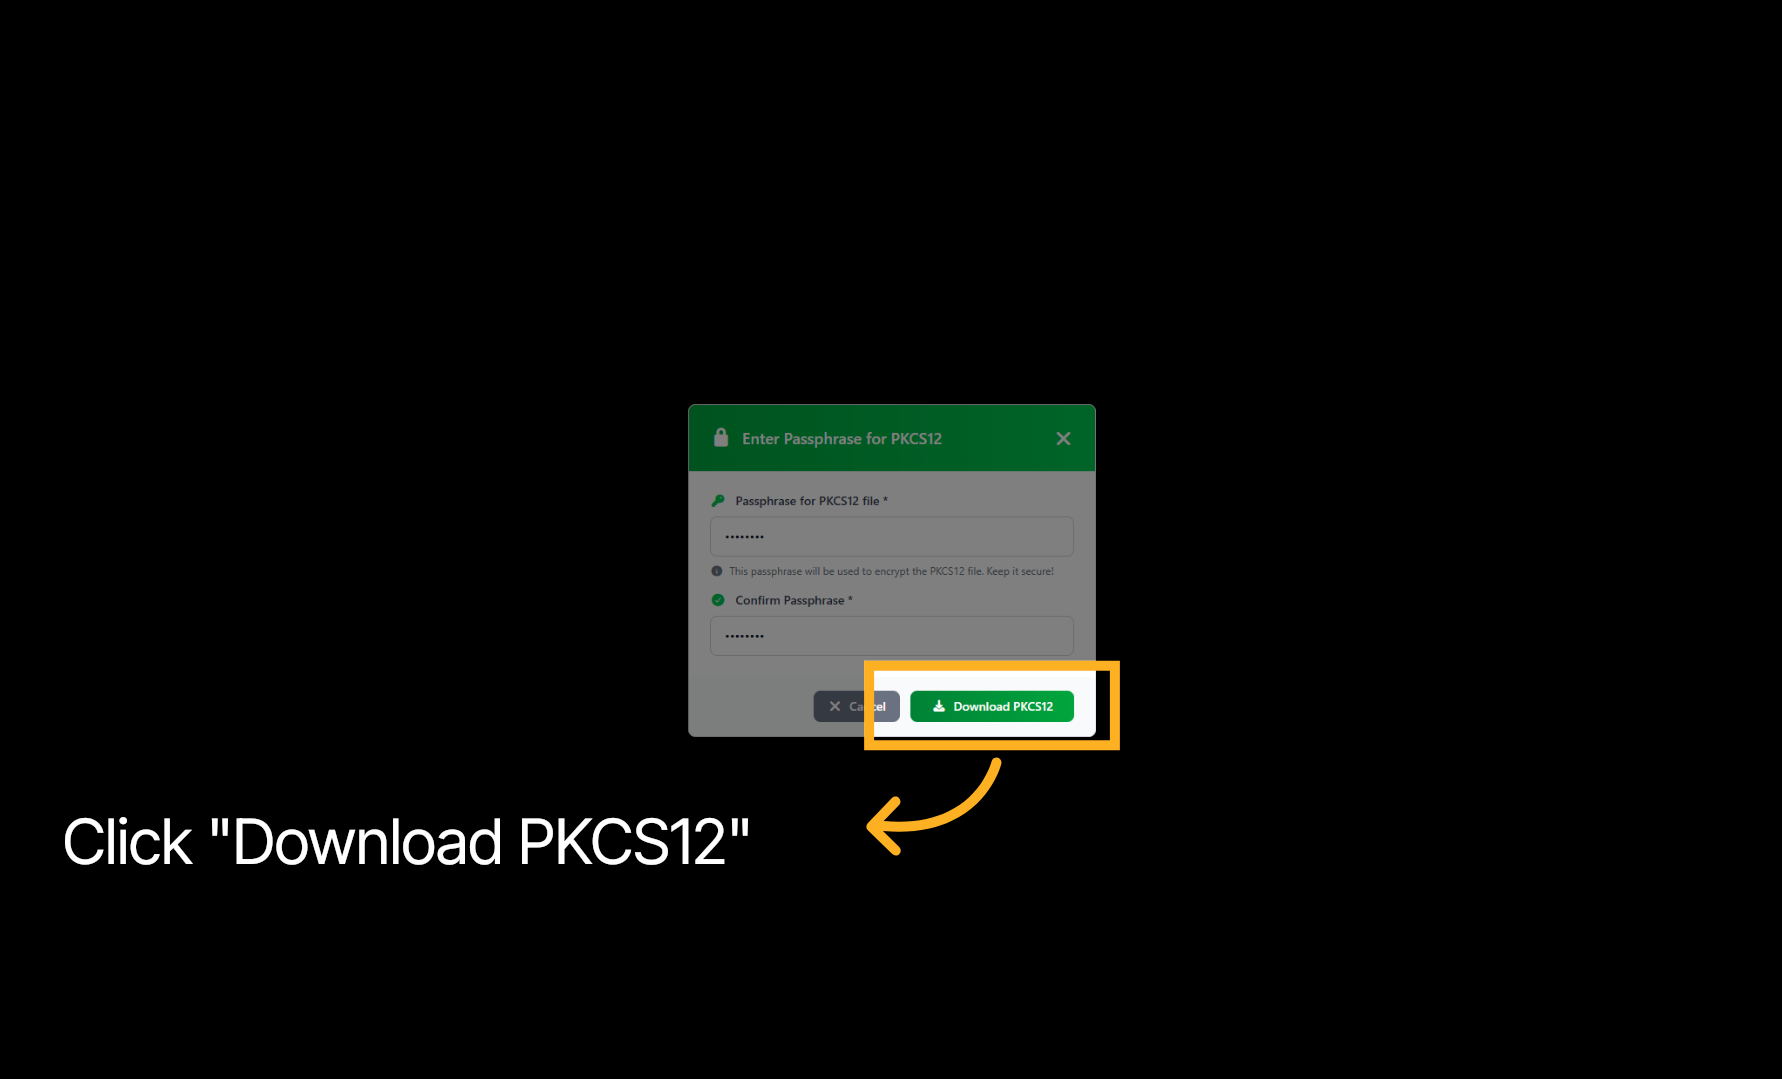
25. Confirm PKCS12 Download#
Click Download PKCS12 to finalize saving the certificate file.
Congratulations!You have successfully issued a certificate using the PKI Trust Manager by completing all necessary configuration and download steps. For further management, consider exploring certificate renewal and revocation processes. Additionally, visit our website or contact support if you require further assistance.