ADCS MSCA Proxy Gateway on a Windows Member Server
Deploy PKI Trust Manager Microsoft CA Proxy Gateway

This tutorial guides you through deploying the PKI Trust Manager Microsoft CA / ADCS Proxy Gateway. The Proxy Gateway for ADCS is used to integrate the PKI Trust Manager in order to provide backend access to the Certificate Authority without exposing it directly. The Proxy Gateway integrates with PKI Trust Manager so that automation and certificate lifecycle management can be performed using Microsoft Active Directory Certificate Authority
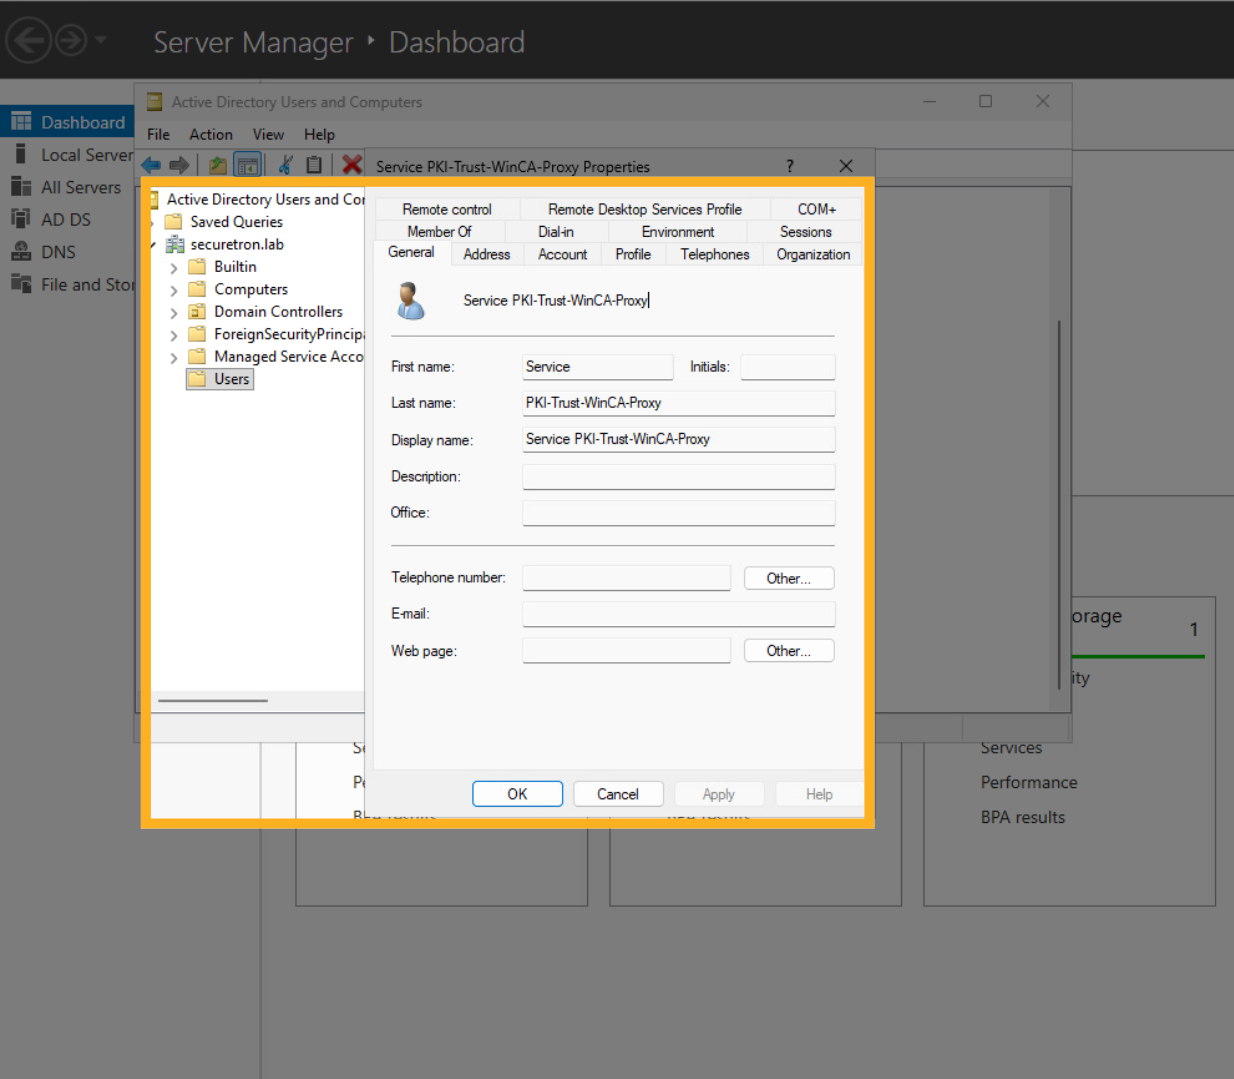
1. Add a Service Account#
We will begin by adding a service account user to the AD Domain. Provision the domain service account as per your organization standard. This service account will be used to run the CA Proxy Gateway service and will be the CA Manager
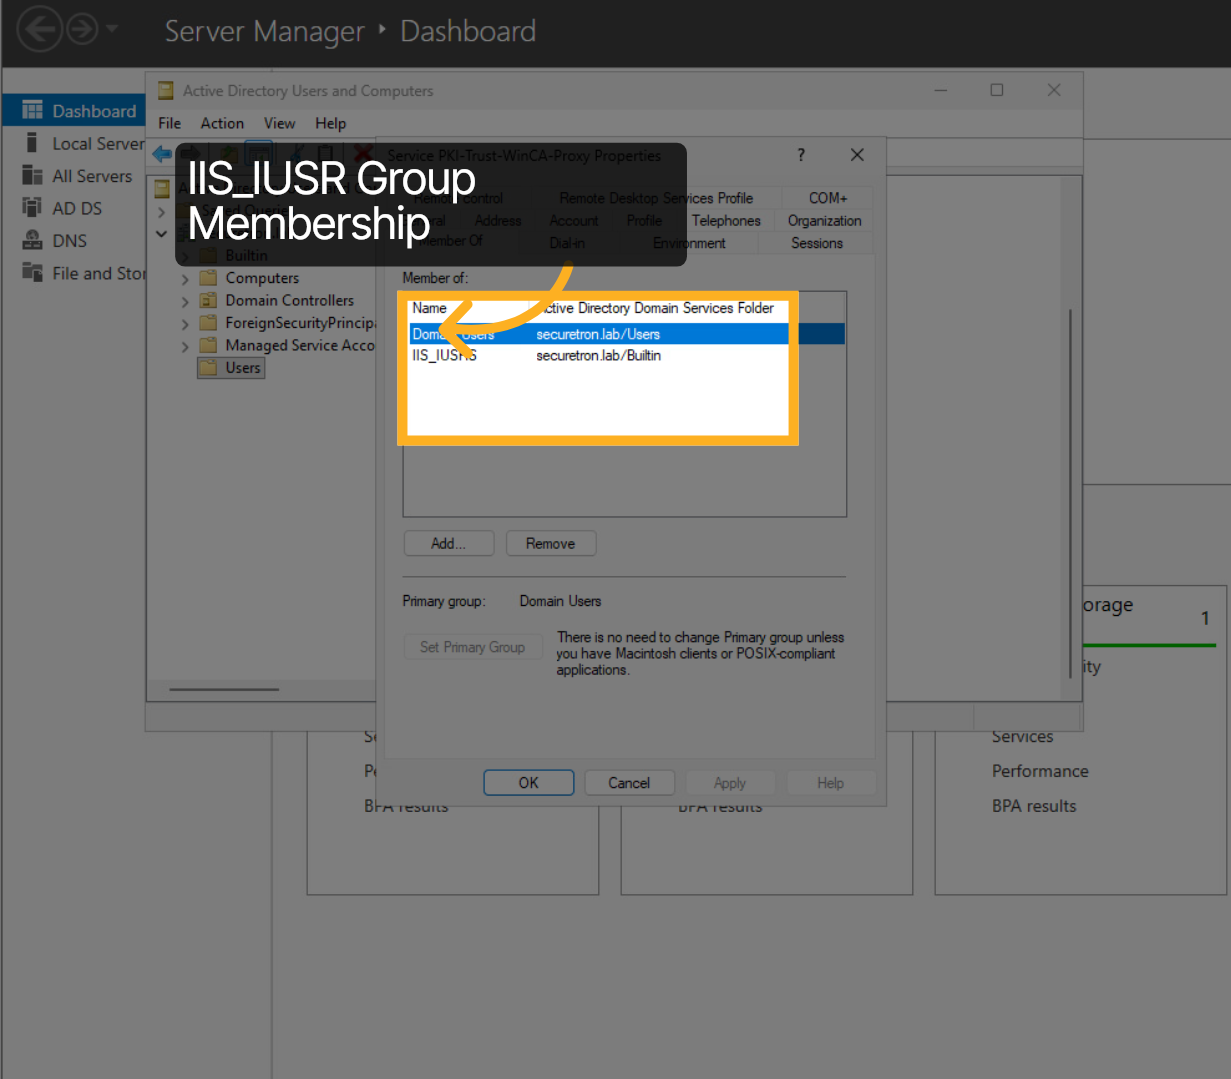
2. Group Membership of the Service Account#
Ensure that the service account is the member of IIS_IUsr Group as well as member of CA Admin Group if you have one
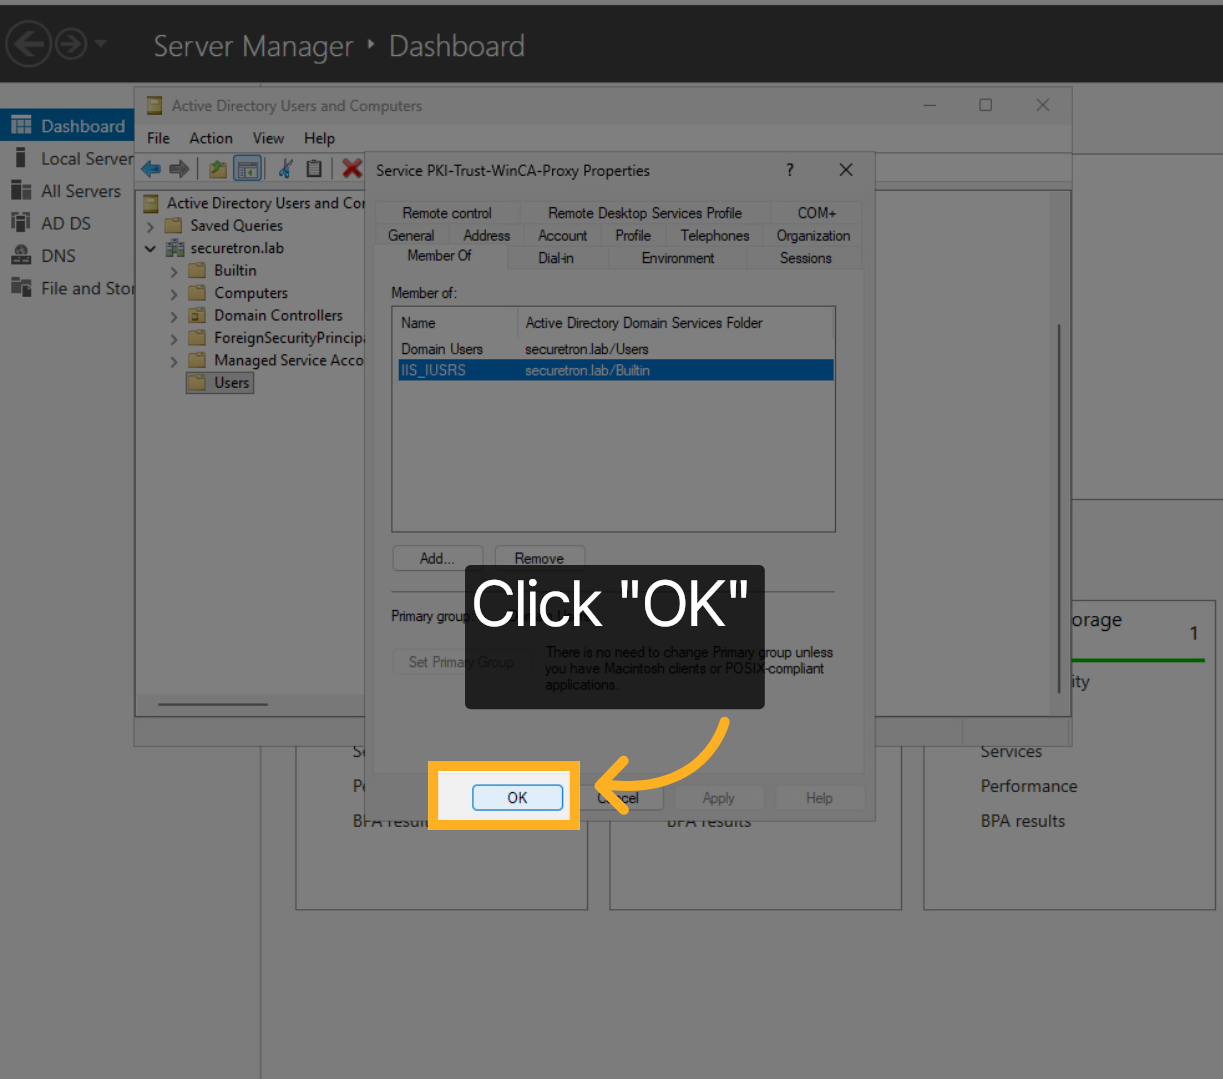
3. Confirm Adding the User#
Click OK to confirm the current action and continue.
4. CA Proxy Memeber Server#
On a member server that will run the CA Proxy Gateway application, ensure that IIS Web server is installed. If not then through the Add Roles and Features Wizard, add the necessary roles.
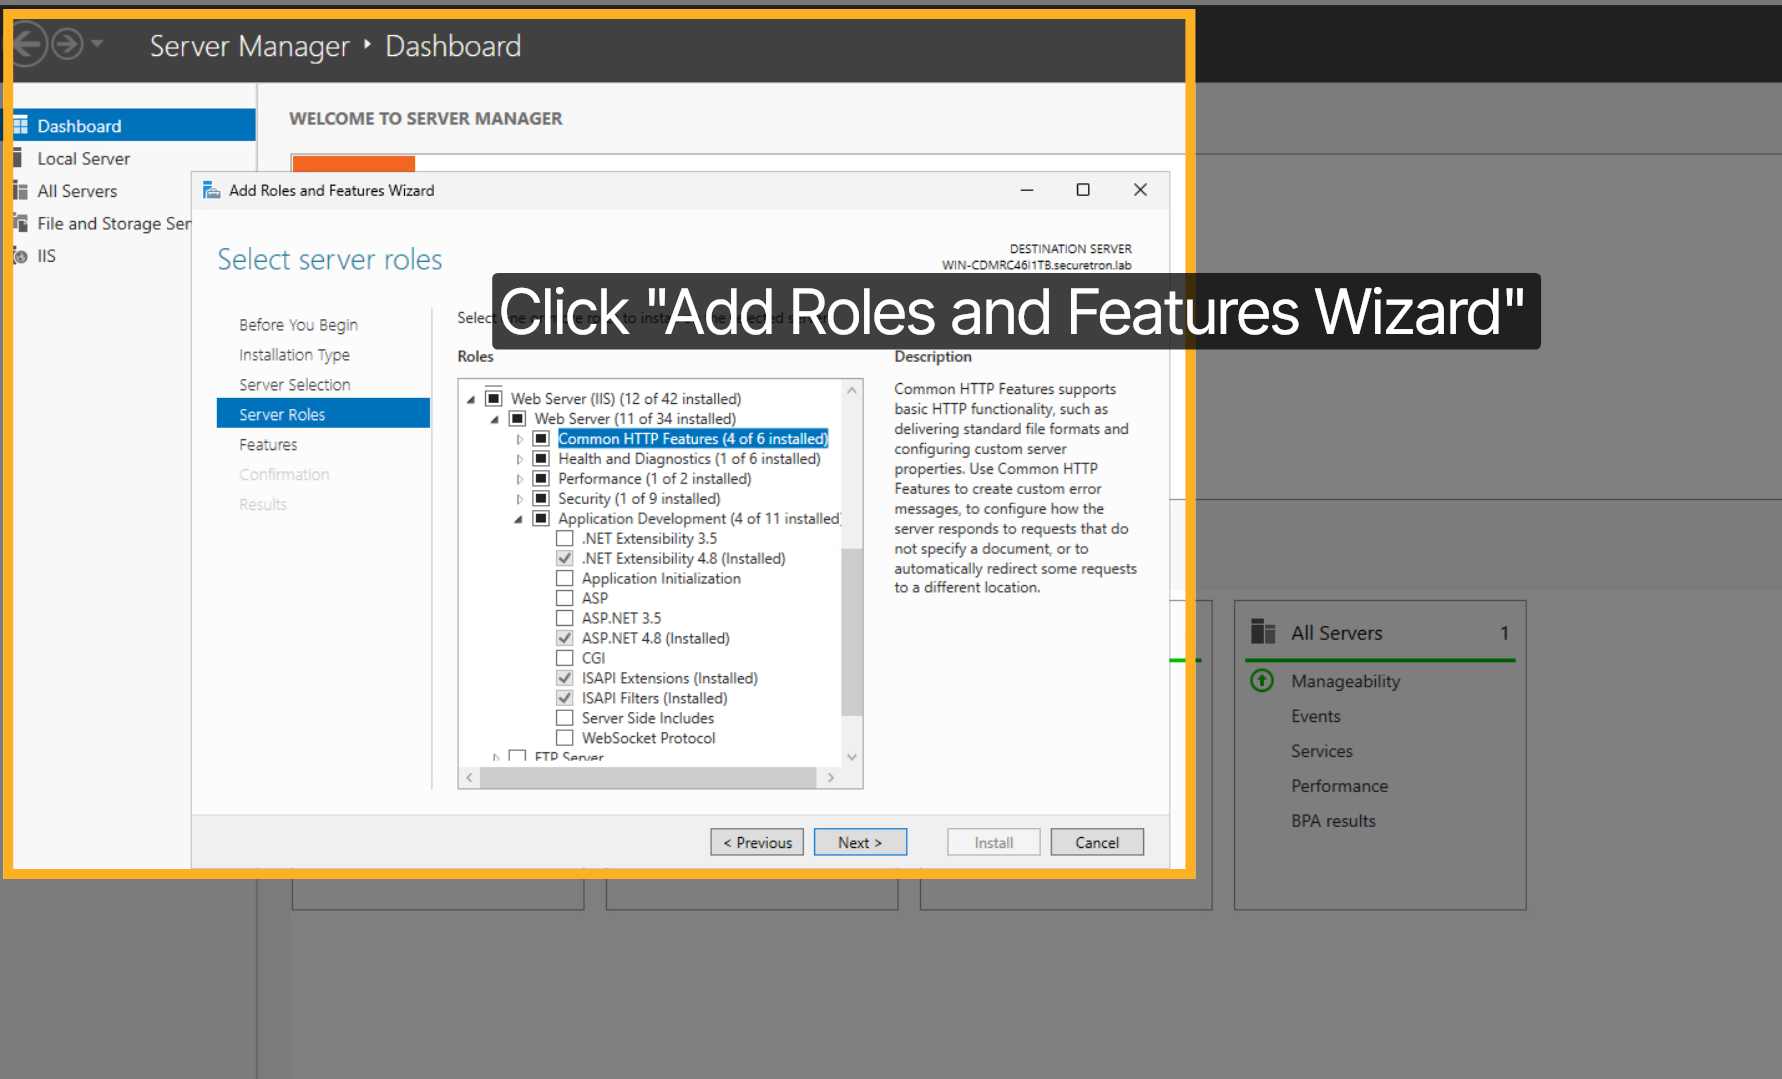
5. Select Role Installation Option#
Select the IIS Web Server role installation option to continue.
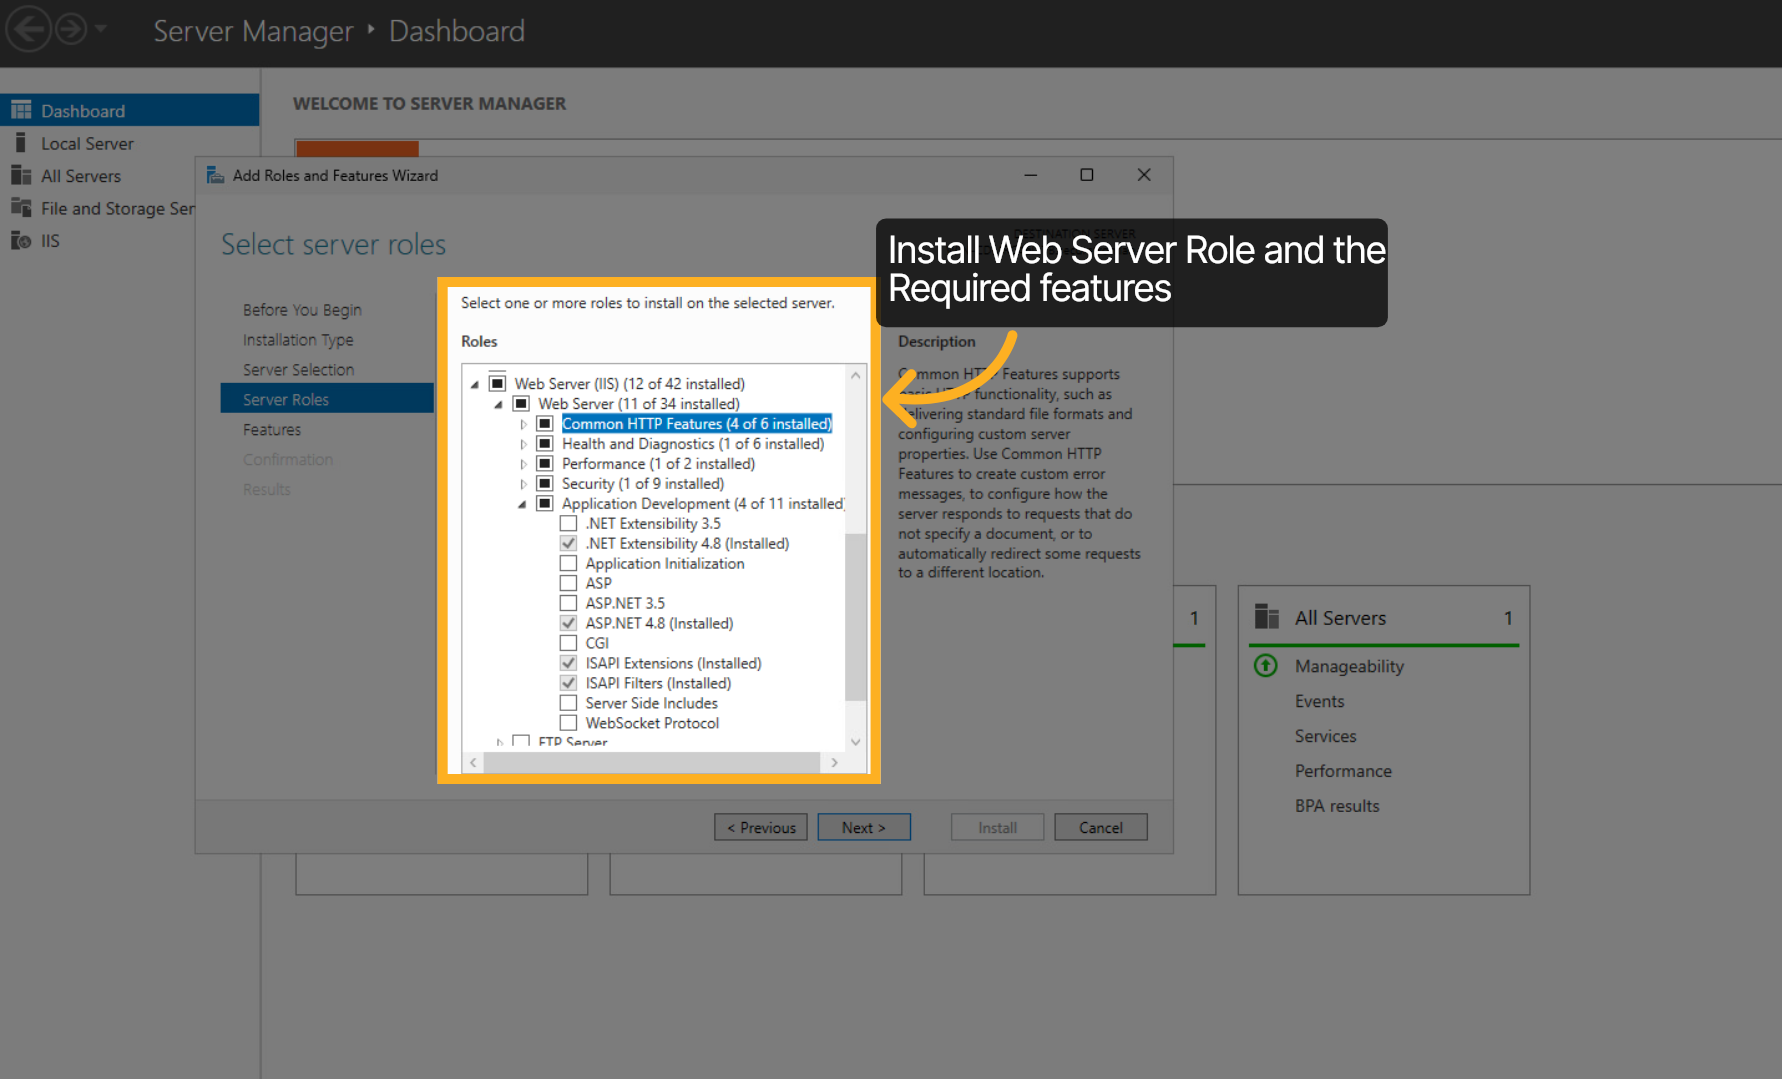
6. Choose Server Selection#
Choose the server selection to specify where roles will be installed.
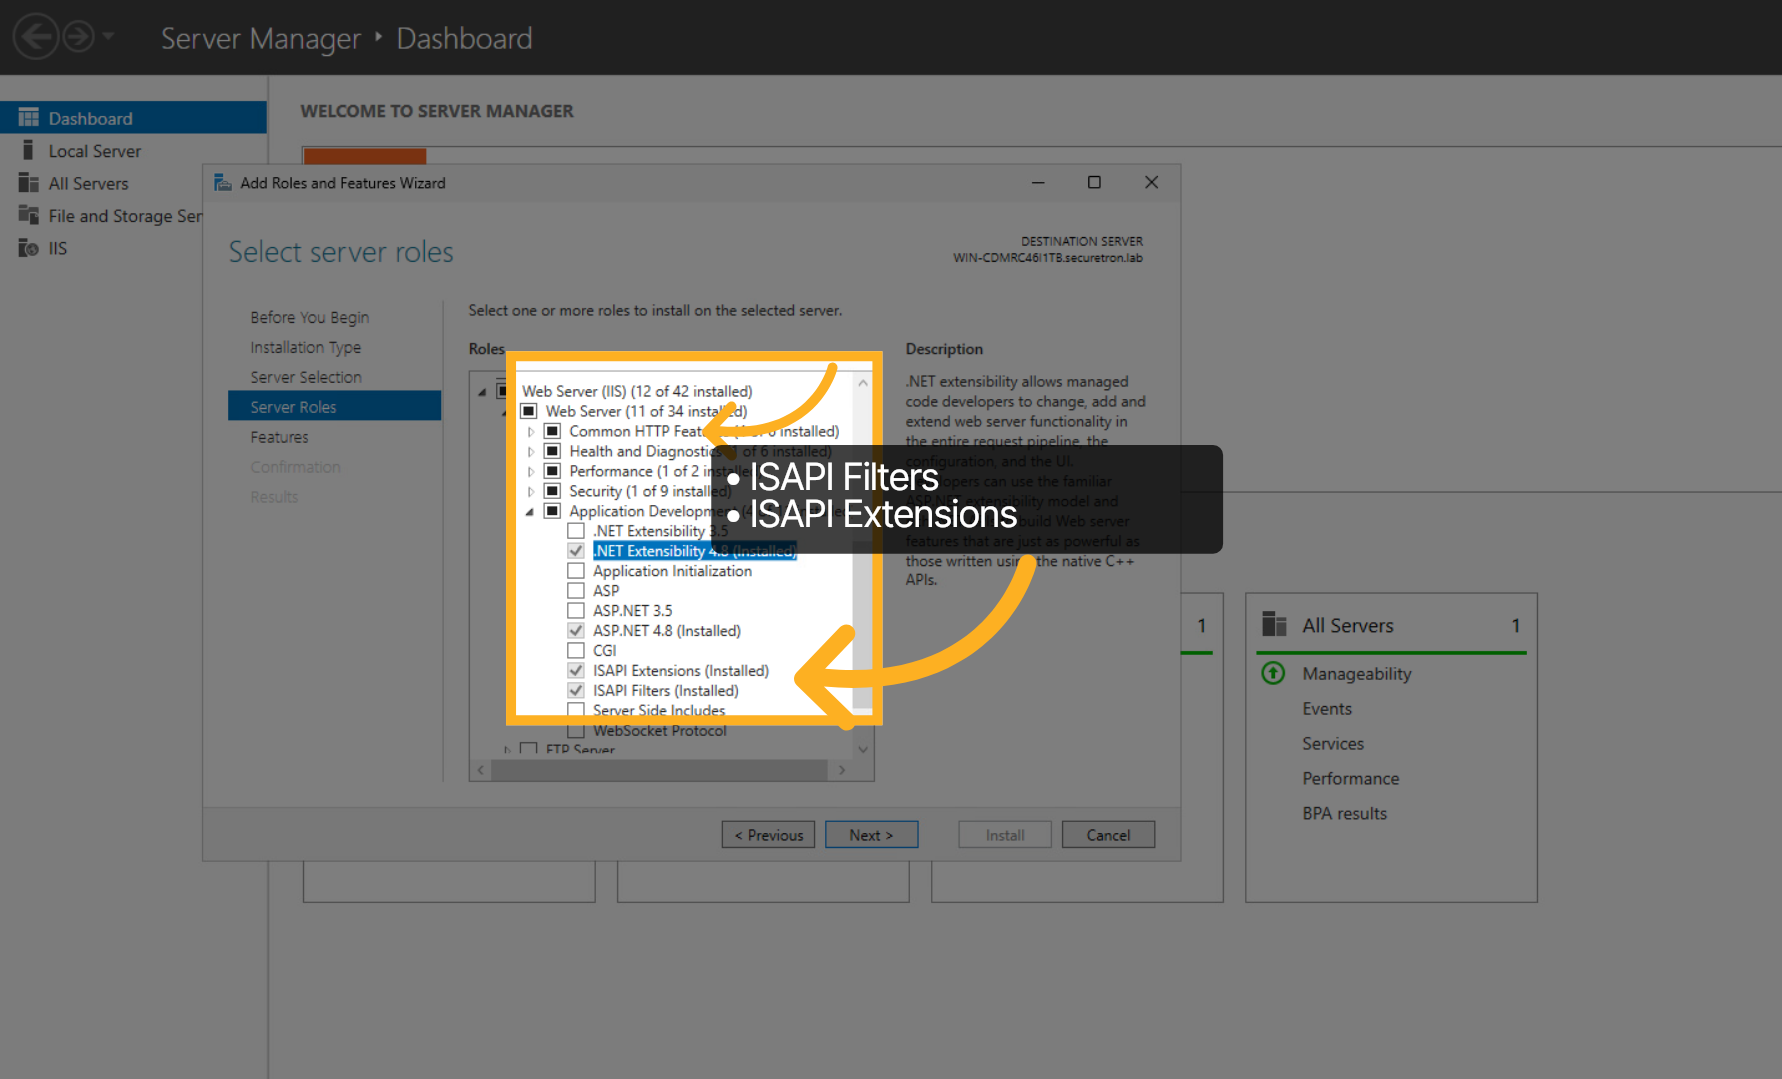
7. Enable WCF and MSMQ Services#
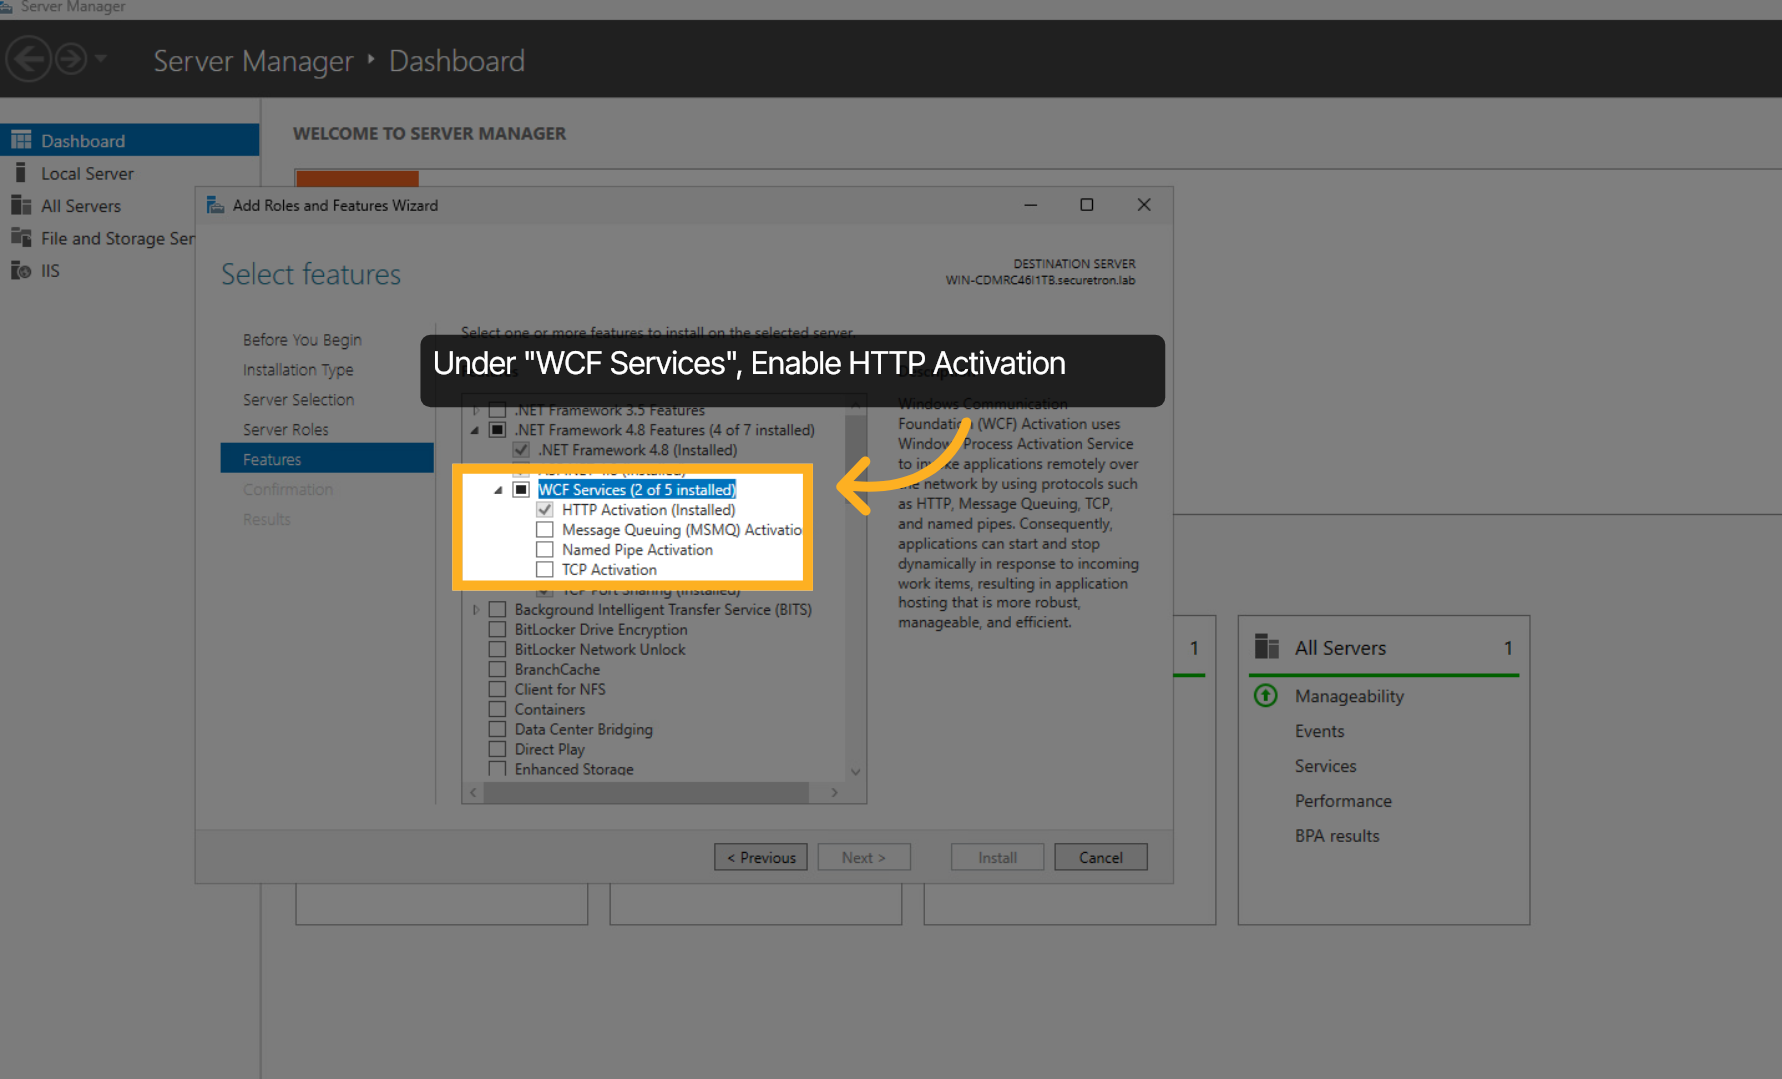
Expand WCF Services and Enable HTTP Activation
8. InetPub Directory#
Download the PKI Trust Manager CA Proxy Gateway app from securetron website. Extract the downloaded zip file to the inetpub directory and call it caproxyapi
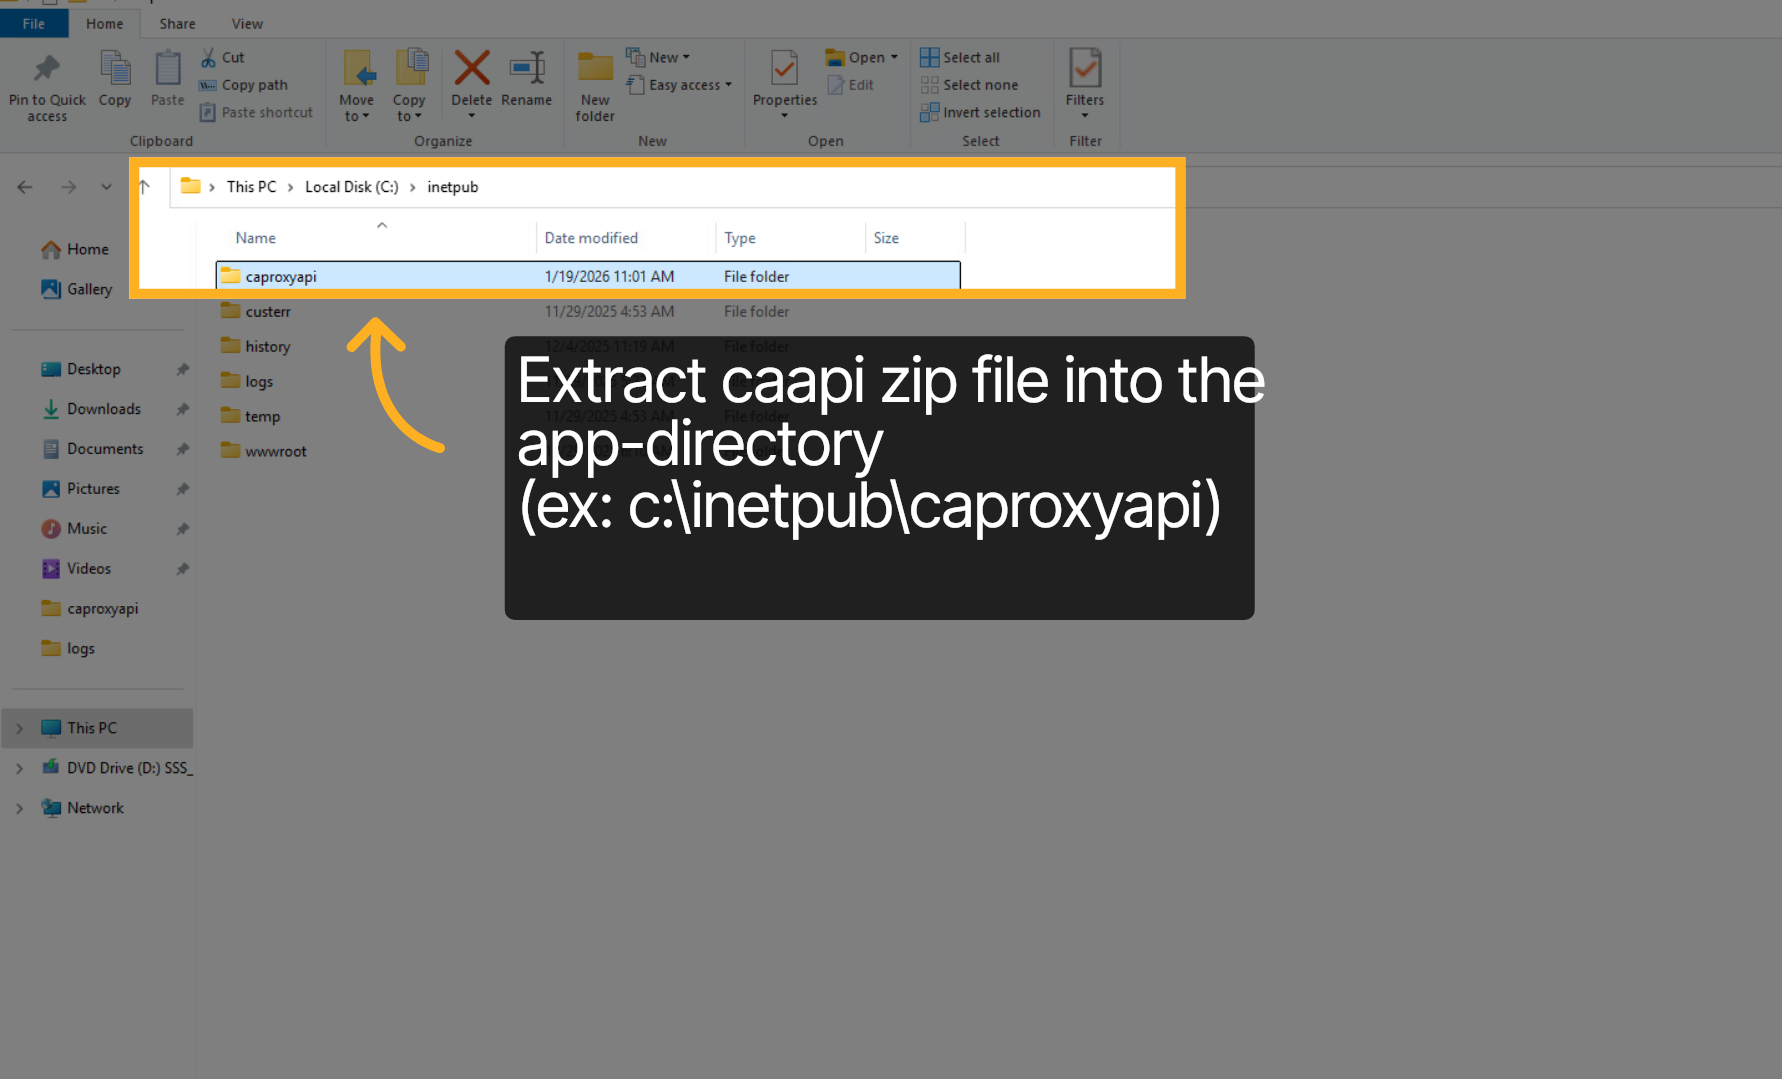
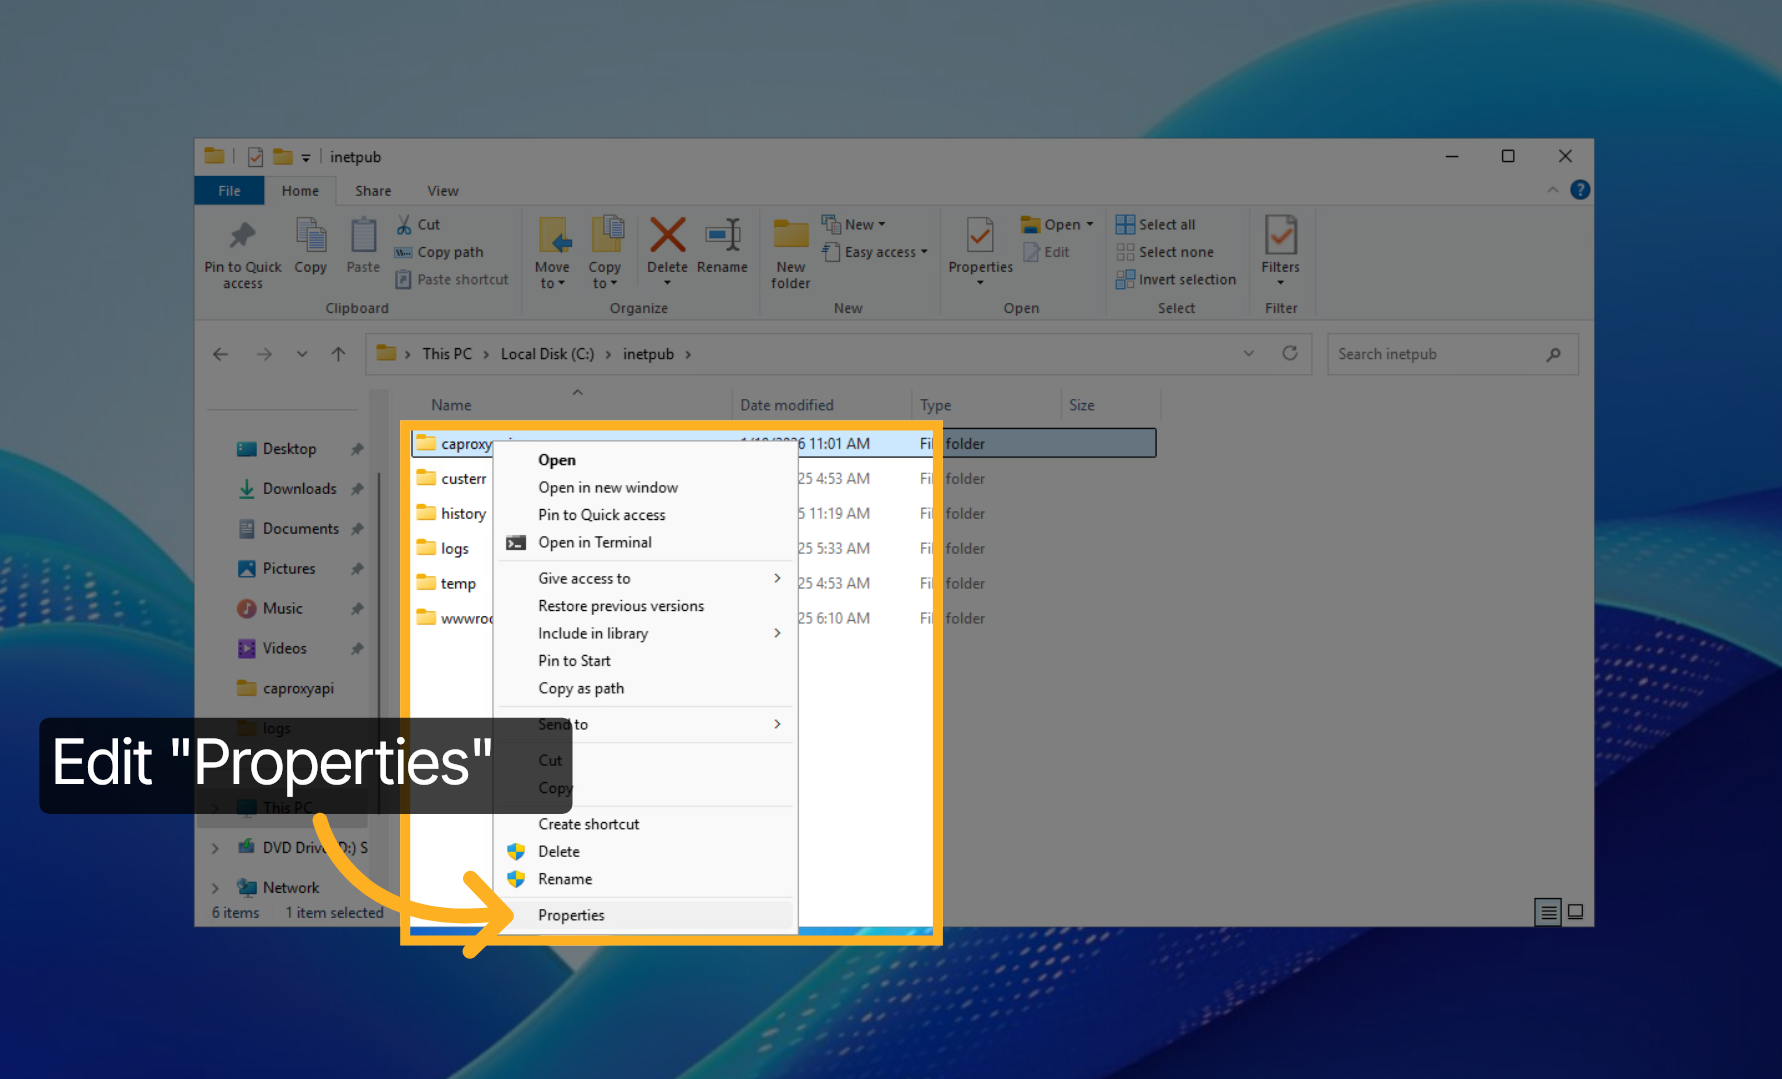
9. Directory Permissions#
Open the properties of the caproxyapi app folder to grant permissions to the previously created service account.
10. Grant Service Account Permissions#
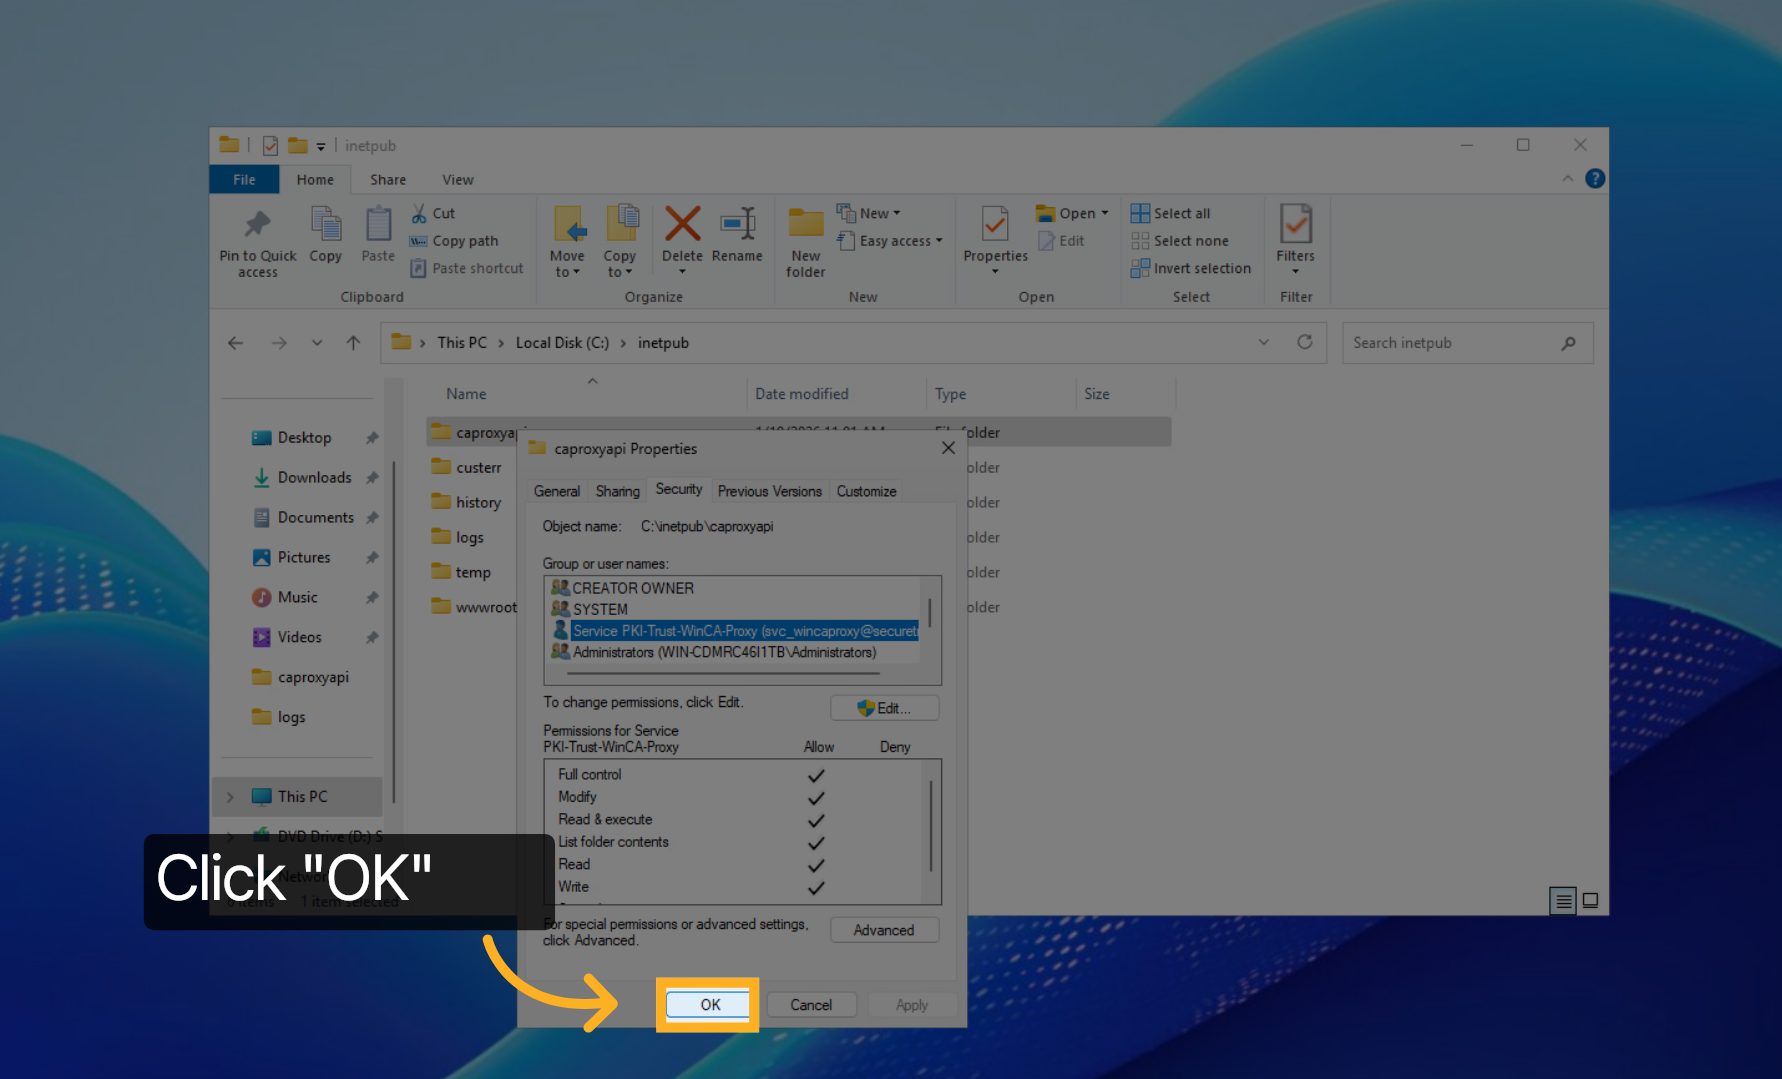
Under the Security tab; add the service account and assign fully manage permissions.
11. Edit Web.Config file#
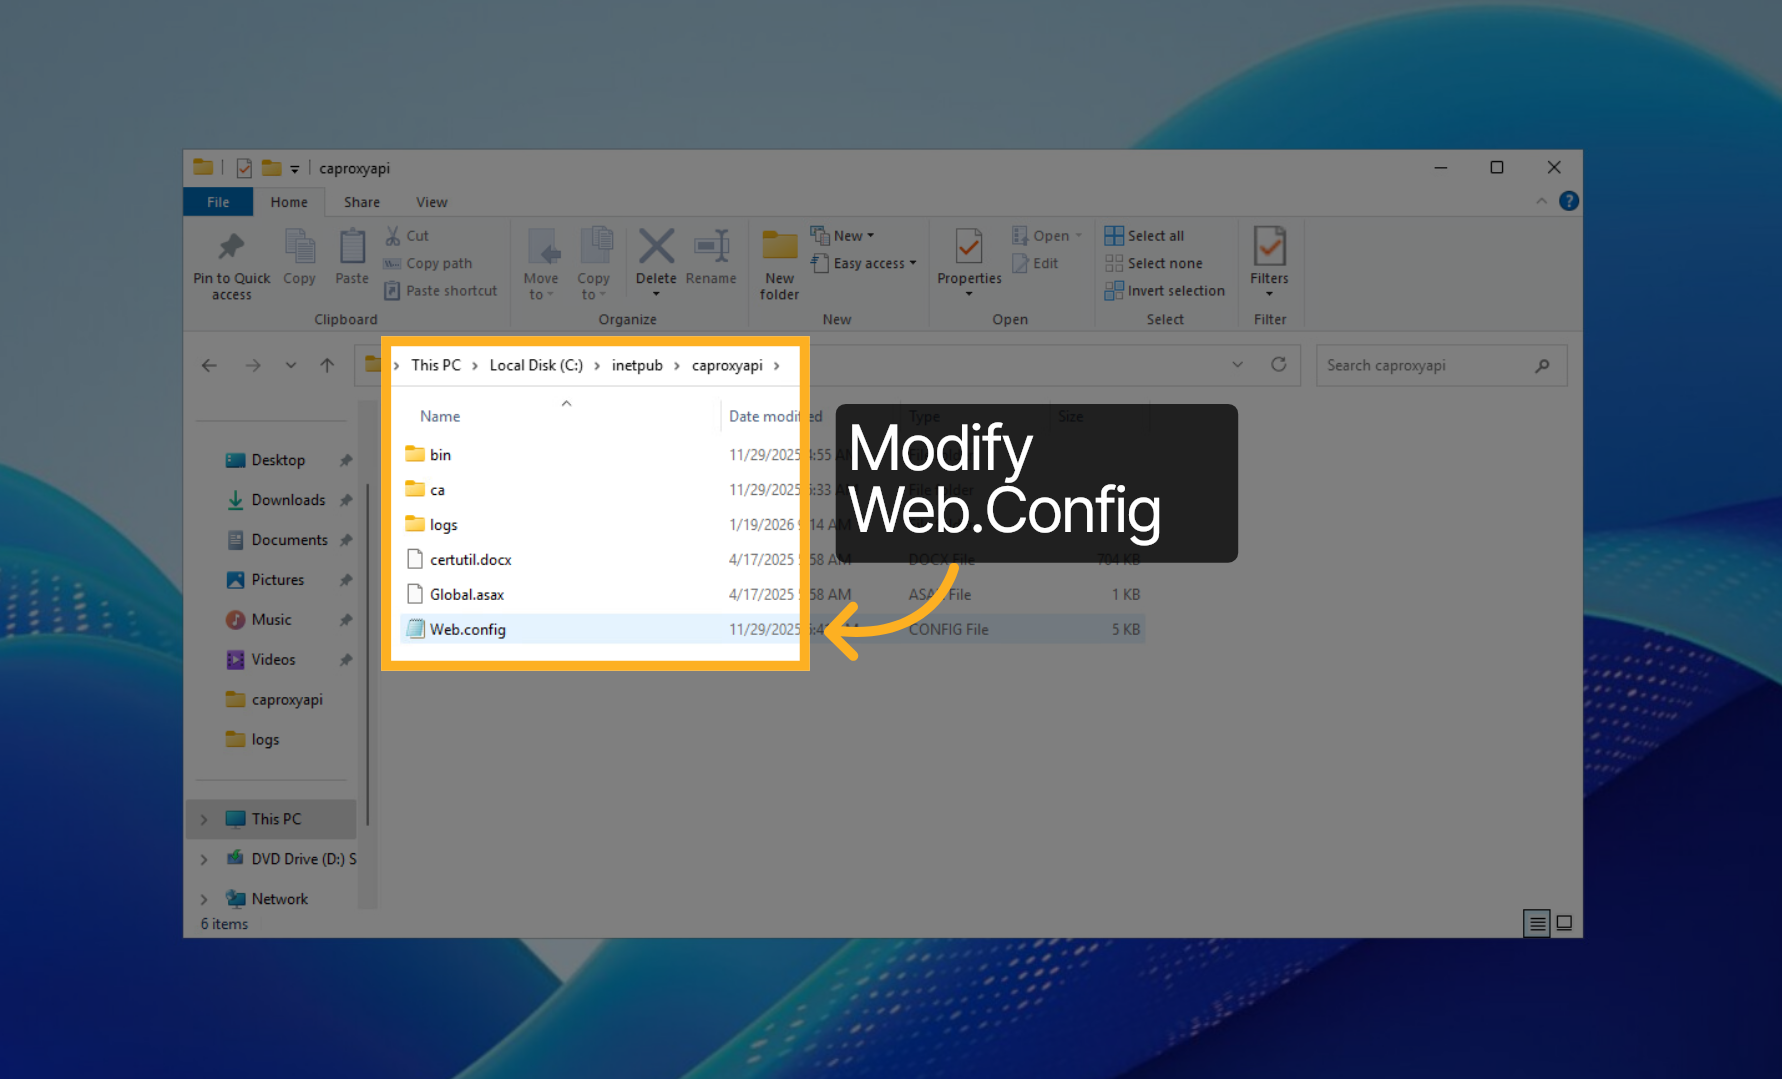
Within the caproxyapi folder, edit the Web.Config file using a text editor
12. AppSettings section in Web.Config#
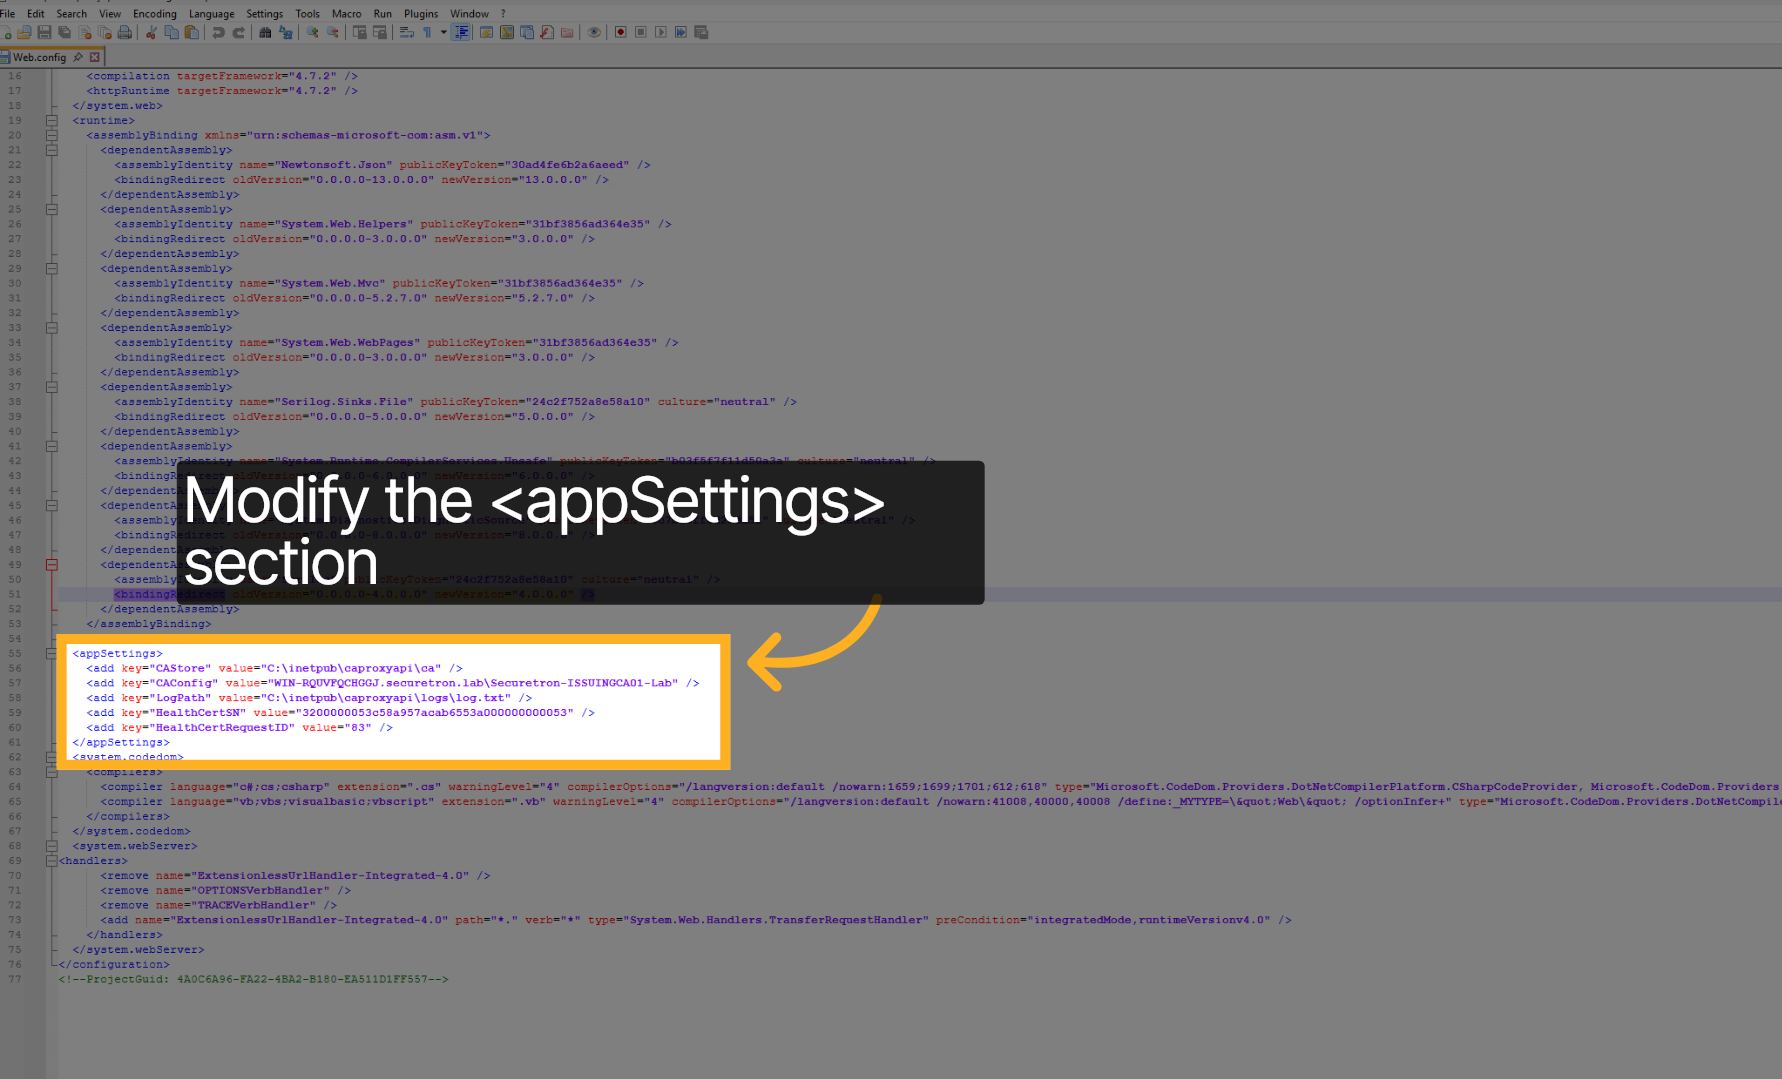
Go to the App Settings section. We will need to modify first 3 lines corresponding to CAStore, CAConfig, and LogPath
13. Web.Config - CA Certs#
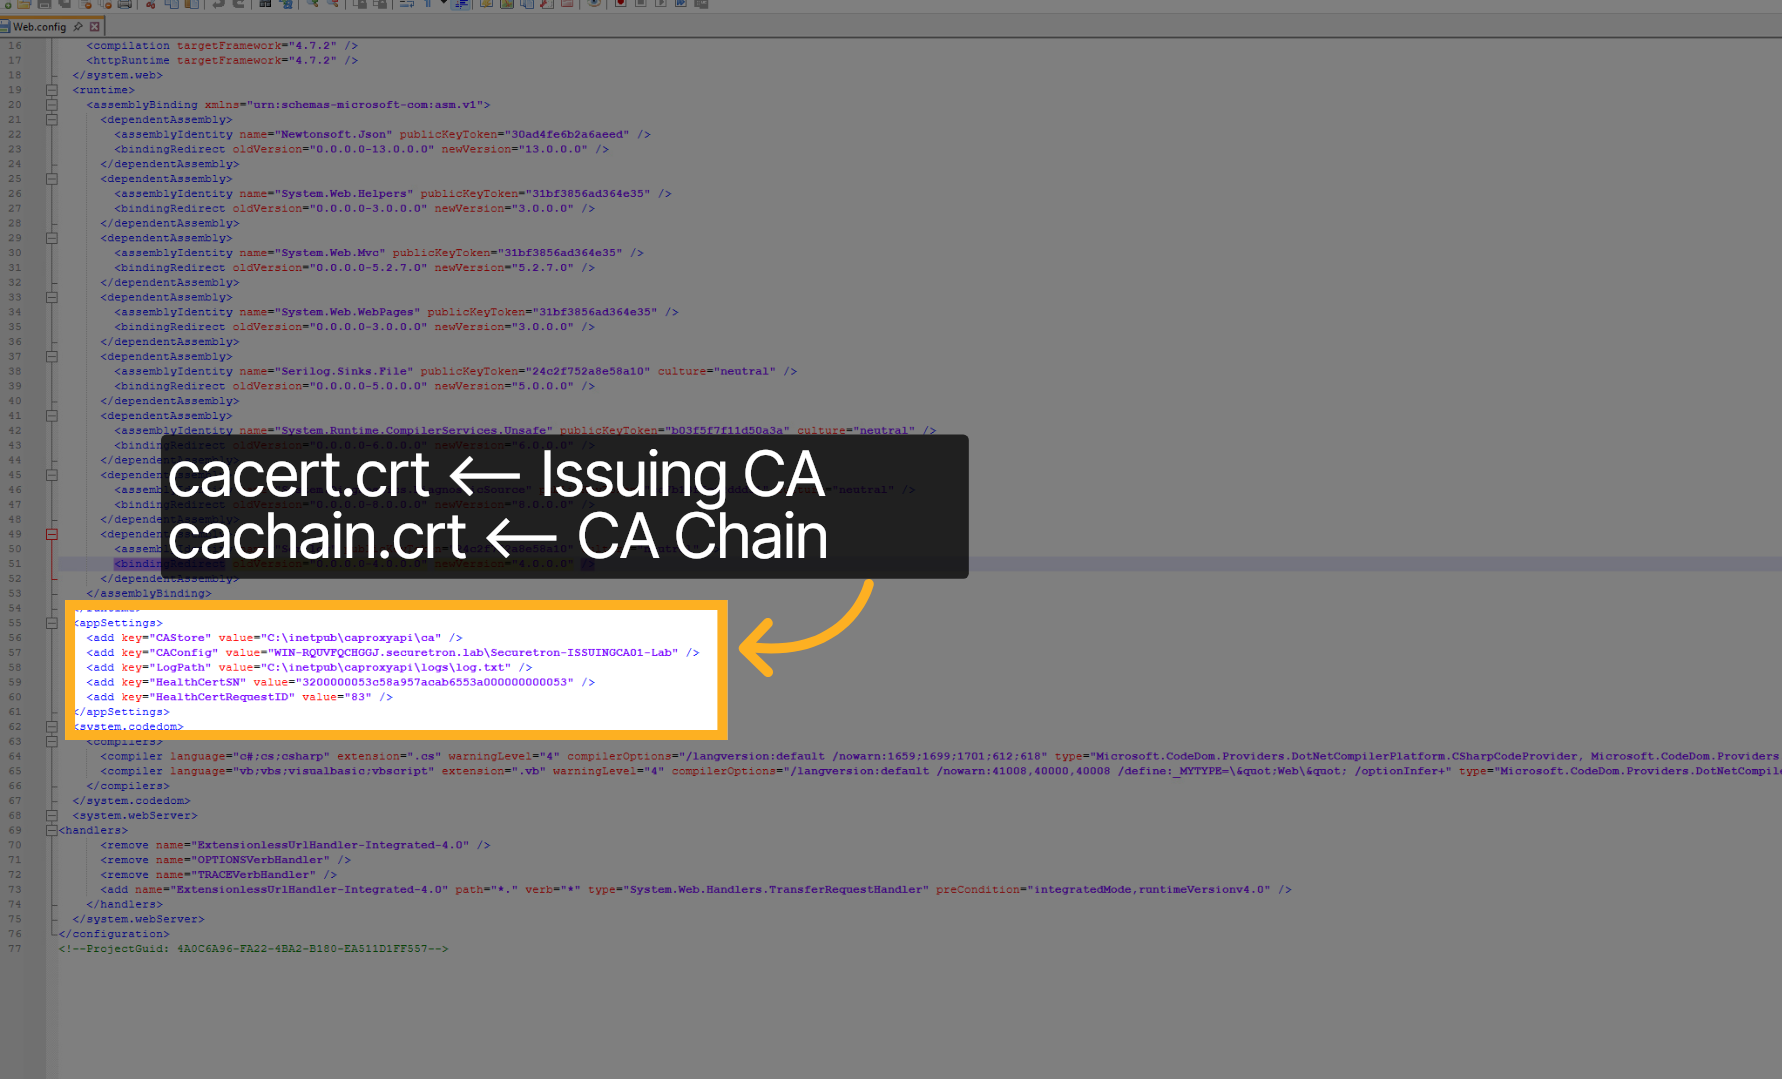
The CA folder is where the ISSUING CA and CA CHAIN in .PEM format needs to be copied. Manually copy these from the Certificate Trust Store or from the CA. The two files are: cacert.crt which is the Issuing CA whereas the second file is cachain.crt which corresponds to the ROOT plus Subordinate CA
14. Web.Config - CA Config#
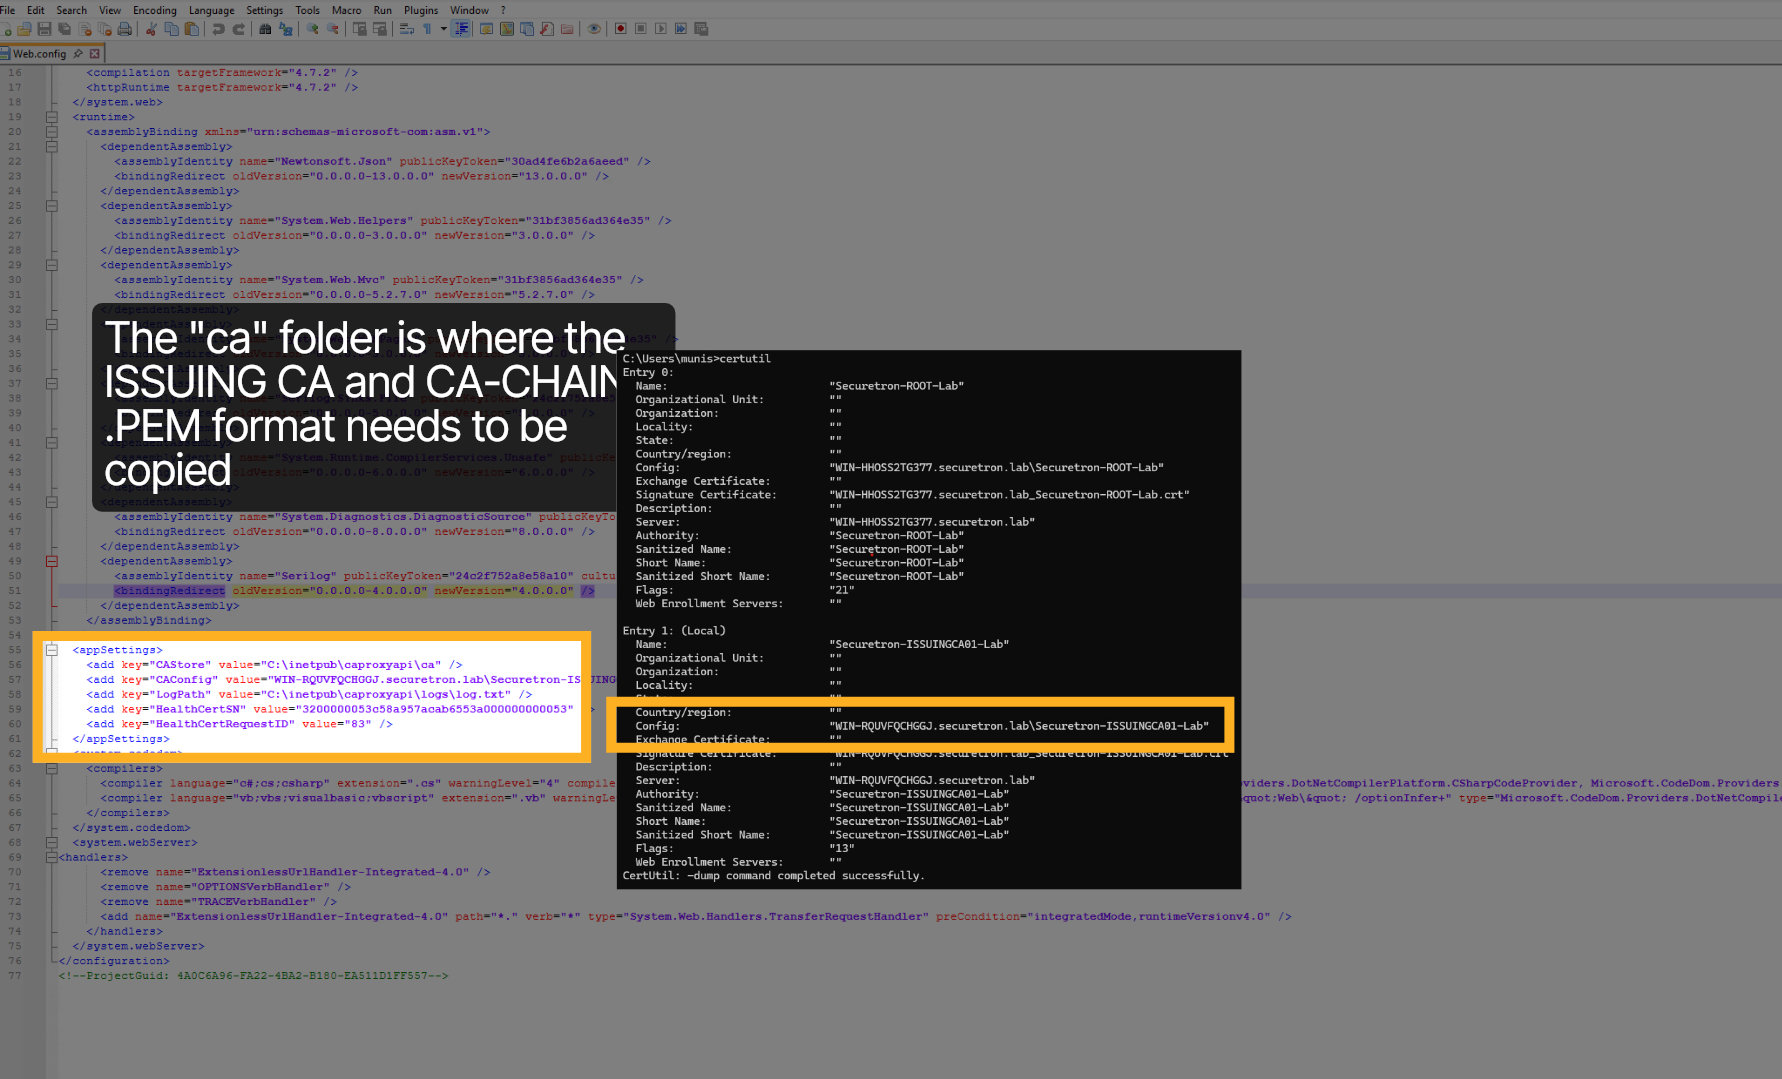
The "CA Config" refers to the "Config" parameter in the output of certutil executed on the CA to which the CA Proxy App will connect. It typically consists of FQDN backslash CA Name
15. Web.Config - Log Path#
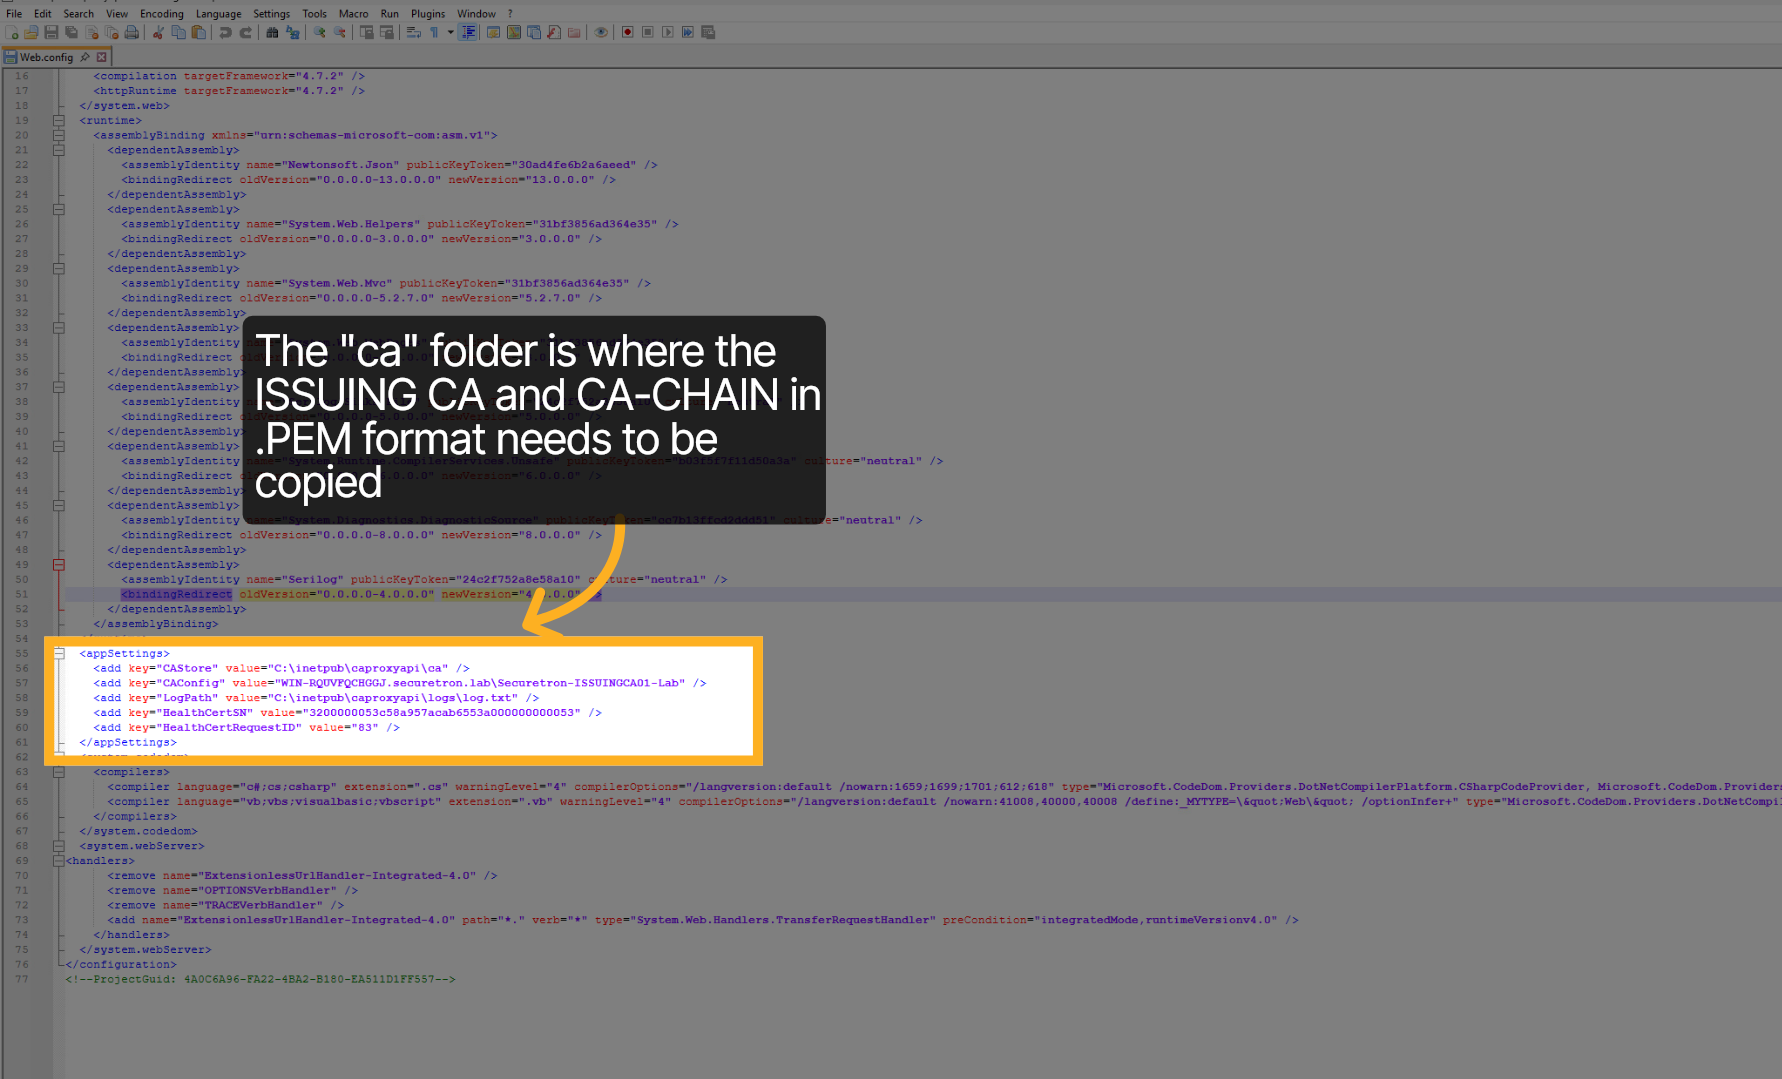
Finally, the last parameter to configure is the Log Path. The default value is the logs subdirectory. If the path of the logs directory is different then enter it here. Also ensure that the service account has ful permissions to the logs director
16. Right Click Interface Element#
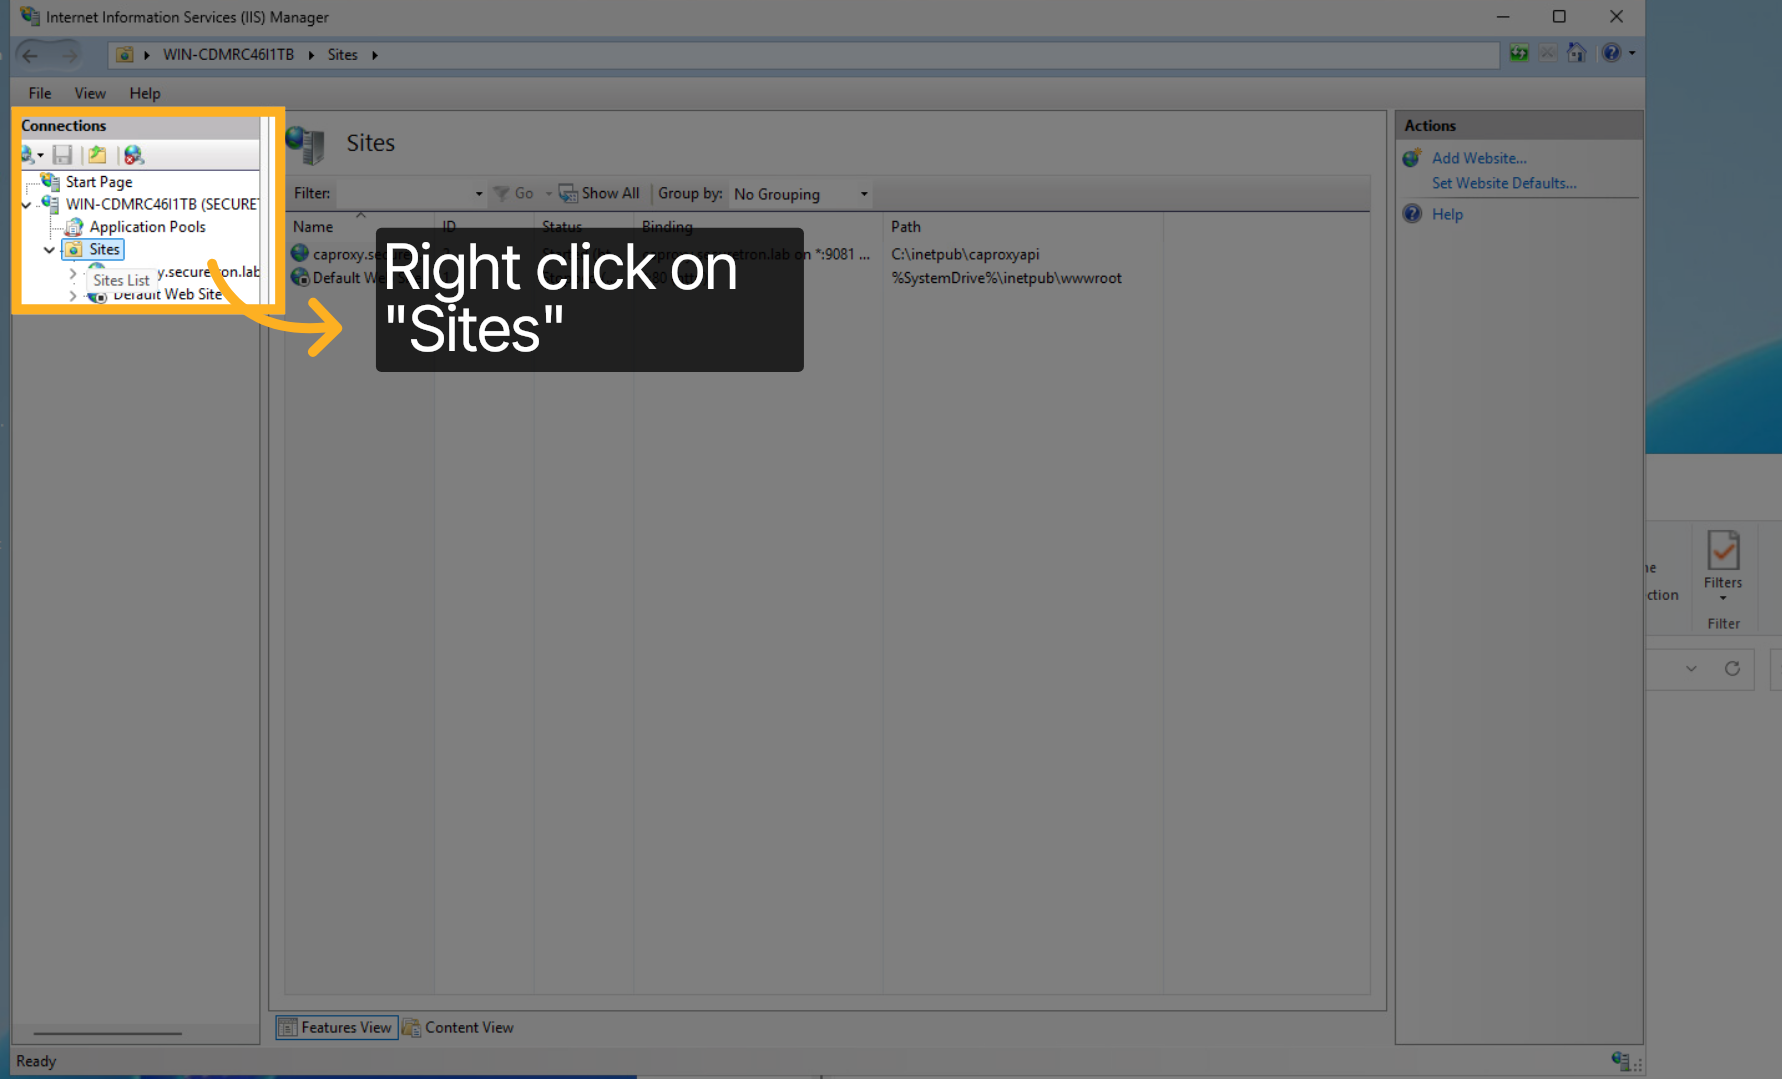
In the IIS Server Manager, let us add the CA Proxy App. Right click on the Sites
17. IIS Web Server - Add New Website#
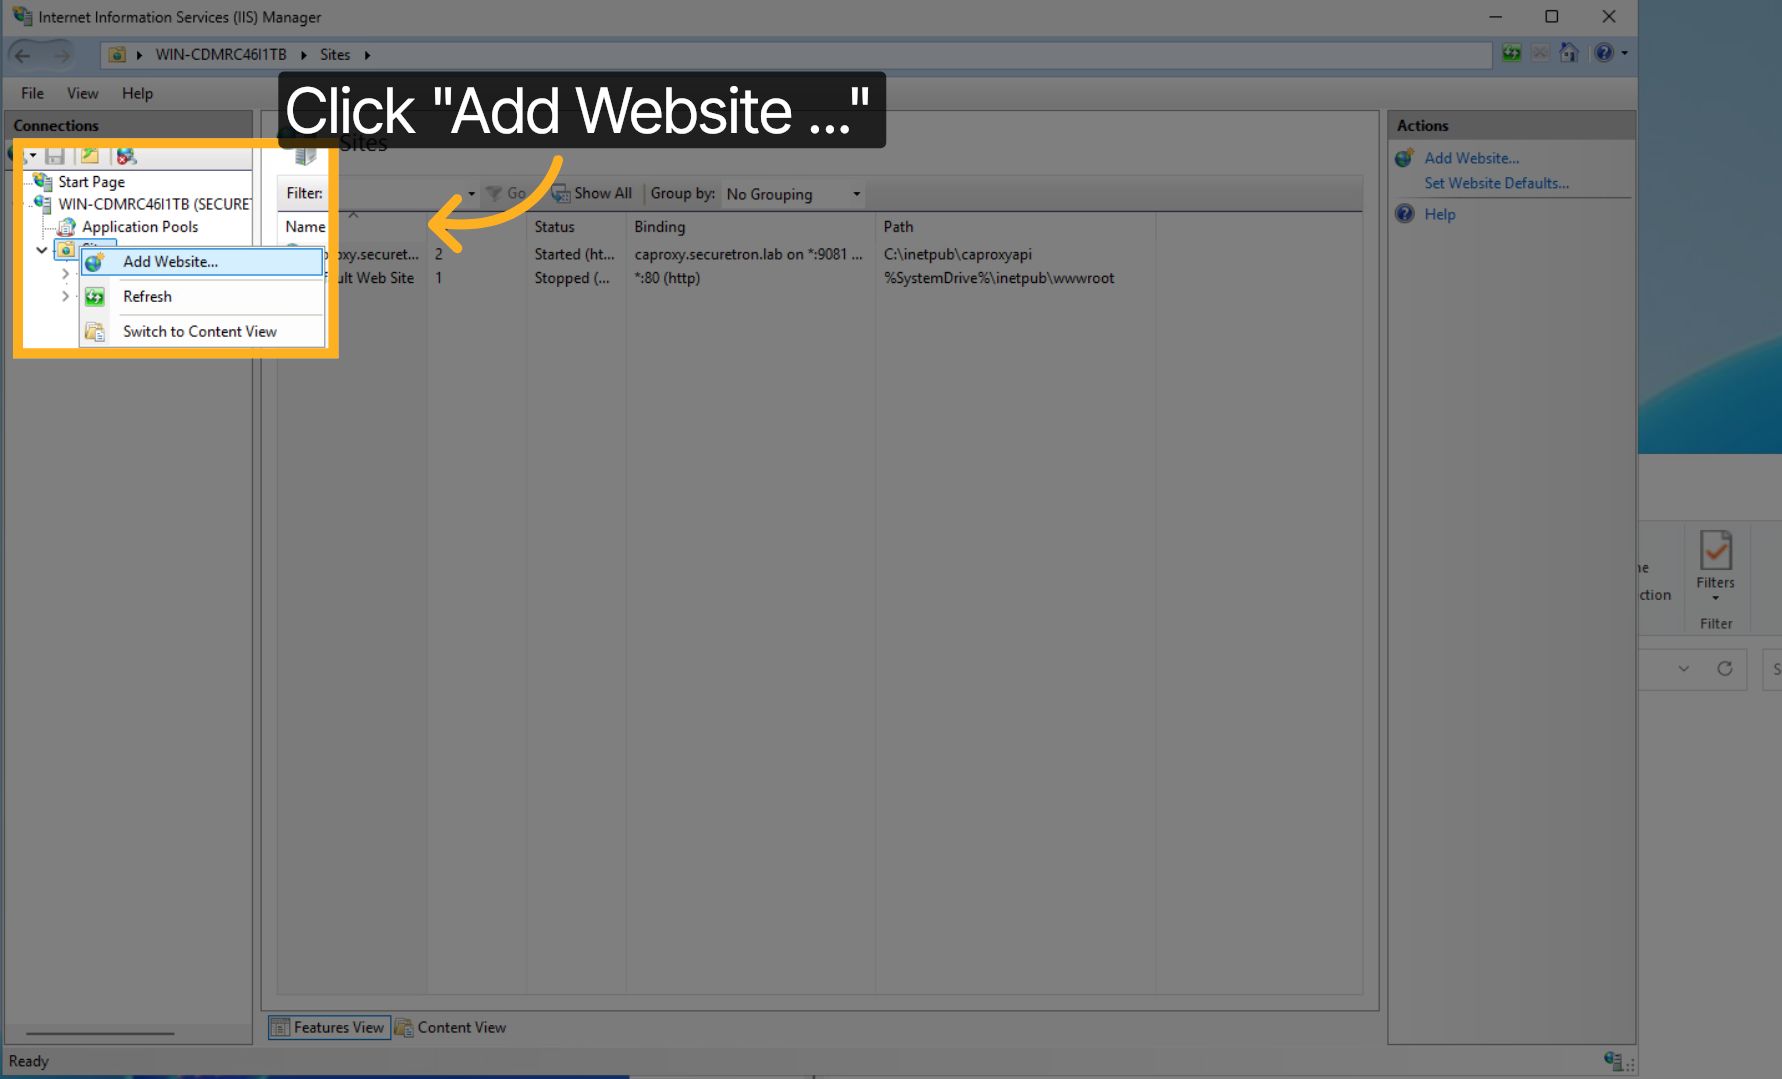
Click Add Website to create a new website configuration using the IIS Server Manager
18. Configure Proxy App Website Path Settings#
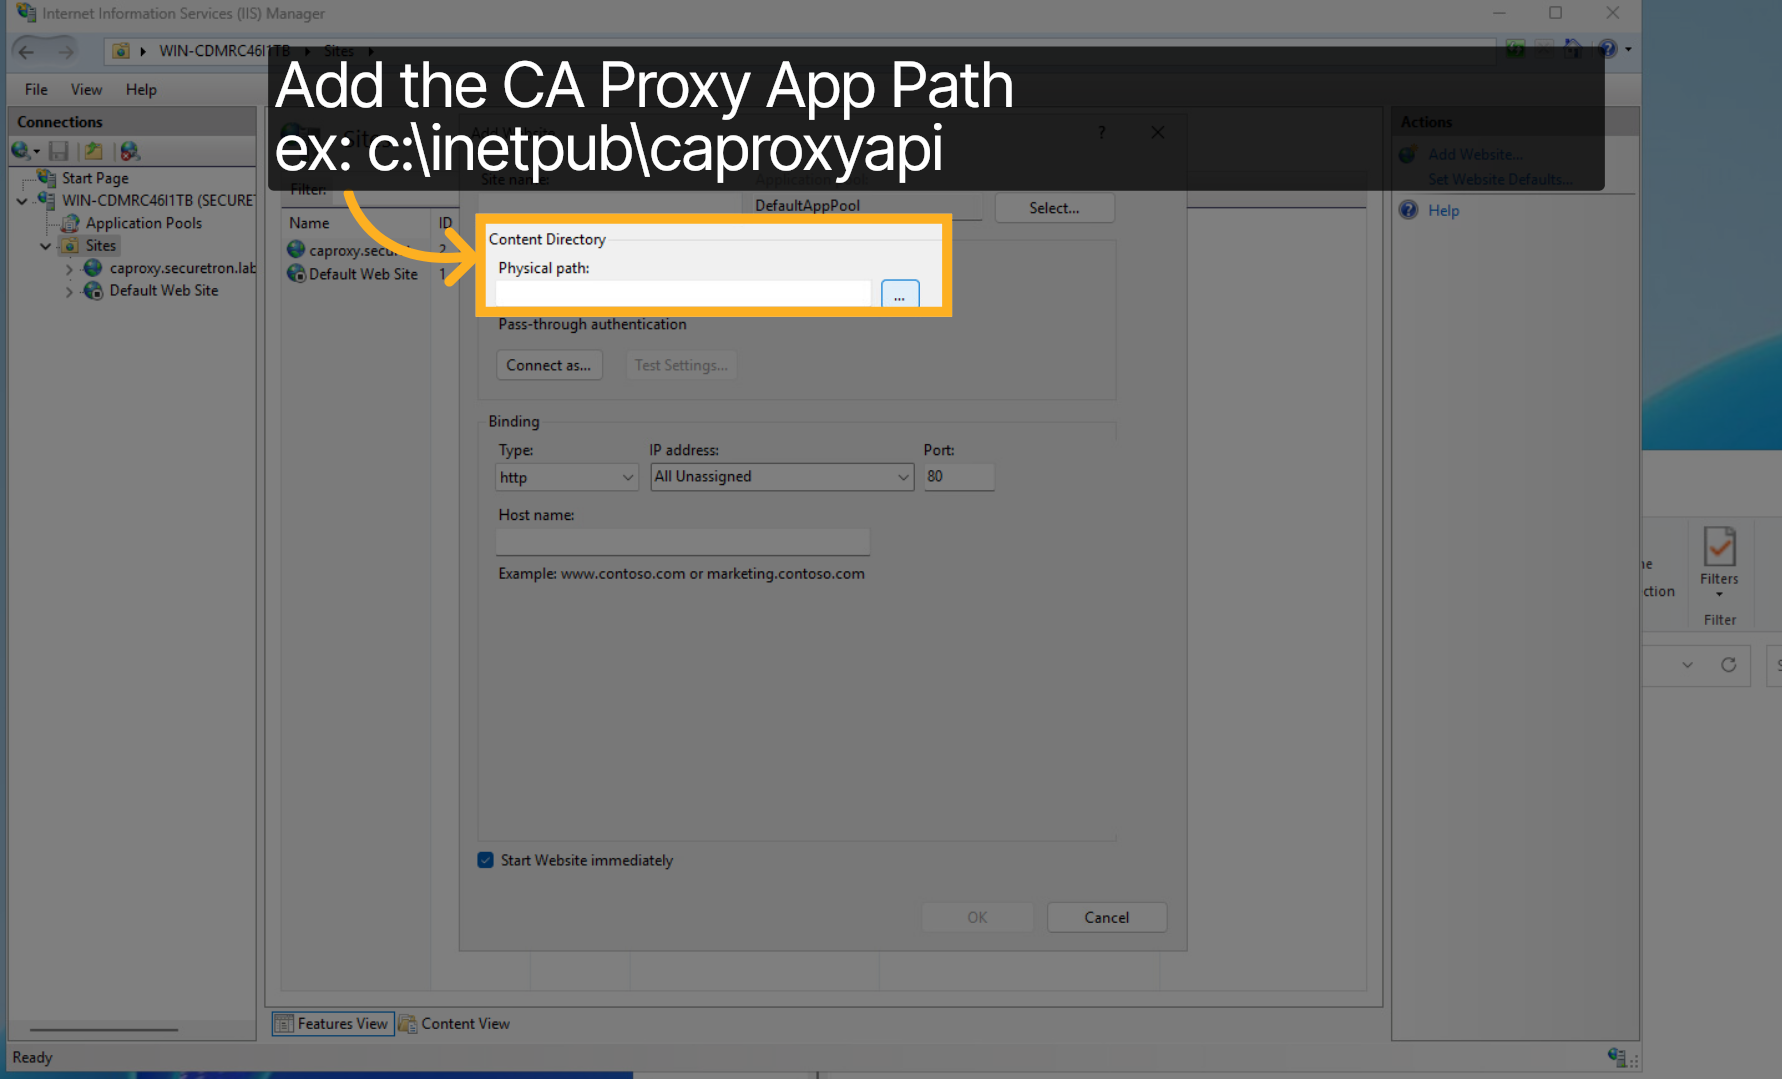
Add the path of the CA Proxy App which in our example is c:\inetpub\caproxyapi
19. Add Proxy App Website DNS/URL Name#
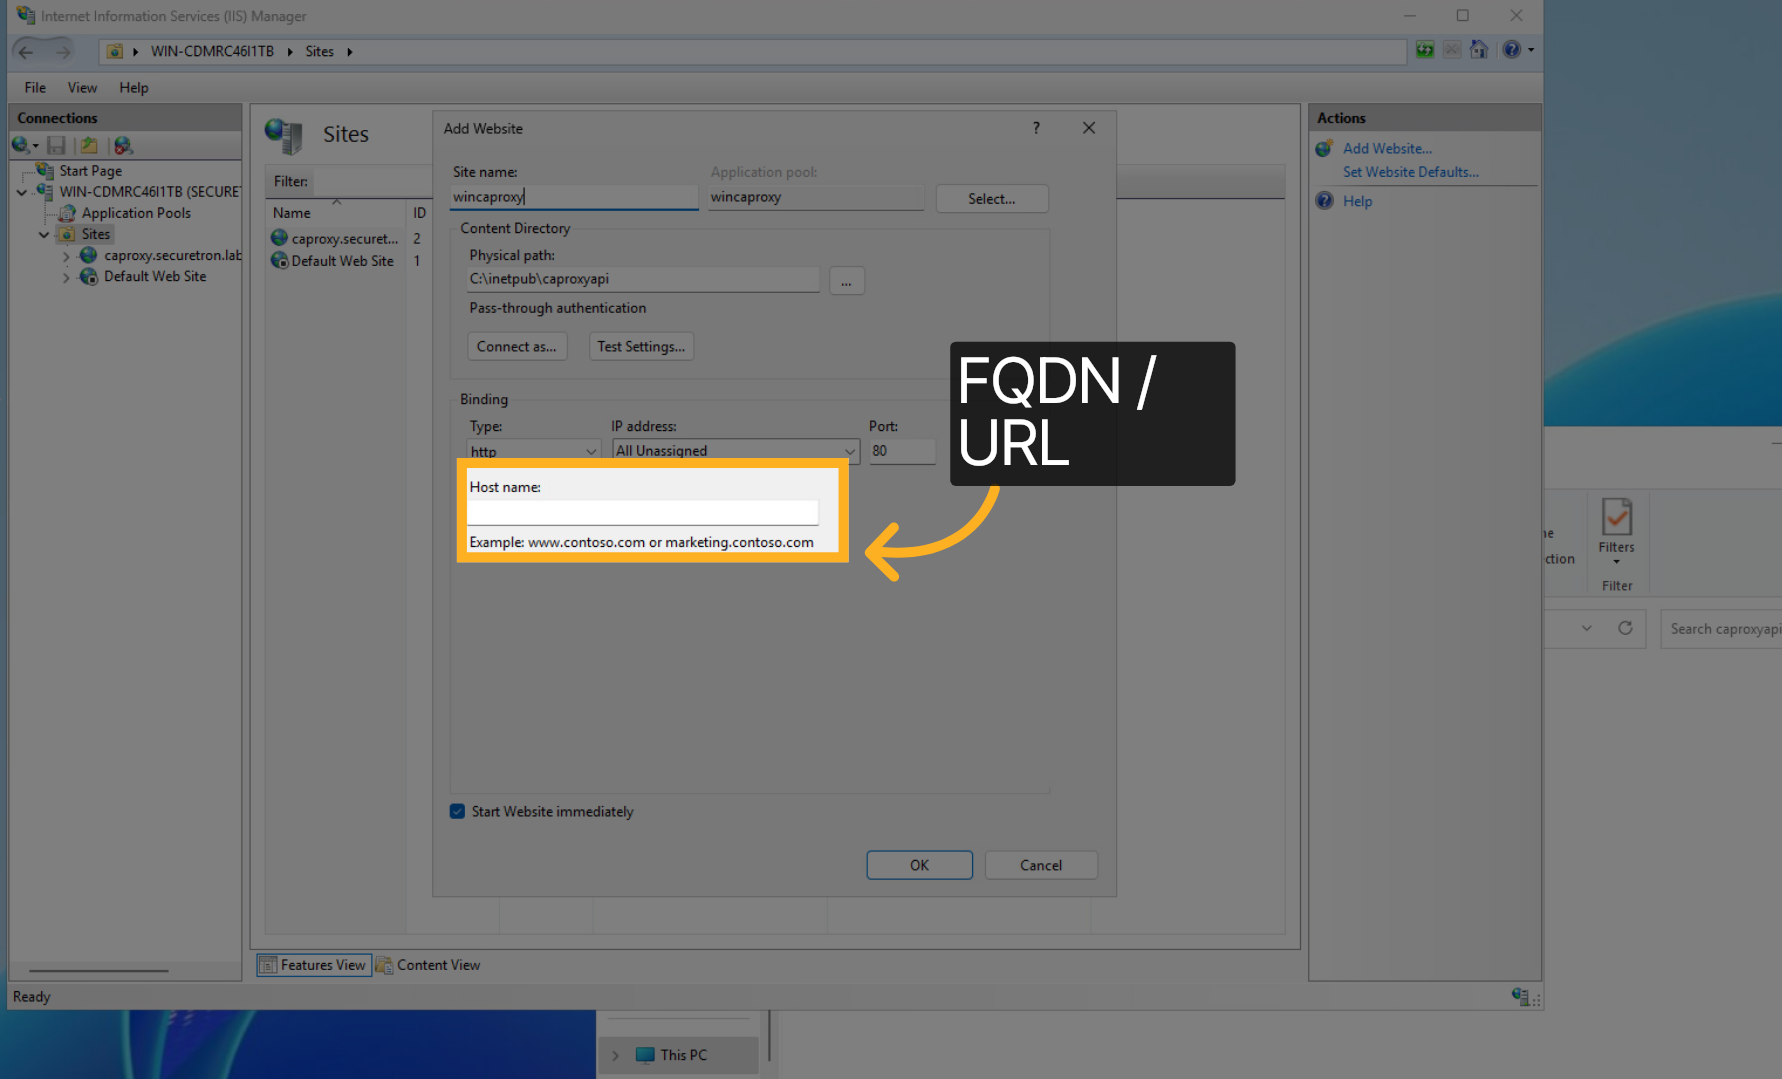
Add the DNS / URL for the site. You may need to add the DNS entry to your DNS server to point to the website
20. Save Settings#
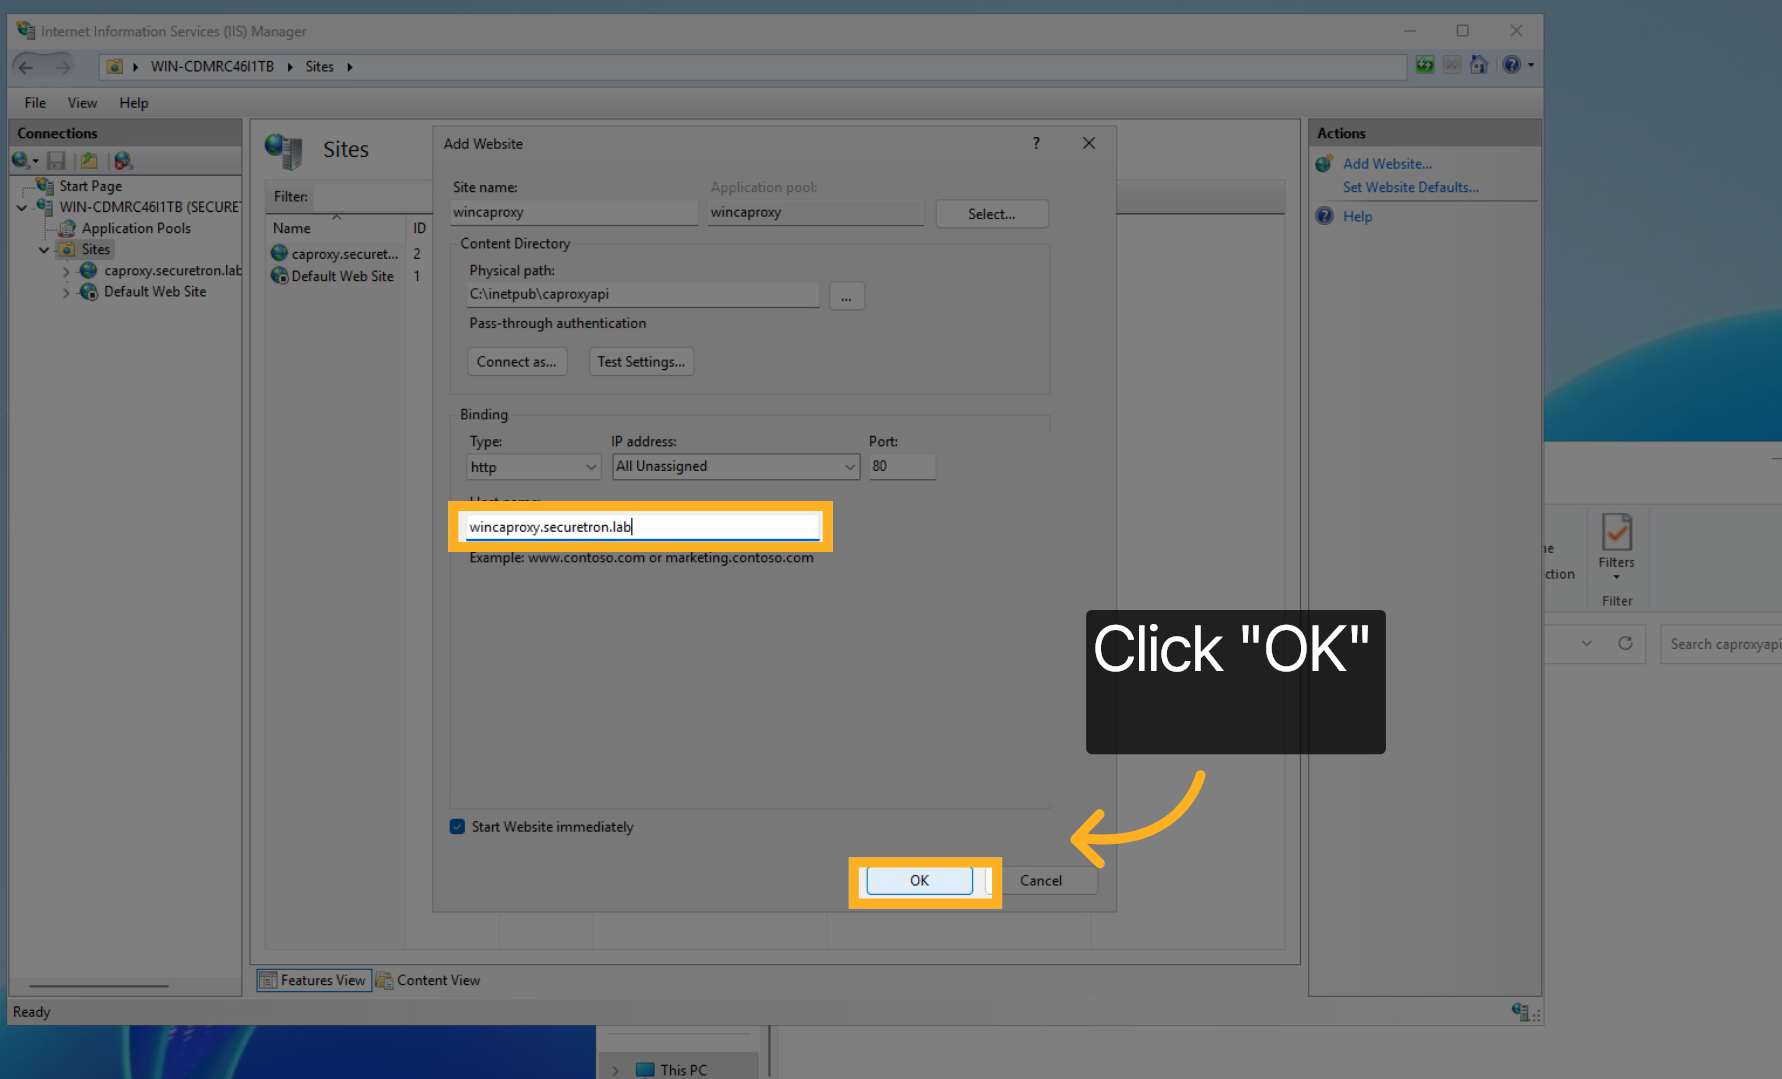
Click OK to confirm your settings and continue.
21. Application Pool#
Under the Application Pools; Right Click on the newly created CA proxy api site
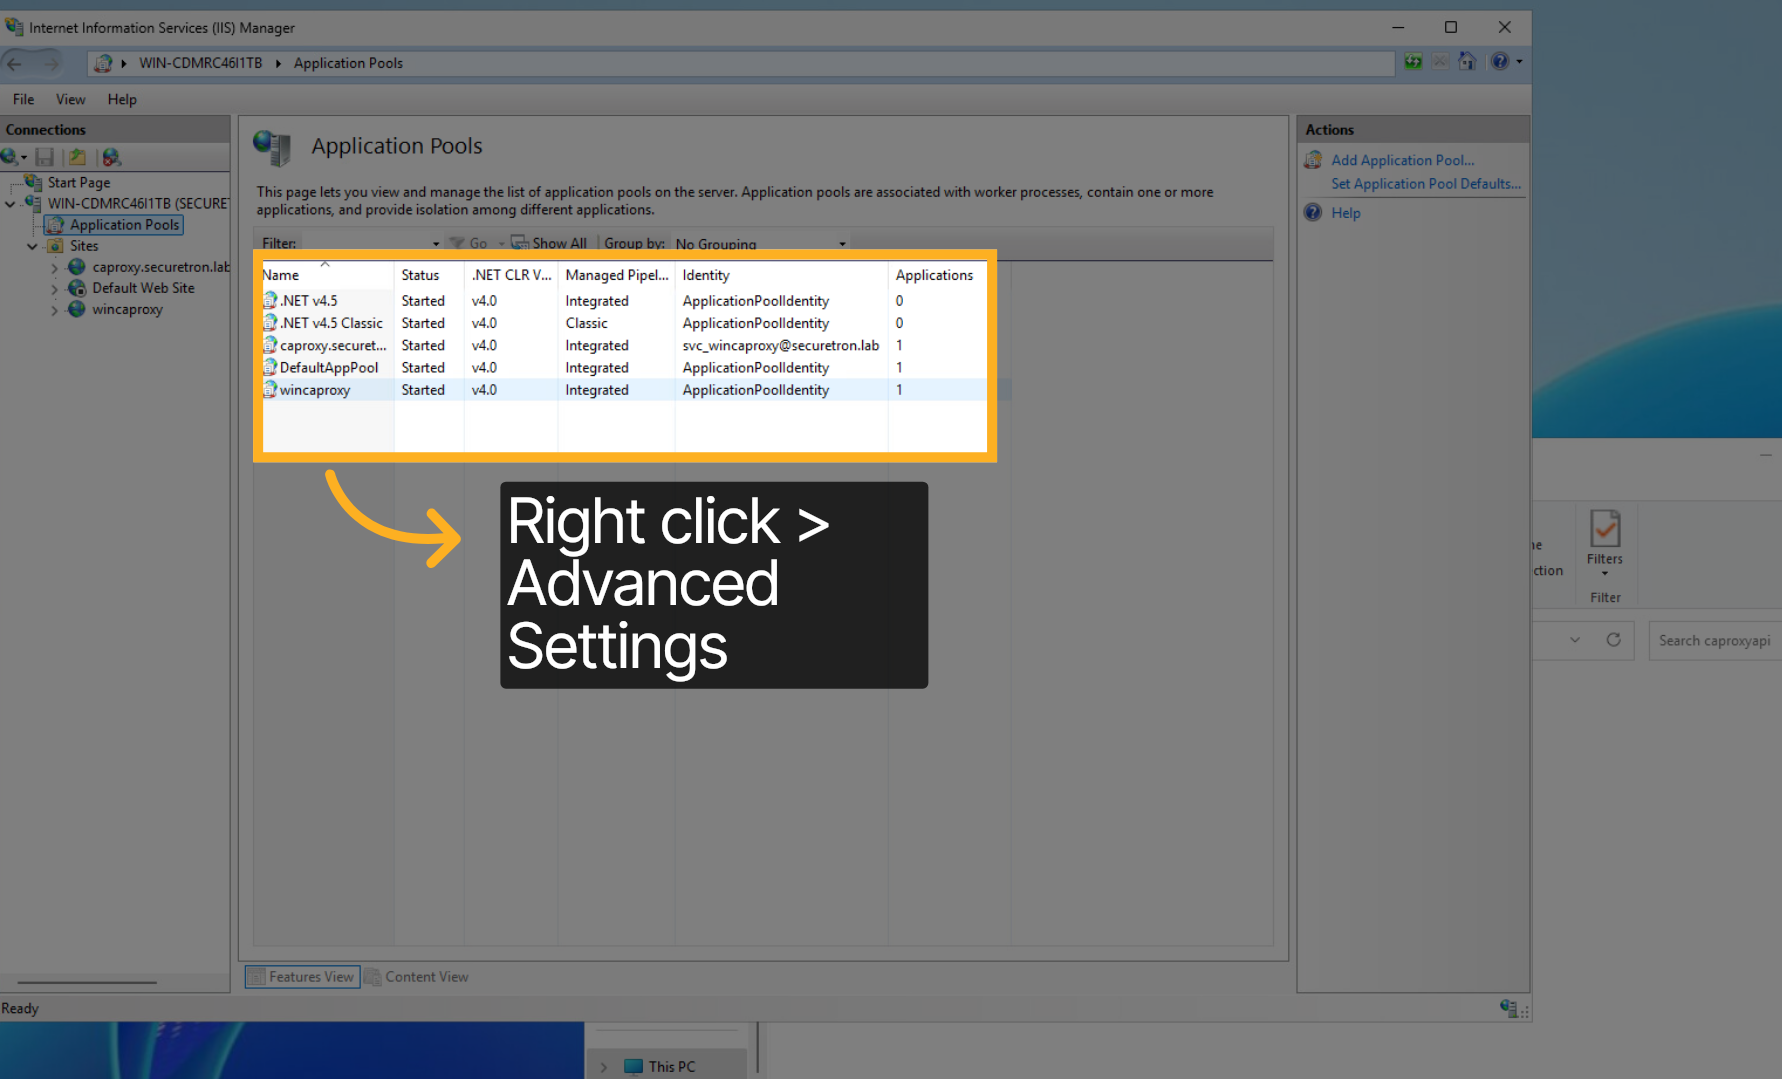
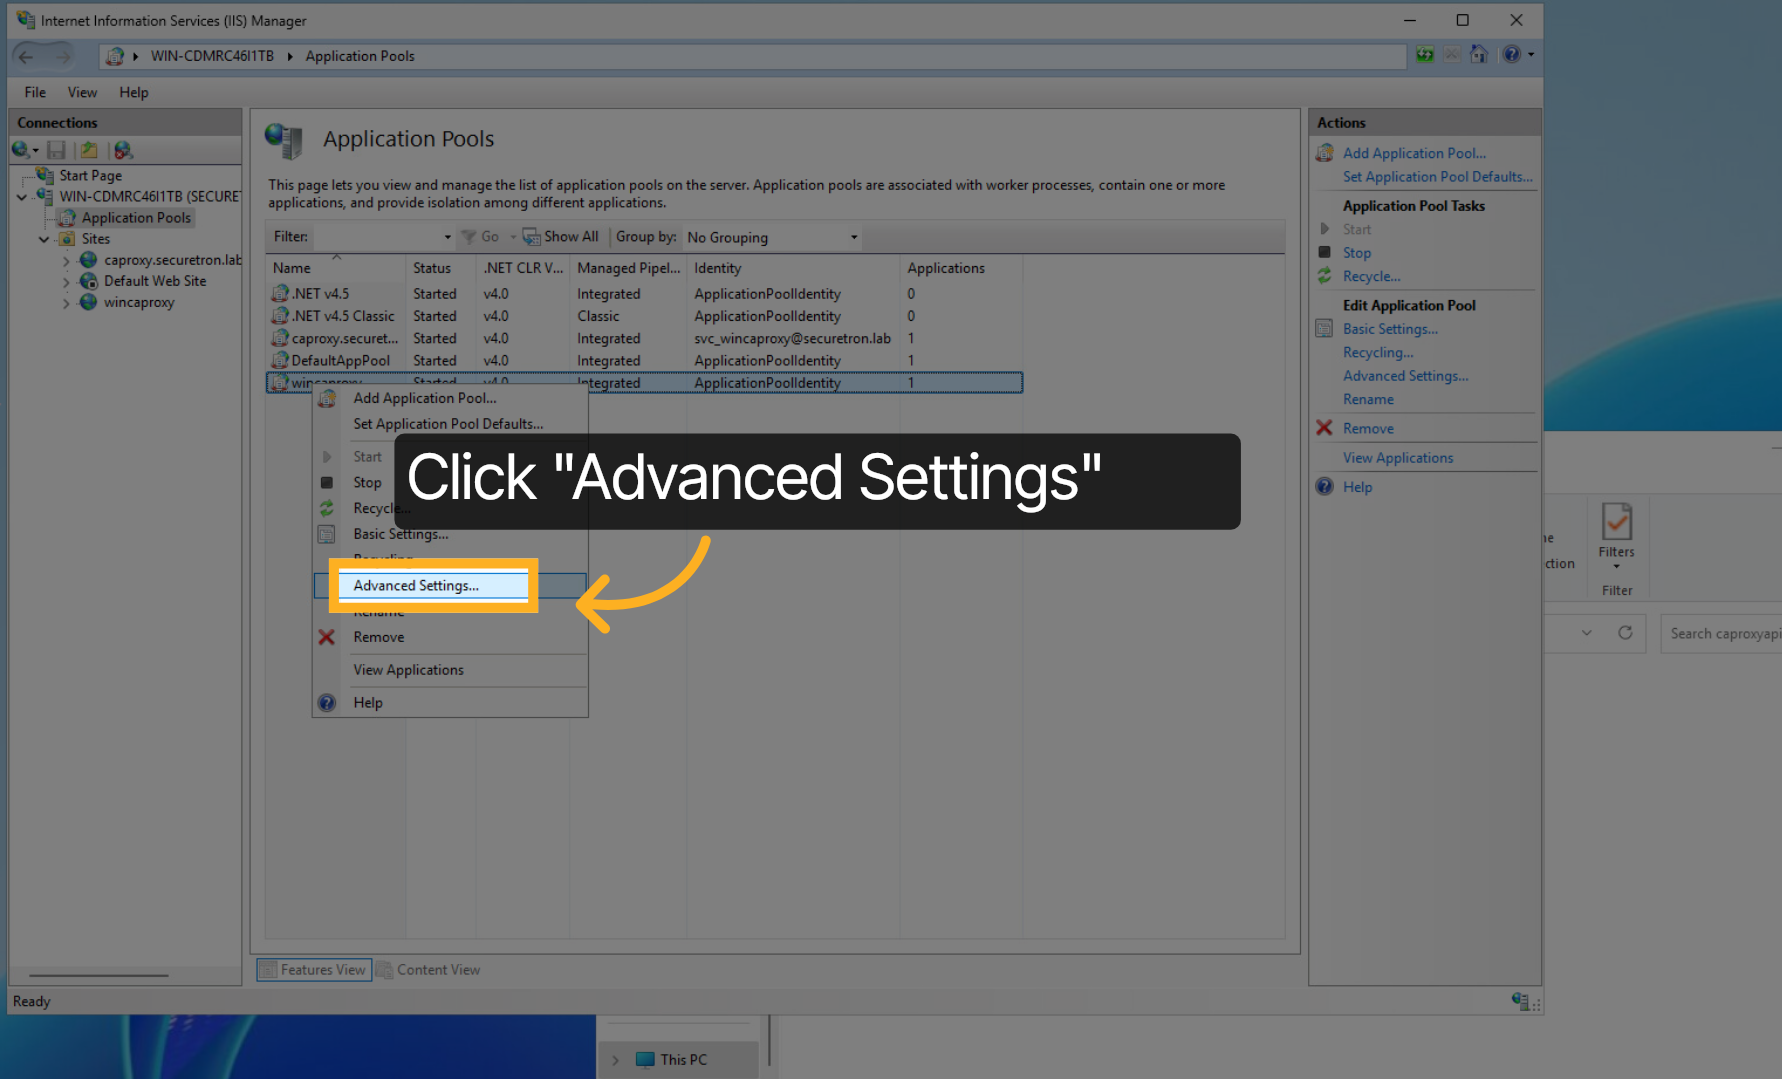
22. Application Pool - Advanced Settings#
and select Advanced Setting
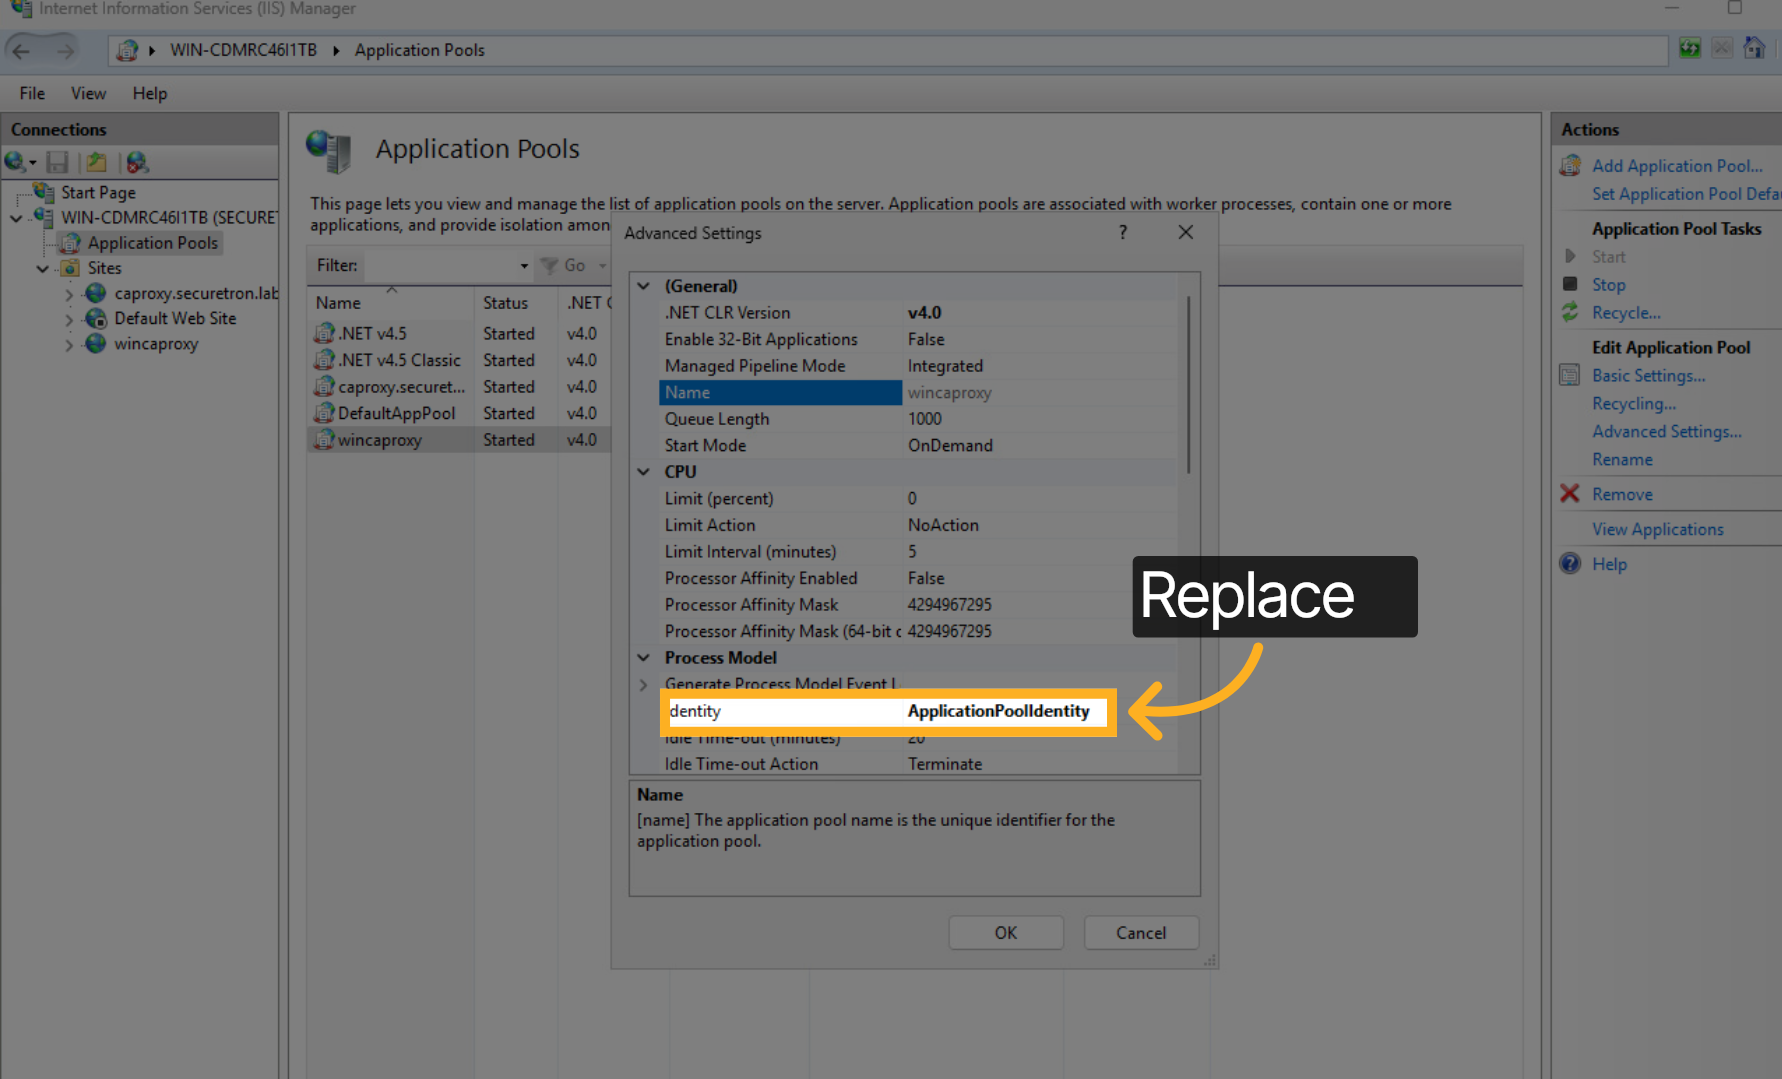
23. Application Pool - Identity#
Within the Advanced Settings. Replace the Identity with the service account provisioned earlier
24. Confirm Application Health#
Click Response to view the response details.

You have successfully deployed the PKI Trust Manager Microsoft CA / ADCS Proxy Gateway by configuring required roles, features, and website settings. Verify the deployment by confirming all configurations and accessing the response section for validation. For more information please visit our website or contact support if you require further assistance